

Check the SSD’s interface, form factor, boot support, and motherboard limits before buying or installing it.
Learning how to check SSD compatibility with older motherboard hardware can save you money, time, and a frustrating installation. The key is to match the drive’s connection type and size with the ports your computer supports. This guide explains the process in simple steps, including SATA and NVMe differences, BIOS limits, adapters, and real-world upgrade tips.
Why SSD compatibility matters
An SSD may look like a simple storage upgrade, but several parts must work together. The drive needs a matching interface, a suitable physical size, enough power, and motherboard support.
The most common mistake is confusing the SSD’s shape with its connection type. A 2.5-inch SATA SSD and an M.2 NVMe SSD are very different, even though both are solid-state drives.
When learning how to check SSD compatibility with older motherboard systems, focus on these four points:
• Interface: SATA or PCIe/NVMe
• Form factor: 2.5-inch, M.2 2280, mSATA, or another size
• Key type: M-key, B-key, or B+M-key for M.2 drives
• Firmware support: BIOS boot support and storage limits
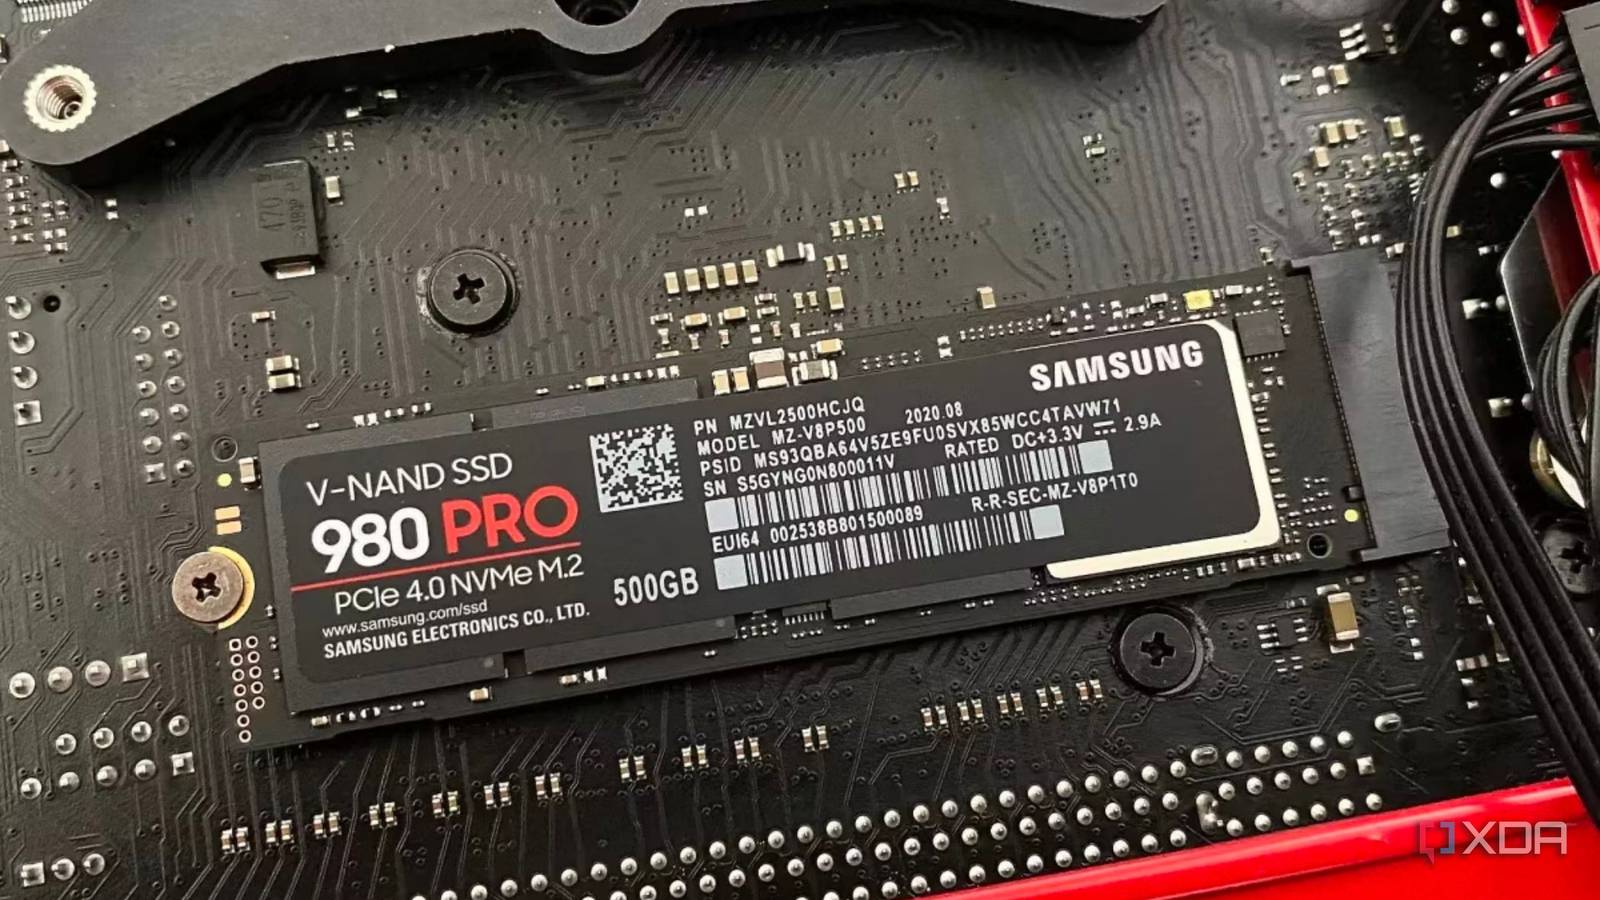
An older motherboard can often use a modern SSD, but it may not support every feature. For example, a PCIe 4.0 NVMe drive may work in a PCIe 3.0 slot, but it will run at the older slot’s speed.
Identify your motherboard model
The first step in how to check SSD compatibility with older motherboard hardware is finding the exact motherboard model. Do not rely only on the computer brand. A Dell, HP, Lenovo, or custom-built PC may have several board versions.
You can find the model in several ways:
- Check the motherboard manual or original box.
- Look for printed text on the board itself.
- Open Windows System Information.
- Use a trusted hardware tool such as CPU-Z.
- Check the manufacturer’s support page with your computer’s serial number.
In Windows, press Windows + R, type msinfo32, and press Enter. Look for “BaseBoard Manufacturer” and “BaseBoard Product.” These details usually reveal the board maker and model.
You can also open Command Prompt and run:
wmic baseboard get product,manufacturer,version
This command may not work on newer Windows versions, but it still works on many older systems.
Once you have the model number, search for the official manual. The manual is more reliable than a random product listing because it explains the exact ports, supported drive types, and storage limits.
In my experience, this step prevents the most avoidable mistake: buying an M.2 SSD for a board that has no M.2 slot. A small amount of research is much cheaper than returning the wrong drive.

Check the motherboard’s storage ports
The next step is to inspect the available storage connectors. Most older motherboards use SATA ports, while newer models may include M.2 slots.
SATA ports
SATA ports are small, flat connectors. They usually support 2.5-inch SATA SSDs and hard drives. SATA III, also called SATA 6 Gb/s, is the fastest common SATA standard.
A 2.5-inch SATA SSD needs two connections:
• A SATA data cable from the SSD to the motherboard
• A SATA power cable from the power supply
SATA II and SATA III drives are generally backward compatible. If you connect a SATA III SSD to a SATA II port, it should work, but its speed will be limited by the older port.
A SATA III port has a theoretical speed of 6 Gb/s. In real use, many SATA SSDs reach about 500 to 560 MB/s. A SATA II port usually limits performance to around 250 to 300 MB/s.
M.2 slots
An M.2 slot is a narrow socket on the motherboard. It can support different devices, including:
• SATA M.2 SSDs
• PCIe NVMe SSDs
• Wi-Fi cards
• Other expansion devices
This is why an M.2 slot does not automatically mean NVMe support. The motherboard manual must state which protocols the slot accepts.
The slot may also support only one M.2 size. The most common size is M.2 2280, which is 22 millimeters wide and 80 millimeters long. Older boards may support M.2 2242 or M.2 2260 instead.
When learning how to check SSD compatibility with older motherboard systems, never judge an M.2 slot by appearance alone. Two slots can look identical but use different communication standards.
Understand SATA, NVMe, and PCIe
The interface determines how the SSD communicates with the motherboard. This is one of the most important parts of how to check SSD compatibility with older motherboard computers.
SATA SSDs
SATA SSDs use the same basic data interface as many older hard drives. They are usually the safest choice for an older computer.
A 2.5-inch SATA SSD is often compatible with systems that have:
• SATA II ports
• SATA III ports
• A standard SATA power connector
• A free drive bay or mounting bracket
SATA SSDs are slower than NVMe models, but they still make an older computer feel much faster. Windows can start faster, programs can open sooner, and file searches can feel smoother.
NVMe SSDs
NVMe SSDs use the PCI Express bus. They are usually installed in an M.2 slot, although PCIe adapter cards are also available.
An NVMe drive requires more than a physical M.2 slot. The motherboard must support PCIe storage through that slot, and the firmware may need NVMe boot support.
A board from the early M.2 era may support only SATA M.2 drives. Installing an NVMe drive in such a slot may result in no detection at all.
PCIe generations
PCIe versions are usually backward compatible. For example, a PCIe 4.0 SSD can often operate in a PCIe 3.0 slot. However, it will use the slower PCIe 3.0 connection.
The drive may also run hotter than an older SATA drive. Some NVMe models need a heatsink during long transfers, though basic desktop use often creates less heat.
For older systems, compatibility matters more than maximum speed. A reliable SATA SSD can be a better upgrade than a fast NVMe drive that needs adapters, firmware changes, or special boot settings.

Match the SSD form factor and key
Physical fit is another major part of how to check SSD compatibility with older motherboard hardware. The drive must match both the connector and the available space.
Common SSD form factors
• 2.5-inch SATA: Common in desktops and laptops
• M.2 2280: The most common M.2 size
• M.2 2242: Shorter than the 2280 format
• mSATA: Found mainly in older laptops and compact systems
• PCIe add-in card: Installs into a motherboard expansion slot
A 2.5-inch SSD cannot plug directly into an M.2 slot. Likewise, an M.2 SSD cannot connect to a regular SATA port without a special enclosure or adapter.
M.2 key types
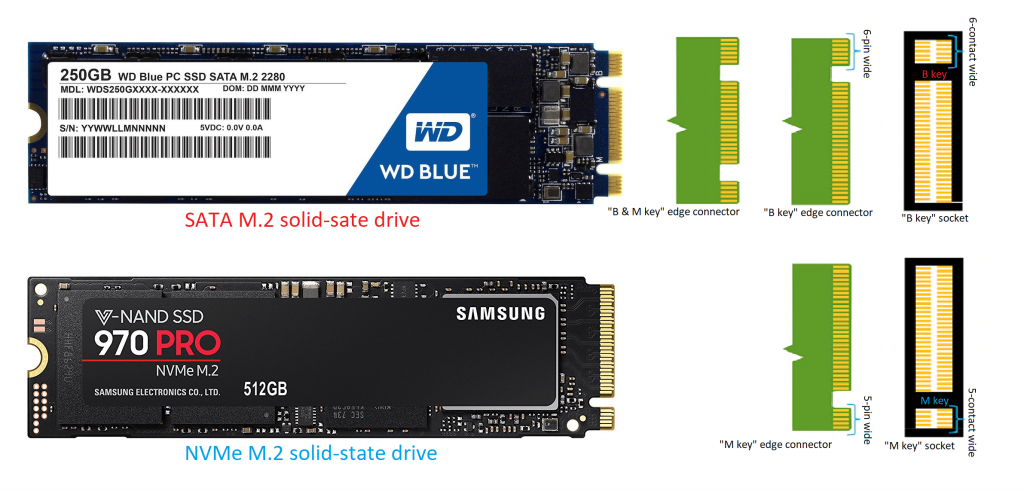
M.2 drives have notches called keys. These notches help identify the supported connection.
• B-key drives may support SATA or PCIe x2, depending on the device
• M-key drives commonly support PCIe x4 NVMe
• B+M-key drives have two notches and may support broader compatibility
The key alone does not guarantee compatibility. It only helps prevent physically incorrect installation. The motherboard manual still determines whether the protocol is supported.
Check the mounting screw position as well. If your board supports only M.2 2242 but you buy an M.2 2280 drive, the connector may fit while the mounting point does not.
Check BIOS and boot support
A drive can be electrically compatible but still fail to boot. This is where BIOS and UEFI support become important.
Older motherboards often use Legacy BIOS. Newer systems use UEFI, which provides better support for modern storage devices and larger boot drives.
When learning how to check SSD compatibility with older motherboard systems, check whether the motherboard supports:
• Booting from SATA SSDs
• Booting from NVMe SSDs
• UEFI mode
• GPT partitioning
• Firmware updates for storage support
A SATA SSD usually has the fewest boot problems. Most systems that can boot from a SATA hard drive can also boot from a SATA SSD.
NVMe boot support is less certain on older boards. Some boards can use an NVMe drive for storage but cannot boot Windows from it. Others may gain NVMe boot support after a BIOS update.
Before updating BIOS, read the official instructions carefully. A failed update can make a motherboard unusable. Use stable power, the exact firmware file, and the correct board revision.
In one older desktop upgrade, the NVMe drive appeared in the operating system after installation but did not appear as a boot option. The motherboard supported NVMe storage but lacked native boot support. A SATA SSD would have avoided that issue, while a custom BIOS modification would have introduced unnecessary risk.
Review motherboard storage limits
Older motherboards may have storage limits based on firmware, partition style, or controller design. This matters when buying a high-capacity SSD.
Many modern systems support drives larger than 2 TB when using UEFI and GPT. Older BIOS-based computers may have trouble booting from a drive above 2 TB if they use MBR partitioning.
This does not always mean the SSD will be unusable. The computer may detect the drive as a secondary data disk, even if it cannot boot from it.
Check these details in the motherboard manual:
• Maximum supported drive capacity
• Supported partition style
• SATA controller mode
• RAID requirements
• Available SATA port numbering
• Whether certain ports are disabled when M.2 is used
Some motherboards disable one or two SATA ports when an M.2 drive is installed. This is not a fault. It happens because the M.2 slot shares bandwidth with the board’s storage controller.
If you install a drive and another disk disappears, move the SATA cable to a different port. The manual usually lists which ports share resources.

Decide between a SATA SSD and an NVMe SSD
For many older computers, the best choice is not the fastest SSD. It is the drive with the simplest, safest installation.
Choose a 2.5-inch SATA SSD when:
• The motherboard has SATA ports but no M.2 slot
• The computer uses an older BIOS
• You want an easy Windows installation
• You are upgrading a laptop with a 2.5-inch drive bay
• You want broad compatibility
Choose an NVMe SSD when:
• The motherboard manual confirms NVMe support
• The M.2 slot supports PCIe storage
• The firmware supports NVMe booting
• You need high transfer speeds
• You are comfortable updating BIOS or configuring UEFI
A SATA SSD is still a major improvement over a mechanical hard drive. For everyday tasks, the change from a hard drive to any good SSD is usually more noticeable than the difference between SATA and NVMe.
This is an important lesson in how to check SSD compatibility with older motherboard systems: prioritize a complete, stable match over impressive specifications.
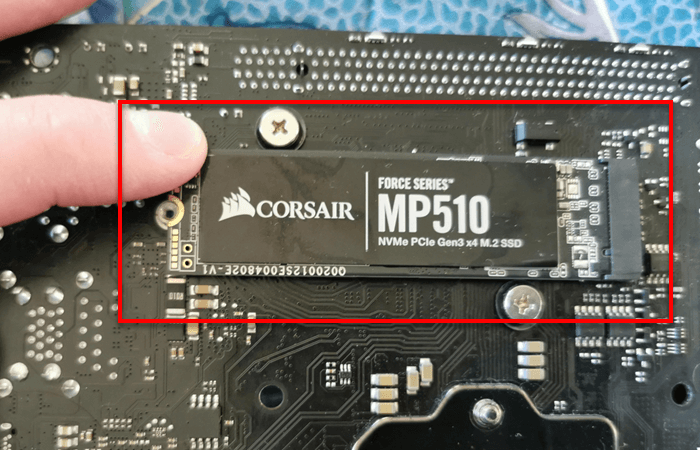
Use adapters carefully
Adapters can expand your options, but they do not create support that the motherboard lacks.
A 2.5-inch SATA-to-USB adapter can connect an SSD externally. A PCIe-to-M.2 adapter can hold an NVMe drive inside a desktop. However, the motherboard must still support the adapter’s communication method.
For example, a PCIe adapter can allow an NVMe drive to work as a storage disk on some older desktops. It may not allow the computer to boot from that drive because the old BIOS does not contain an NVMe boot driver.
Common adapter limits include:
• No boot support
• Reduced PCIe bandwidth
• Heat buildup
• Disabled motherboard features
• Poor compatibility with laptop hardware
• Need for an available PCIe slot
Avoid cheap adapters that claim to convert SATA into NVMe. SATA and NVMe use different protocols. A passive adapter cannot translate one protocol into another.
An adapter is most useful when you understand its exact purpose. Use it to solve a physical connection problem, not to bypass a missing storage protocol.

Follow a safe installation process
After learning how to check SSD compatibility with older motherboard hardware, install the drive carefully. Back up important files before opening the case or cloning a disk.
For a 2.5-inch SATA SSD
- Shut down the computer and unplug it.
- Touch a metal part of the case to reduce static risk.
- Mount the SSD in a drive bay or bracket.
- Connect the SATA data cable.
- Connect the SATA power cable.
- Start the computer and enter BIOS.
- Confirm that the drive appears.
- Initialize, partition, or clone the drive.
For an M.2 SSD
- Shut down the computer and disconnect power.
- Find the correct M.2 slot.
- Remove the small mounting screw.
- Insert the SSD at a slight angle.
- Press it flat and secure the screw.
- Reassemble the computer.
- Check BIOS detection.
- Install the operating system or configure the drive in Windows.
Do not force the connector. If the notch does not line up, stop and recheck the drive type. Forcing an M.2 drive can damage the slot or the SSD.
If the drive is missing in Windows but visible in BIOS, open Disk Management. It may need to be initialized and assigned a drive letter.
Troubleshoot a drive that is not detected
If the SSD does not appear, work through the problem in a fixed order. Random changes can make diagnosis harder.
Check the following:
• Confirm that the drive is fully inserted.
• Test another SATA data cable.
• Try a different SATA motherboard port.
• Check the power connection.
• Review BIOS storage settings.
• Disable outdated RAID settings if appropriate.
• Update BIOS only after checking official support notes.
• Test the SSD in another compatible computer or enclosure.
For M.2 drives, confirm that the slot supports the correct protocol. A SATA M.2 drive will not work in a PCIe-only slot, and an NVMe drive will not work in a SATA-only M.2 slot.
For SATA drives, check whether the port is disabled because of an M.2 device or a motherboard lane-sharing rule. Also confirm that the SATA controller is enabled in BIOS.
If BIOS detects the SSD but Windows does not, the issue may involve partitioning, drivers, or disk initialization. If BIOS does not detect it, focus first on physical installation, interface support, firmware, and power.
Avoid common SSD compatibility mistakes
The most common errors are easy to prevent once you know what to look for.
• Buying an M.2 drive without checking the M.2 protocol
• Assuming every M.2 slot supports NVMe
• Ignoring the SSD length
• Forgetting the SATA power cable
• Expecting a PCIe adapter to guarantee boot support
• Installing a large drive without checking BIOS and partition limits
• Updating BIOS with the wrong firmware file
• Cloning a disk without checking boot mode
• Using a low-quality adapter or enclosure
• Forgetting that some ports share bandwidth
Cloning can also cause confusion. If the old installation uses Legacy BIOS and MBR, but the new setup requires UEFI and GPT, the cloned drive may not boot until the partition style and firmware mode match.
Keep the original drive untouched until the new SSD starts correctly. This gives you a safe fallback if the clone fails or the new drive needs repair.
Frequently Asked Questions
How do I know if an SSD is compatible with my old motherboard?
Find the exact motherboard model and read its manual. Match the SSD’s interface, form factor, key type, capacity, and boot support with the board’s specifications.
Will a SATA SSD work on an older motherboard?
In most cases, yes, if the motherboard has a compatible SATA port and the power supply has a SATA power connector. A SATA III SSD can usually work on a SATA II port, but the older port will reduce its speed.
Can I install an NVMe SSD on an old motherboard?
You can install one only if the motherboard supports PCIe NVMe storage or if a suitable PCIe adapter is available. Even then, the older BIOS may not support booting from the NVMe drive.
Does every M.2 slot support NVMe?
No. Some M.2 slots support only SATA M.2 drives, while others support only PCIe NVMe drives or support both. Always check the motherboard manual before buying an M.2 SSD.
Can a PCIe 4.0 SSD work in a PCIe 3.0 motherboard?
Usually, yes. PCIe devices are generally backward compatible, but the SSD will operate at the older PCIe generation’s speed.
Why does my motherboard detect the SSD but not boot from it?
The motherboard may support the SSD as a storage device but lack the firmware needed to boot from it. Check UEFI settings, partition style, boot mode, and BIOS updates listed for your exact motherboard model.
Is a SATA SSD better than an NVMe SSD for an old computer?
A SATA SSD is often the better practical choice for an older computer because it has wider compatibility and simpler installation. NVMe is faster, but the system may not support its interface or boot process.
Conclusion
The safest way to check SSD compatibility with older motherboard hardware is to start with the motherboard model and manual. Confirm the storage interface, physical size, M.2 key, BIOS support, capacity limits, and available power connections.
For most older computers, a 2.5-inch SATA SSD offers the easiest and most reliable upgrade. An NVMe drive can work well when the motherboard clearly supports PCIe storage and NVMe booting.
Take a few minutes to verify the details before you buy. That simple habit can turn a risky upgrade into a smooth one. If this guide helped, compare your motherboard manual with the SSD specifications and share your upgrade experience in the comments.
