

Install two compatible M.2 NVMe drives in separate motherboard slots, secure them with heatsinks, then initialize them in your operating system.
Learning how to install dual NVMe SSDs in one PC is easier than it first appears. The key is checking motherboard support, understanding PCIe lanes, mounting each drive correctly, and setting up Windows without confusing an NVMe drive with a SATA M.2 drive. This guide covers the full process, from planning and physical installation to BIOS checks, drive formatting, cooling, and common fixes.
Check whether your PC supports two NVMe SSDs
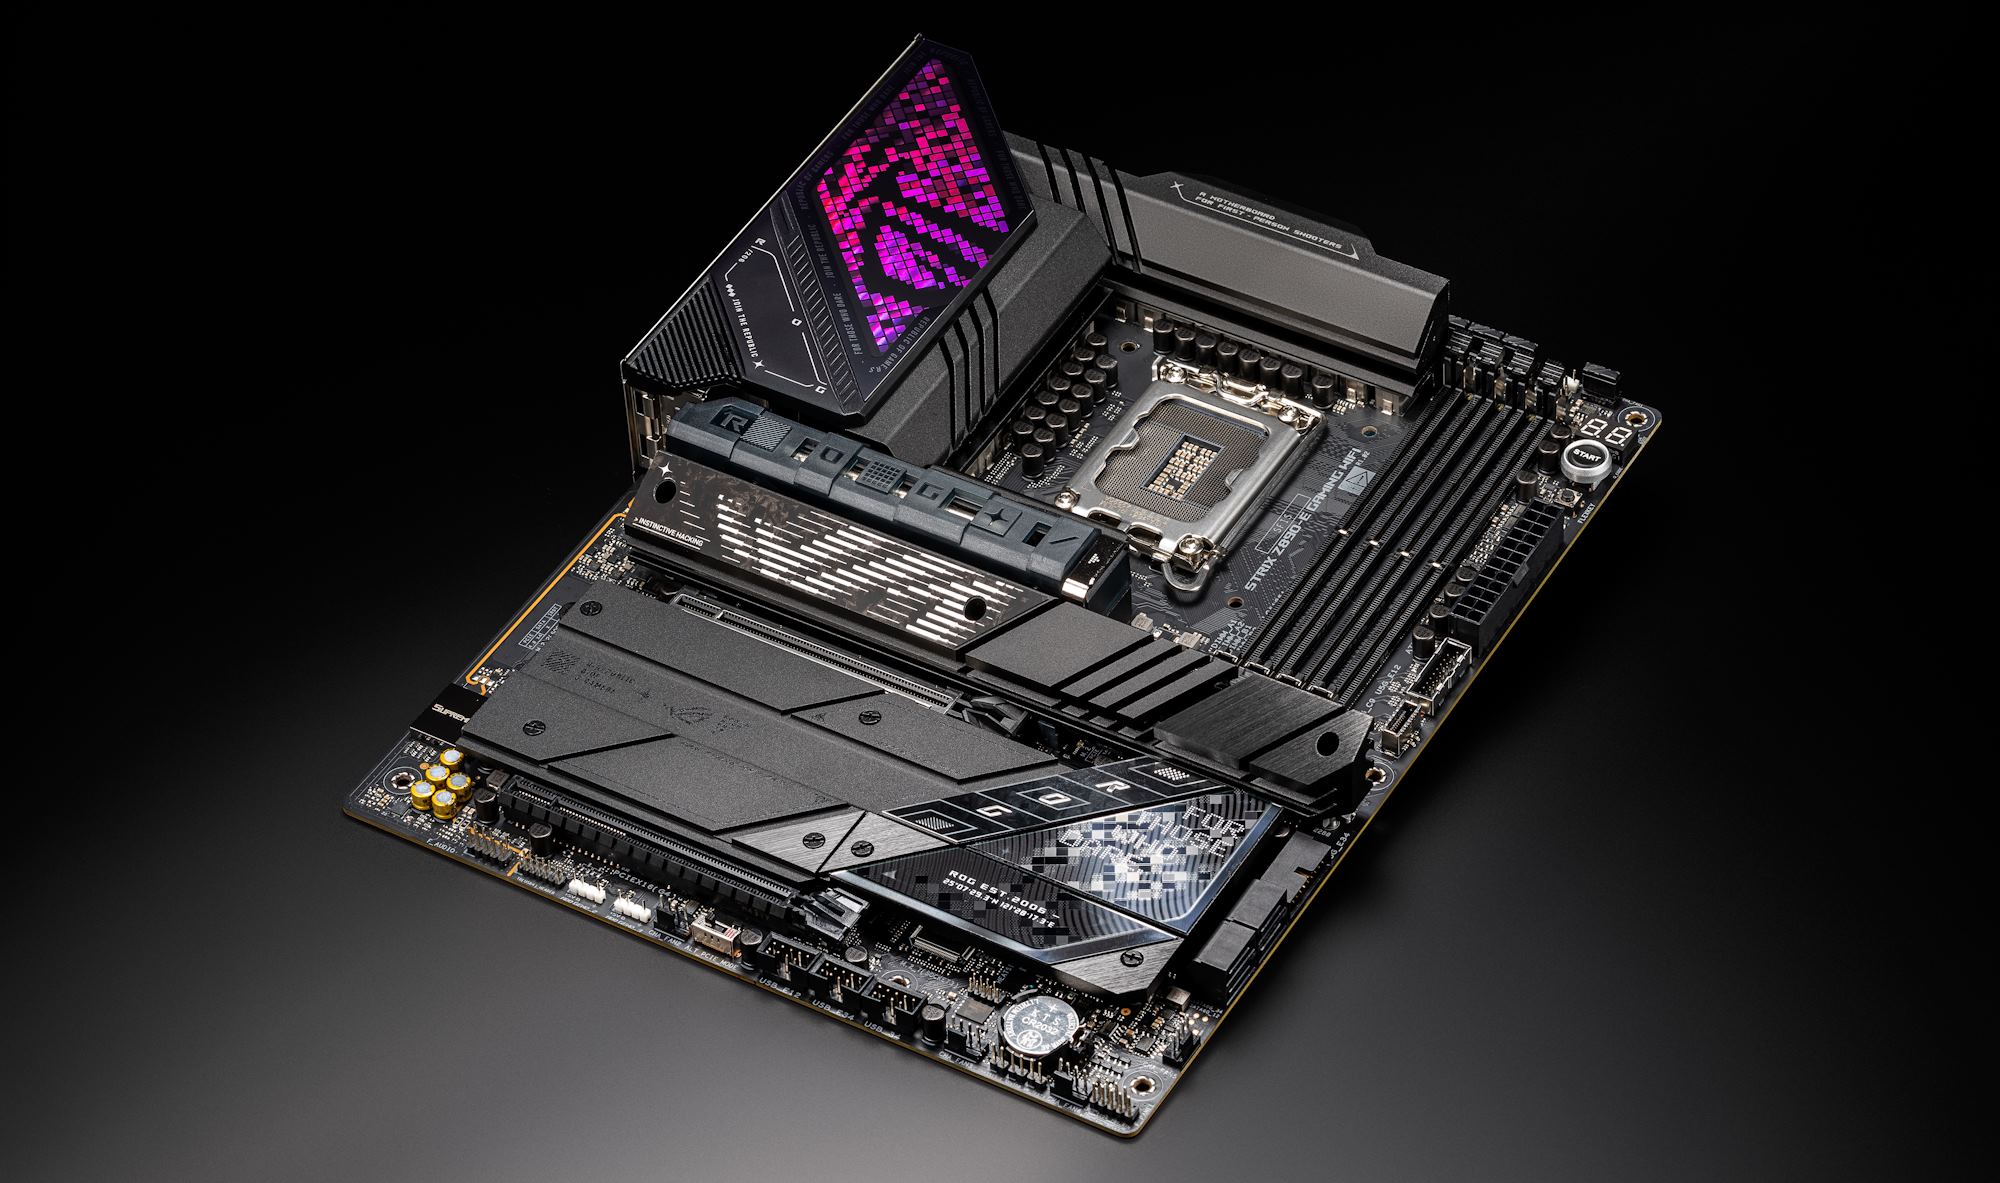
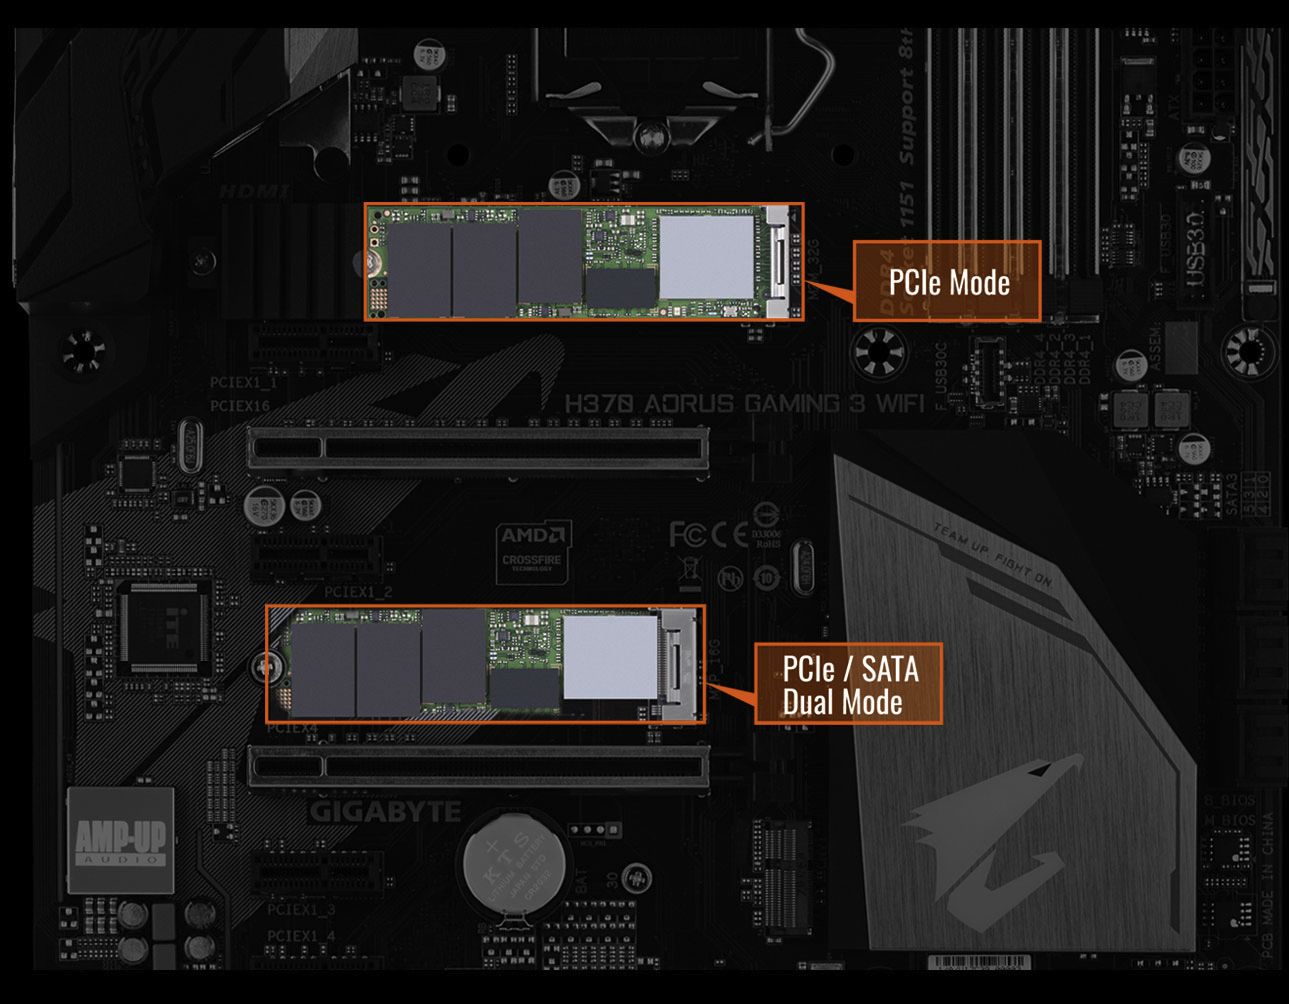
Before opening your computer, confirm that the motherboard supports two NVMe drives. Most newer desktop motherboards have two or more M.2 slots, but not every M.2 slot supports NVMe storage.
An M.2 slot can support PCIe NVMe, SATA M.2, or both. The slot type is listed in the motherboard manual. Look for terms such as:
• M.2 PCIe
• M.2 NVMe
• PCIe x4
• Socket 3
• M-key
• Gen 3, Gen 4, or Gen 5
The safest way to install dual NVMe SSDs in one PC is to read the motherboard manual before buying the second drive. The manual usually explains which slots connect to the CPU, which connect to the chipset, and which ports become disabled when an M.2 slot is used.
Check these details:
• The number of available M.2 slots
• The supported PCIe generation
• The supported drive length, usually 2280
• Whether the second slot supports bootable NVMe storage
• Whether using an M.2 slot disables SATA ports
• Whether the second slot shares bandwidth with a graphics card
• Whether a BIOS update is recommended
A PCIe 4.0 NVMe SSD can usually work in a PCIe 3.0 slot, but it will run at PCIe 3.0 speeds. A PCIe 5.0 drive can also work in many older slots, but its speed will be limited by the slot.
Understand PCIe lanes
PCIe lanes are like road lanes that carry data between the SSD and the processor or chipset. The primary M.2 slot often connects directly to the CPU. The second slot may use chipset lanes.
This can affect speed, but it does not always cause a major problem. For gaming, office work, and most creative tasks, both drives can perform well. Heavy file transfers may slow down if both devices share the same chipset connection.
What you need before installing dual NVMe SSDs
Gather the right tools and parts before you begin. The installation itself is simple, but a missing screw or incompatible heatsink can turn a five-minute job into a frustrating afternoon.
You may need:
• Two NVMe M.2 SSDs
• A motherboard with two compatible M.2 slots
• M.2 mounting screws or standoffs
• Motherboard M.2 heatsinks
• A small Phillips screwdriver
• Your motherboard manual
• An anti-static wrist strap, if available
• A USB flash drive with Windows, if installing a fresh system
• A backup of important files
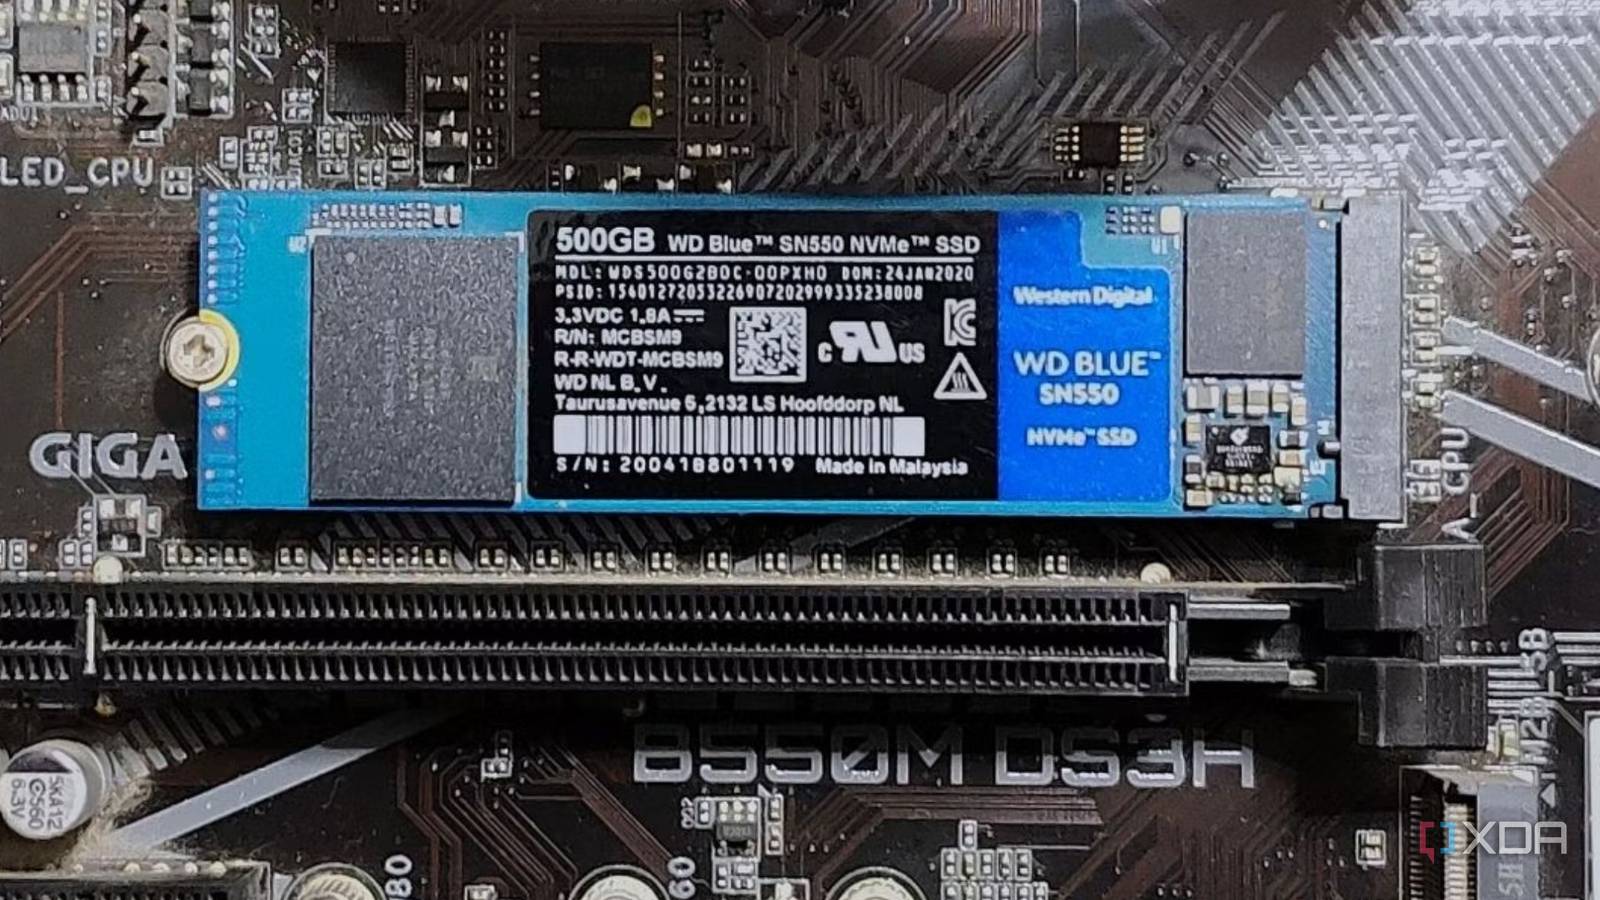
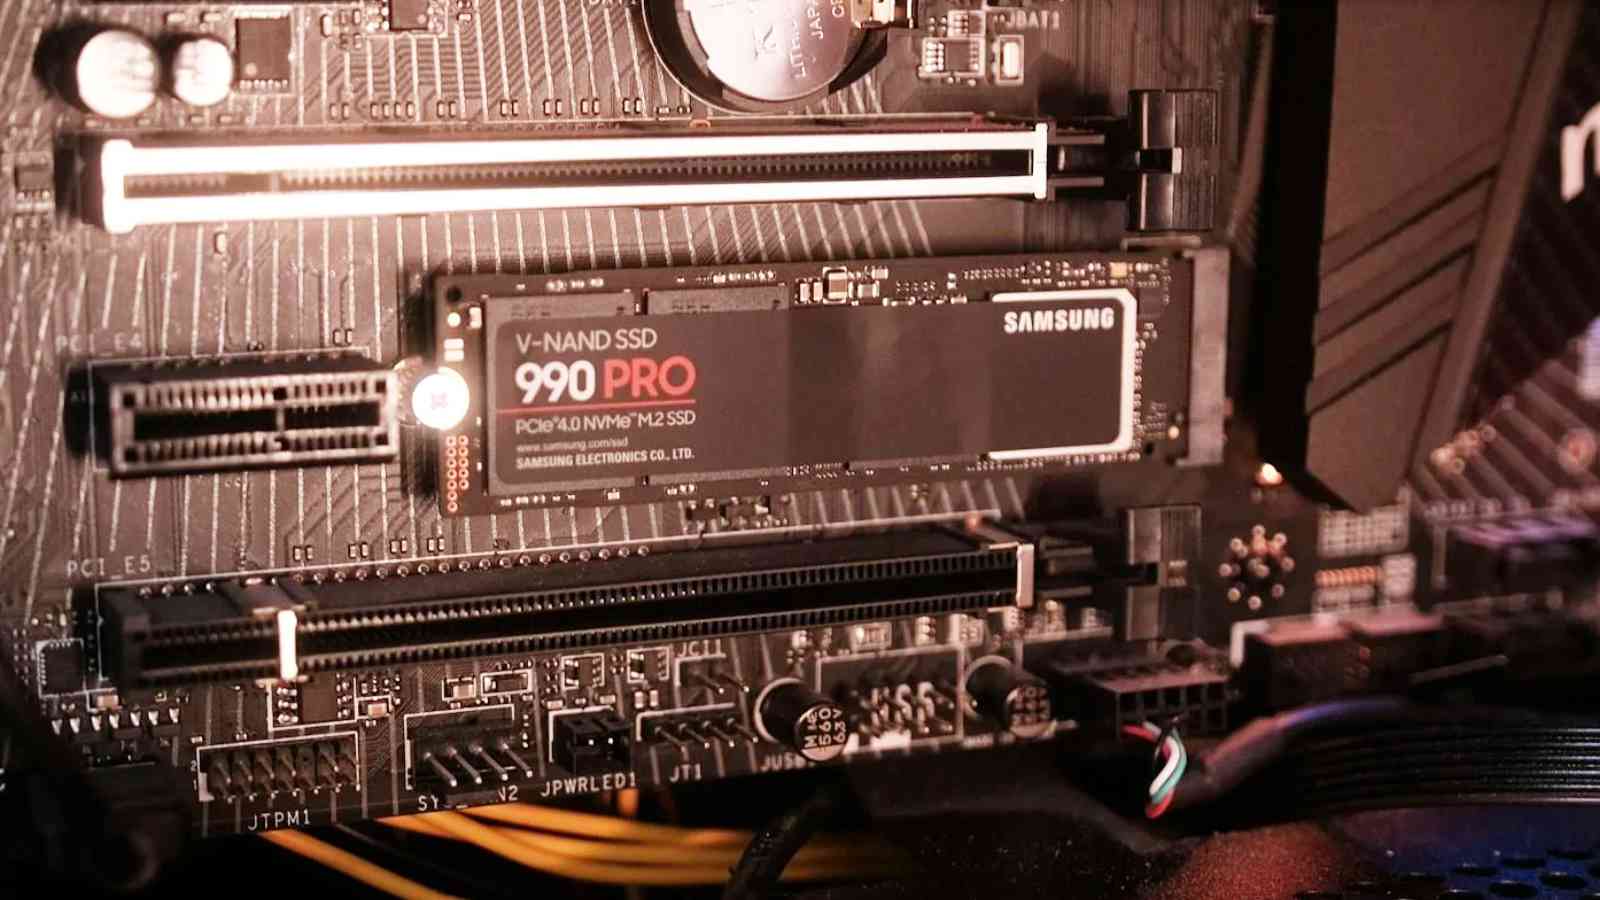
Check the labels on both SSDs. A typical NVMe drive has a narrow circuit board with gold contacts at one end. It may have chips on one or both sides.
Do not remove labels from the SSD unless the manufacturer specifically allows it. Some labels act as part of the thermal design, and removing one may affect the warranty.
If the motherboard includes M.2 heatsinks, remove the protective plastic film from the thermal pad before installing the heatsink. Leaving the film in place can prevent heat transfer and may cause the drive to run hotter.
Choose the best slot for each drive
Place the operating system drive in the primary M.2 slot when possible. This slot is often marked M2_1 and may connect directly to the CPU.
Use the second slot for games, applications, media, backups, or project files. If both SSDs have similar performance, the difference between the two slots may be small. Still, following the manual is the best approach.
How to install dual NVMe SSDs in one PC
Power down the computer fully before touching the internal parts. Shut down Windows, switch off the power supply, unplug the power cable, and press the power button for a few seconds to discharge leftover power.
Place the PC on a stable surface with good lighting. Remove the side panel and locate the M.2 slots. They are usually near the CPU socket, below the processor cooler, or between the CPU socket and graphics card.
Follow these steps:
Locate the first M.2 slot and confirm that the mounting standoff is set to the correct length, usually 2280.
Remove the tiny M.2 screw if it is already installed. Keep it somewhere safe because it is easy to lose.
Hold the first NVMe SSD by its edges. Avoid touching the gold contacts or the small chips on the board.
Insert the drive into the slot at about a 25 to 30-degree angle. The notch on the SSD must match the key inside the connector.
Press the free end of the SSD down until it rests on the mounting standoff.
Secure the SSD with the M.2 screw. Tighten it gently. Do not force it, because the screw and standoff are small and delicate.
Install the motherboard heatsink over the drive if one is provided.
Repeat the same process for the second NVMe SSD in the second compatible slot.
Reinstall the graphics card or other components if you removed them for access.
Close the case, reconnect the power cable, and turn on the PC.
The SSD should lie flat after it is secured. If it bends sharply, stop and check the standoff position. A slight angle during insertion is normal, but the drive should become level before you tighten the screw.
In builds I have worked on, the most common physical mistake was installing the M.2 screw before the drive was fully inserted. This can hold the SSD at an angle and prevent the contacts from seating correctly. Insert the drive first, press it down, and then add the screw.

Configure the drives in BIOS or UEFI
After installing dual NVMe SSDs in one PC, enter the BIOS or UEFI setup to check whether both drives are detected.
Turn on the computer and press the setup key during startup. Common keys include Delete, F2, F10, and Esc. The correct key appears briefly on the screen or is listed in the motherboard manual.
Look for a menu called:
• Storage
• NVMe Configuration
• Advanced Storage Configuration
• PCIe Information
• Boot
• System Information
Both drives should appear by model name or capacity. If they appear, the physical installation is likely correct.
You may need to change one setting:
• Set the boot mode to UEFI
• Enable PCIe or NVMe storage support
• Set the operating system drive as the first boot device
• Enable AHCI when recommended by the motherboard manual
• Update the BIOS if the board cannot detect a newer SSD
Do not enable RAID simply because you installed two drives. RAID is optional and changes how the drives work. It can also make recovery and troubleshooting more complex.
If the BIOS detects both SSDs but Windows does not, the drives probably need to be initialized and formatted. If the BIOS does not detect one drive, focus first on the slot, mounting, firmware, and motherboard compatibility.
Set up the second NVMe SSD in Windows
A new SSD may not appear in File Explorer right away. Windows often needs you to initialize the drive, create a partition, and assign a drive letter.
To prepare the second NVMe SSD:
Right-click the Start button.
Select Disk Management.
Find the new drive by checking its capacity. Be careful not to select your existing system drive.
If Windows asks to initialize the disk, choose GPT.
Right-click the unallocated space.
Select New Simple Volume.
Follow the setup wizard.
Assign a drive letter.
Format the drive as NTFS for general Windows use.
Give the volume a clear name, such as Games, Projects, or Media.
GPT is the normal choice for modern UEFI systems. MBR is mainly useful for older hardware or special compatibility needs.
If you want to use the second drive for Linux, dual booting, or another operating system, do not format it as NTFS without planning the layout first. Operating system installation can erase partitions, so back up important data before making changes.
Move games and files to the second SSD
You can use the second drive to reduce space pressure on the operating system drive. Steam, Xbox, Epic Games, Adobe applications, and other programs usually let you choose a library or installation location.
A simple setup might look like this:
• C: for Windows and essential applications
• D: for games and large programs
• E: for projects, photos, or local backups
Two separate drives are often easier to manage than one large partition. However, drive letters do not improve speed by themselves. Performance comes from the SSD hardware, PCIe connection, workload, and cooling.

Install Windows on one NVMe SSD
If you are building a new PC or replacing the main drive, install Windows on the SSD connected to the primary M.2 slot.
Create a Windows installation USB with Microsoft’s official installation tool. Boot from the USB, choose a custom installation, and select the correct NVMe drive.
Before deleting any partitions, verify the drive’s capacity and model. Selecting the wrong disk can erase the second SSD or an existing backup.
A clean installation usually creates the required UEFI partitions automatically. After Windows starts:
• Install the motherboard chipset drivers
• Install the latest storage and graphics drivers
• Run Windows Update
• Check Disk Management
• Confirm that the second SSD has the correct capacity
• Install the SSD manufacturer’s management software only if needed
If both drives contain operating systems, use the motherboard’s boot menu or configure the preferred boot drive in UEFI. Make sure the Windows Boot Manager entry for the correct drive is selected.
Clone an existing Windows installation
You do not need to reinstall Windows if you want to move your current system to a new NVMe SSD. Drive cloning can copy the operating system, applications, settings, and files.
Before cloning:
• Back up important files
• Check that the new drive has enough space
• Confirm whether the source uses GPT or MBR
• Use reliable cloning software
• Disconnect unnecessary external drives
• Keep the computer connected to stable power
After cloning, shut down the PC and set the new SSD as the first boot device in UEFI. Do not format the old drive until Windows starts correctly from the new SSD.
Cloning can fail when the source drive is larger than the destination, when partitions are damaged, or when encryption complicates the process. If BitLocker or another form of drive encryption is active, save the recovery key before making changes.
Manage heat and performance
NVMe SSDs are fast, but high speed creates heat. A drive that becomes too hot may reduce its speed for a short time. This behavior is called thermal throttling.
Use the motherboard’s M.2 heatsinks when available. Also check that:
• The thermal pad touches the SSD controller area
• The heatsink film has been removed
• The graphics card is not blocking airflow
• Case fans move air across the motherboard
• The SSD is not trapped beneath a hot graphics card without a heatsink
The controller is usually the hottest part of an NVMe SSD. The NAND flash chips may not heat in the same way, so correct thermal pad placement matters.
You can monitor temperatures with the SSD maker’s tool or a trusted hardware monitor. Normal temperatures vary by model, case, workload, and room temperature. A brief temperature rise during a large file transfer is normal, but repeated throttling suggests that airflow or heatsink contact needs attention.
In one dual-drive setup, placing the second SSD directly below a large graphics card caused noticeably higher temperatures. Moving that drive to another supported slot and using the board heatsink improved sustained transfers. This is a good reminder that slot location matters as much as drive speed.

Understand speed limits and storage performance
Installing two NVMe SSDs does not automatically double computer speed. Each drive has its own performance limit, and the motherboard may divide bandwidth between devices.
A PCIe connection uses lanes and generations:
• PCIe 3.0 x4 provides less bandwidth than PCIe 4.0 x4
• PCIe 4.0 x4 provides less bandwidth than PCIe 5.0 x4
• An x2 connection has fewer lanes than an x4 connection
• Chipset-connected slots may share bandwidth with USB, SATA, or other devices
For everyday use, the difference may be hard to notice. Windows startup, application loading, and gaming also depend on the CPU, memory, software, and game engine.
Two NVMe drives are most useful when you regularly work with large files, virtual machines, video projects, software development tools, or large game libraries. A second drive can also keep the system drive from becoming too full.
Do not use synthetic benchmark results as the only measure of value. Real performance depends on sustained writes, drive capacity, free space, temperature, and the type of files being copied.
Troubleshoot a missing NVMe SSD
If one drive does not appear, work through the problem in a careful order. Avoid changing several settings at once because that makes the cause harder to identify.
Try these checks:
• Shut down the PC and reseat the SSD
• Confirm that the drive is installed in the correct slot
• Check the M.2 screw and standoff
• Test the SSD in the primary slot
• Check whether the slot supports NVMe rather than SATA only
• Update the motherboard BIOS
• Check whether using the slot disables a SATA port
• Look for the drive in BIOS before checking Windows
• Open Disk Management and scan for new disks
• Test the SSD in another compatible computer or enclosure
If the drive works in one slot but not another, the second slot may be disabled, defective, or limited by a BIOS setting. If the drive fails everywhere, it may be defective.
When the drive appears smaller than advertised
SSD manufacturers use decimal units, while Windows reports capacity using a different measurement system. A drive sold as 1 TB will therefore show slightly less usable space in Windows.
A small difference is normal. A major difference can indicate an incorrect partition, a faulty drive, or a reporting issue.
When Windows becomes unstable
Unexpected crashes may come from an outdated BIOS, chipset drivers, overheating, a poor connection, or a faulty SSD. Check system logs, update firmware carefully, and run the manufacturer’s diagnostic test.
Never update SSD firmware during an unstable power condition. Keep a current backup before applying firmware updates.
Should you use RAID with two NVMe SSDs?
RAID combines multiple drives for performance, redundancy, or both, depending on the RAID level. RAID 0 can increase throughput but offers no protection if one drive fails. RAID 1 mirrors data, but it reduces usable capacity by half.
For most home users, two independent NVMe SSDs are simpler and safer. You can use one for Windows and programs and the other for games, projects, or backups.
RAID is more suitable when you have a clear need, compatible motherboard support, and a backup plan. RAID is not a replacement for backup because accidental deletion, malware, file corruption, and hardware problems can still affect the array.
Mistakes to avoid when installing two NVMe drives
The installation is straightforward, but small errors are common. Avoid these problems:
• Buying an M.2 SATA drive for an NVMe-only slot
• Ignoring the motherboard’s lane-sharing chart
• Forgetting to remove the thermal pad’s protective film
• Installing the SSD without a proper standoff
• Overtightening the tiny mounting screw
• Touching the gold contacts
• Formatting the wrong disk in Disk Management
• Removing the old drive before testing the new boot drive
• Placing both drives under poor airflow
• Assuming two drives automatically create a RAID array
• Skipping backups before cloning or reinstalling Windows
The safest habit is to slow down at the moments that can cause permanent data loss. Confirm the drive model and capacity before formatting, and keep at least one separate backup of important files.
Frequently Asked Questions About How to Install Dual NVMe SSDs in One PC
Can every PC support two NVMe SSDs?
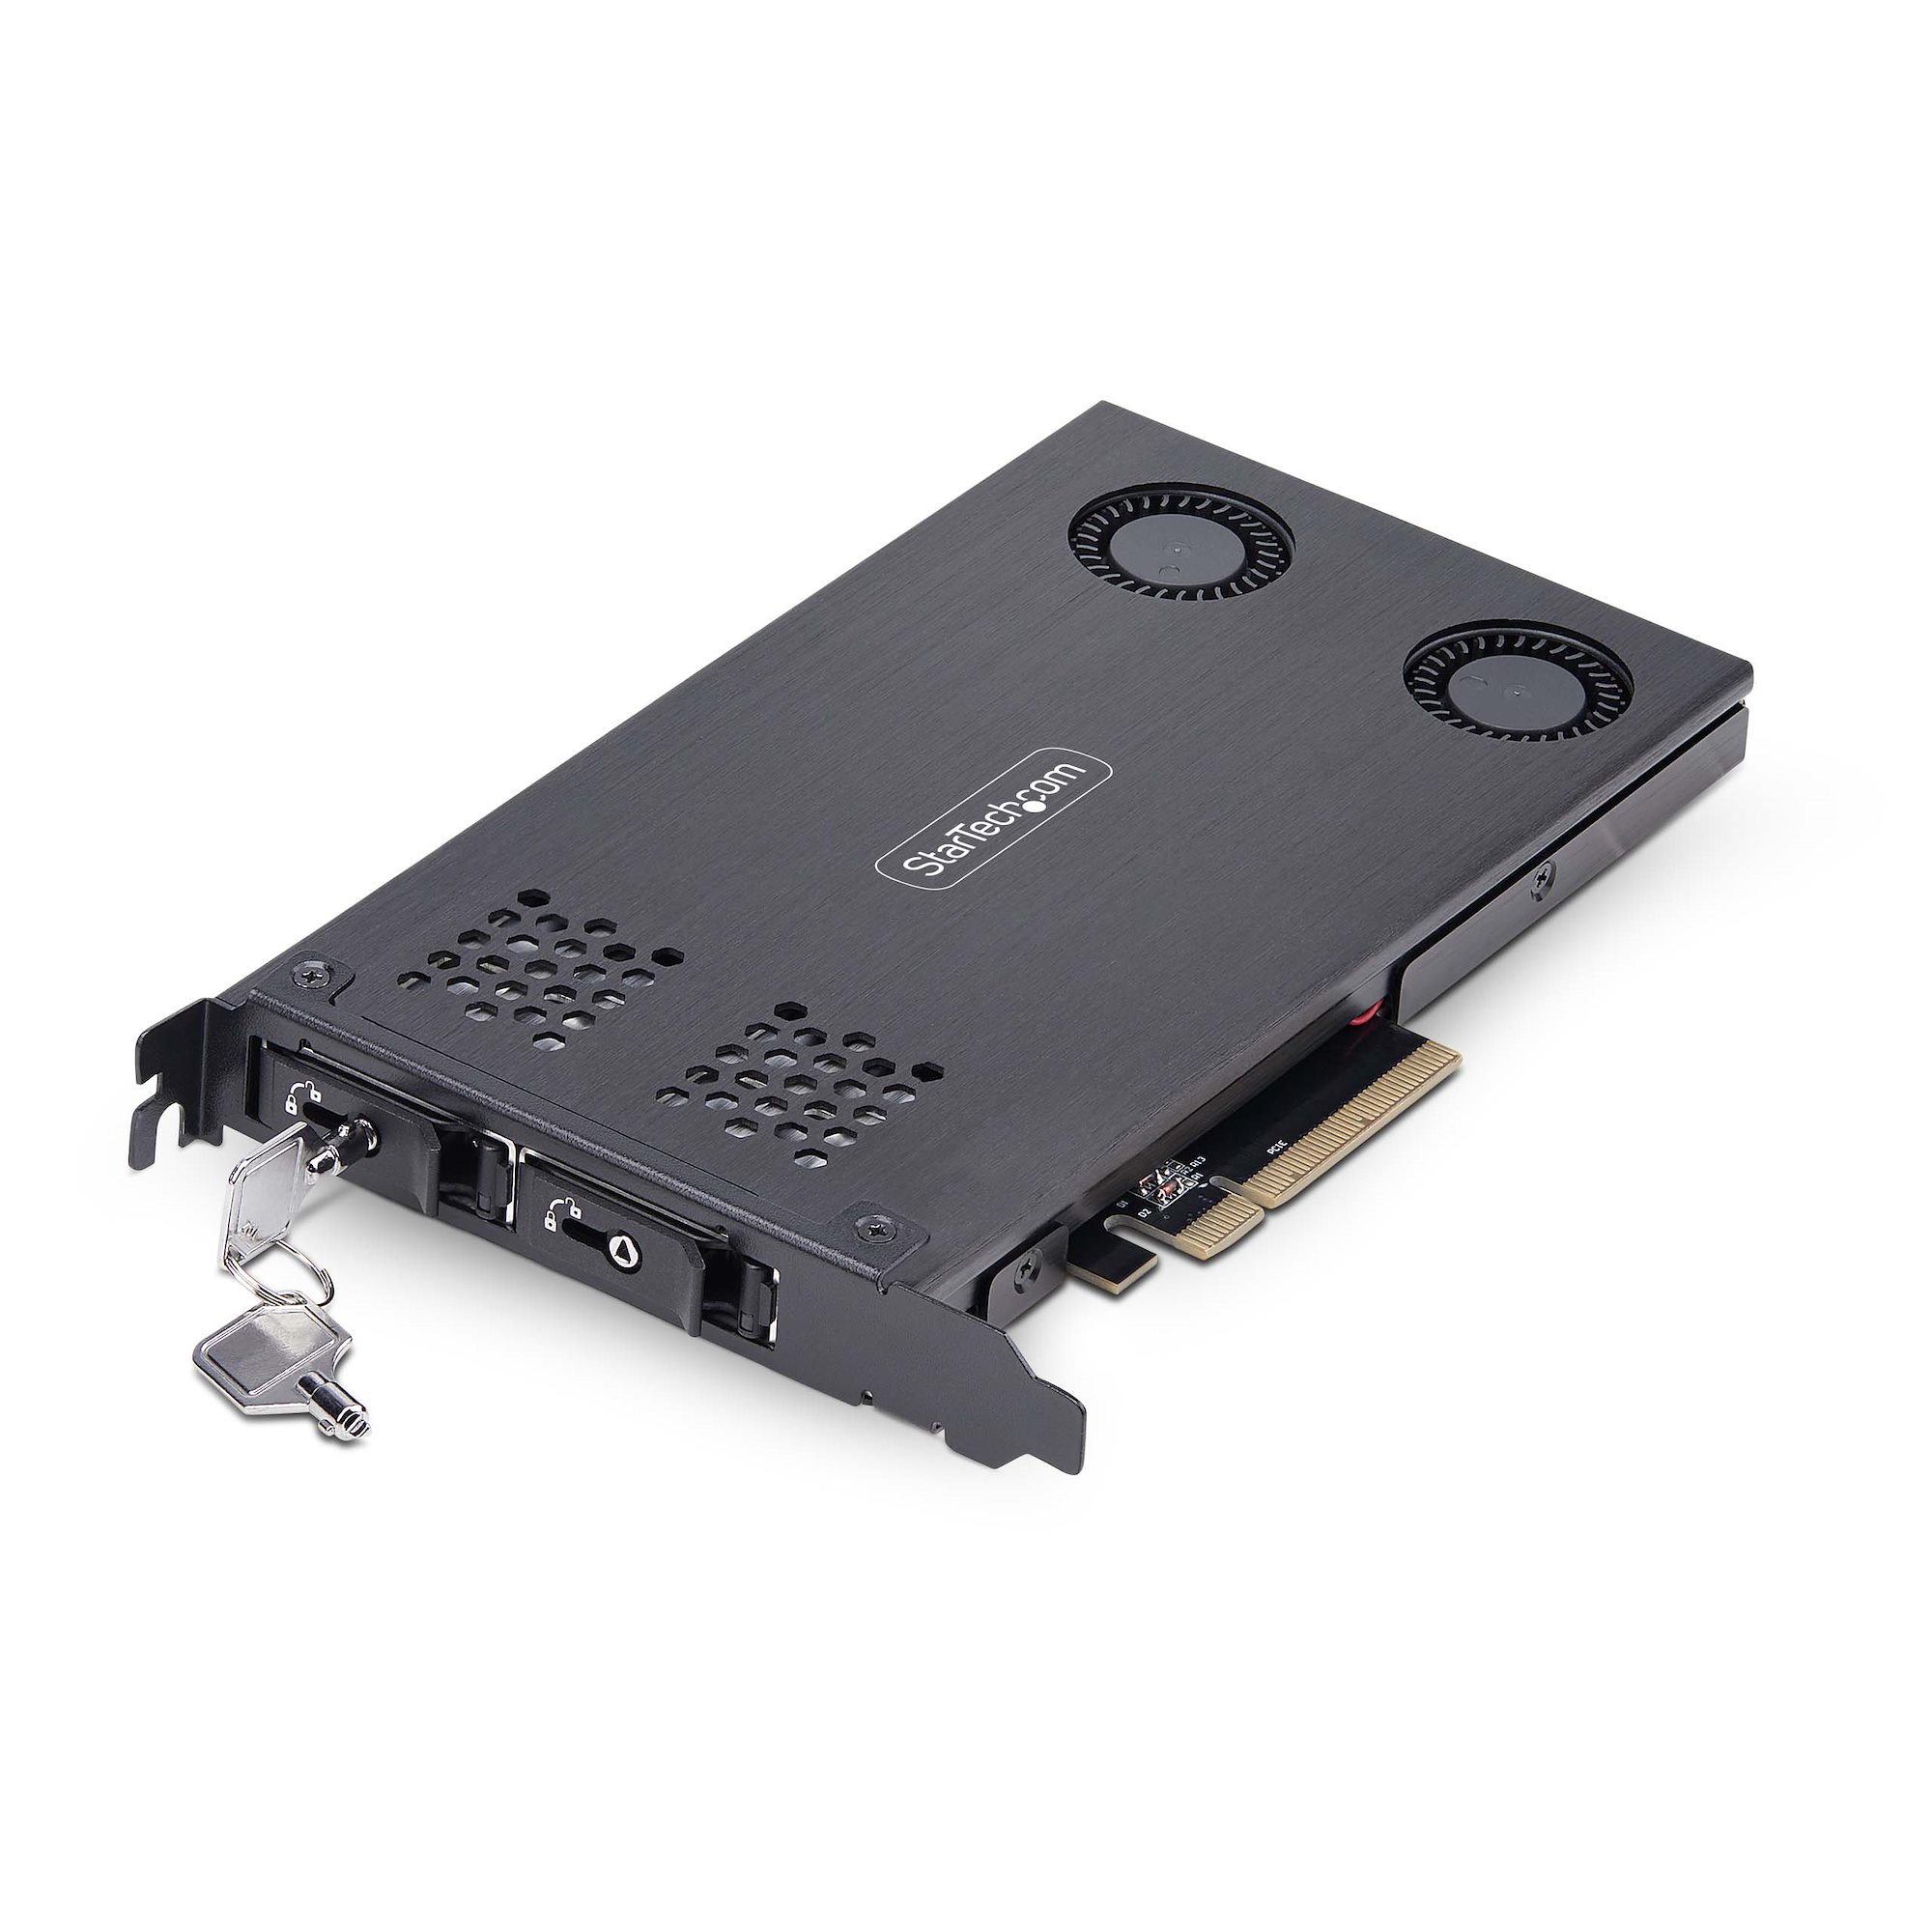
No. The motherboard needs two compatible M.2 slots, or one M.2 slot plus a supported PCIe adapter. Check the motherboard manual because some M.2 slots support SATA only or become disabled when certain ports are used.
Do both NVMe SSDs need to be the same size?
No. You can use different capacities, brands, and speeds. The drives work independently unless you create a RAID array, which has different requirements.
Can I install dual NVMe SSDs in one PC without reinstalling Windows?
Yes. Install the second drive, then initialize and format it in Disk Management. If you want to move Windows, use a careful cloning process or perform a clean installation.
Why is my second NVMe SSD not showing in File Explorer?
A new SSD may not have a partition or drive letter. Open Disk Management, identify the correct drive by capacity, initialize it as GPT if needed, create a volume, and assign a drive letter.
Does installing two NVMe SSDs slow down the graphics card?
It can on some motherboards if the M.2 slots share PCIe lanes with the main graphics slot. Check the motherboard manual to see whether the graphics slot changes from x16 to x8 when another slot is used.
Should I put the faster NVMe SSD in the first slot?
Usually, yes. Put the operating system or most demanding drive in the primary slot, especially when it connects directly to the CPU. The second slot is still suitable for games, files, and applications.
Do I need a heatsink for both NVMe SSDs?
A heatsink is not always required, but it can help during long transfers and heavy workloads. Use the motherboard heatsinks when available, and make sure the thermal pad contacts the drive correctly.
Can I use two NVMe SSDs in RAID 0 for gaming?
You can if the motherboard and firmware support it, but the benefit may be small in many games. RAID 0 also means that one failed drive can make the entire array unavailable, so maintain a separate backup.
Conclusion
Learning how to install dual NVMe SSDs in one PC mainly involves checking motherboard compatibility, using the correct M.2 slots, mounting both drives carefully, and configuring them in BIOS and Windows. Pay close attention to PCIe lanes, heatsinks, drive letters, and data backups.
For most users, two independent NVMe SSDs offer a simple and flexible setup. Install Windows on the primary drive, use the second for games or projects, and monitor temperatures during heavy work. Take your time, verify every disk before formatting, and share your build or questions in the comments.
