

Replacing Bose headphone cushions usually takes 10–20 minutes and needs only new pads, gentle pressure, and the right fit.
Worn ear cushions can make a good pair of Bose headphones feel uncomfortable, loose, or less immersive. Learning how to replace Bose headphone cushions is a simple repair that can restore comfort, improve noise isolation, and extend the life of your headphones. This guide explains the process for popular Bose QuietComfort, QuietComfort 45, QuietComfort Ultra, Noise Cancelling Headphones 700, and SoundLink models, while also covering fit checks, cleaning, common mistakes, and safe replacement tips.
Why Replace Bose Headphone Cushions?
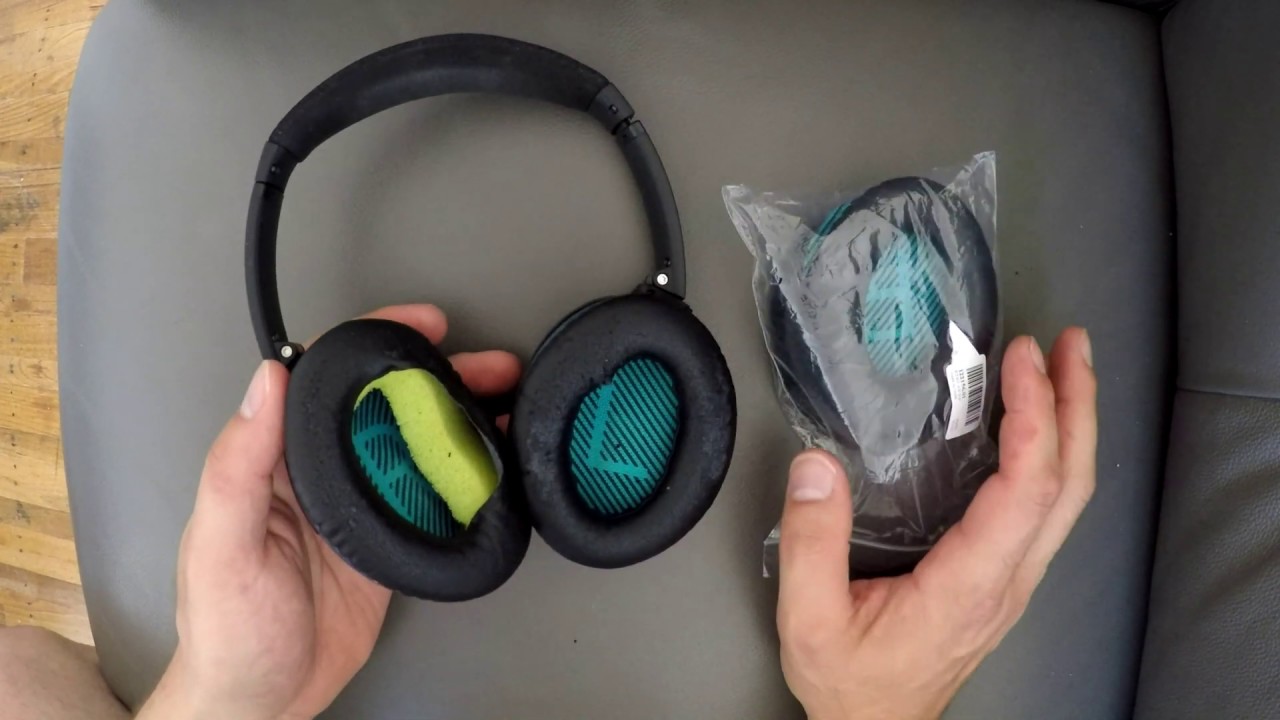
Bose headphone cushions, also called ear pads or ear cups, wear out with regular use. Skin oils, sweat, heat, and daily pressure can break down the outer leatherette material and soften the inner foam.
Common signs of worn cushions include:
• Cracked, peeling, or flaking outer material
• Flattened foam that no longer feels springy
• Ear pain during long listening sessions
• More outside noise entering the ear cup
• Sound that feels weaker or less balanced
• Headphones that no longer seal around your ears
The cushion creates a seal between your ear and the headphone housing. That seal helps passive noise reduction and supports the active noise cancellation system. When the cushion is flat or torn, even working electronics may seem less effective.
Replacing the pads is often cheaper than buying new headphones. It also keeps a familiar pair out of the trash, which is a practical benefit for both your budget and the environment.
Check Your Bose Headphone Model First
Before learning how to replace Bose headphone cushions, identify your exact model. Bose has released several headphones that look similar but use different cushion shapes, attachment systems, or pad sizes.
You can usually find the model name:
• Inside the Bose Music or Bose Connect app
• On the original box or receipt
• On a label inside the headband or ear cup
• In your Bluetooth device list
• In the user guide
Common Bose models include:
• Bose QuietComfort 15
• Bose QuietComfort 25
• Bose QuietComfort 35 and QC35 II
• Bose QuietComfort 45
• Bose QuietComfort Headphones
• Bose QuietComfort Ultra Headphones
• Bose Noise Cancelling Headphones 700
• Bose SoundLink Around-Ear Headphones
Do not assume that all QuietComfort pads fit every QuietComfort model. A replacement cushion made for the QC35 may not attach correctly to the QC45 or QuietComfort Ultra.
When buying replacement cushions, confirm all of these details:
• Exact Bose model and generation
• Left and right pad shape
• Attachment method
• Compatibility with noise cancellation
• Compatibility with the original cushion frame
• Return policy if the fit is wrong
Official Bose replacement pads are the safest choice for fit and function. Third-party pads can work well, but quality varies. Very thick or very firm pads may change the distance between the speaker and your ear, which can affect comfort and sound.
What You Need Before Starting
Most Bose cushion replacements do not require advanced tools. Prepare a clean table, good lighting, and a little patience.
You may need:
• A compatible pair of replacement ear cushions
• A plastic opening tool or a clean, blunt trim tool
• A soft microfiber cloth
• A small flashlight
• A bowl for loose parts, if your model uses clips
Avoid sharp knives, metal screwdrivers, and pointed tools. They can scratch the ear cup, cut the fabric, or damage the small wires and microphone openings inside the housing.
Before you begin, turn off the headphones and disconnect the charging cable. You do not normally need to remove the battery, but you should avoid pressing buttons or moving the ear cups while working.
Place the headphones on a soft cloth. This protects the outer shell and prevents the headband from sliding around.

How to Replace Bose Headphone Cushions
The basic process is similar across many Bose models, but the exact attachment system can differ. Work slowly and compare the old pad with the new one before removing anything.
Step 1: Inspect the old cushion
Look around the edge of the ear cushion. You are checking whether it is held by a plastic lip, retaining clips, or a fitted groove.
Gently lift one small area with your fingers. Do not pull hard. If the pad begins to separate, continue around the edge with steady pressure.
If you feel strong resistance, stop and inspect the edge again. Some pads have a thin mounting ring that must be released from the ear cup. Pulling the cushion away without releasing the ring can bend or break it.
Step 2: Remove the old ear pad
Hold the ear cup firmly in one hand. With the other hand, use your fingers or a plastic tool to loosen the cushion from the outer edge.
Work in short sections:
Start near the lower edge of the cushion.
Lift the cushion lip away from the ear cup.
Move around the sides in small steps.
Release the top edge last if it feels tighter.
On many Bose headphones, the cushion is attached with clips rather than glue. You should not need to rip, twist, or cut it. If you see a fabric layer under the cushion, leave that layer in place.
Step 3: Remove debris
After the old cushion comes off, inspect the exposed mounting area. You may find foam crumbs, dust, hair, or pieces of the old cushion.
Use a dry microfiber cloth or a soft, clean brush. Keep debris away from the speaker opening, microphone ports, and electronic contacts.
Do not spray cleaner directly onto the ear cup. Moisture can move through the speaker grille and damage internal parts.
Step 4: Match the new cushion to the ear cup
Check the left and right cushions before installation. Some replacement sets have markings, while others have a shape that fits only one side.
Look for:
• A mounting rim or plastic ring
• Small tabs or clips
• A thicker rear section
• A seam that should face down
• A specific top and bottom shape
The cushion should sit evenly around the ear cup. If one side looks twisted before installation, rotate it until the shape matches.
Step 5: Attach the new cushion
Place one section of the replacement cushion into the mounting groove. Then work around the edge with your thumbs.
Use this pattern:
Seat the top section.
Seat the bottom section.
Press the left and right sides into place.
Check the full outer edge.
Apply even pressure with your fingers. Do not squeeze the center of the cushion, because excessive pressure can deform the foam.
If your model uses clips, listen and feel for each clip to settle into place. Do not force a clip at an angle. A small plastic tab can break if it is pushed sideways.
Step 6: Repeat on the other side
Replace the second cushion using the same method. Compare both sides as you work.
The two cushions should have the same height, shape, and edge position. Uneven installation can create a weak seal on one side and may make the headphones feel crooked.
Step 7: Test the headphones
After both cushions are installed, check the headphones before normal use.
Test the following:
• Bluetooth connection
• Left and right audio
• Music playback
• Microphone performance
• Noise cancellation
• Transparency or aware mode
• Physical buttons
• Comfort and seal
Play a familiar song or podcast. Turn noise cancellation on and off. A small change in sound can happen with different pad materials, but a major change may indicate a poor seal or an incorrectly fitted cushion.

How to Replace Bose QC35 and QC35 II Cushions
The Bose QC35 and QC35 II use removable cushions that are commonly replaced without opening the electronic housing. Their pads usually attach around a mounting edge and may include a thin support ring.
To replace Bose QC35 cushions:
Turn off the headphones.
Hold the ear cup with the speaker grille facing up.
Pull the old cushion away from the edge in small sections.
Remove loose foam and dust with a dry cloth.
Align the new cushion with the ear cup.
Press the cushion lip into the groove around the full edge.
Run your finger around the seam to confirm that no section is raised.
Pay close attention to the fabric screen inside the ear cup. Do not remove it unless the replacement instructions for your specific kit clearly require it. This screen helps protect the speaker and other internal parts.
A common mistake is installing the cushion with the seam turned inward or leaving one corner outside the groove. The headphones may still produce sound, but the fit will feel uneven and noise cancellation may seem weaker.

How to Replace Bose QC45 and QuietComfort Cushions
The Bose QC45 and newer QuietComfort models have a similar general replacement process, but the cushion attachment can feel tighter than older versions.
When removing a QC45 cushion, use slow pressure along the outer edge. A plastic tool can help, but your fingers are often safer because they give you better feedback.
When fitting the new cushion:
• Match the pad shape to the ear cup
• Keep the inner fabric opening centered
• Seat the mounting lip a little at a time
• Check for gaps around the entire ring
• Avoid stretching the leatherette too far
Do not use glue unless the manufacturer specifically instructs you to do so. Glue can harden the cushion, block the mounting groove, and make future repairs difficult.
After installation, wear the headphones for at least 15 minutes. A cushion can look correct but still feel wrong if it presses on the ear or creates uneven pressure.

How to Replace Bose Headphone 700 Cushions
The Bose Noise Cancelling Headphones 700 use a distinctive cushion shape. Buy pads made specifically for the Headphones 700 rather than relying on a general Bose listing.
The removal process usually begins by loosening the cushion from its mounting edge. Keep the plastic tool shallow so it does not touch the speaker or internal components.
During installation, check the cushion’s top and bottom orientation. The pad should follow the curved shape of the ear cup without bunching at the front or rear.
After replacing Bose Headphone 700 cushions, test the microphones and noise cancellation. The 700 has several microphones around the ear cups, so keep every microphone opening clear of foam, fabric, and cleaning fluid.

How to Replace Bose QuietComfort Ultra Cushions
The QuietComfort Ultra has a newer design and may use replacement parts that differ from older QuietComfort models. Always verify compatibility before ordering.
Use extra care around the ear cup controls and microphone openings. The housing contains sensitive parts, and a sharp tool can cause damage that is not related to the cushion itself.
For the QuietComfort Ultra:
Compare the replacement pad with the original.
Identify the mounting rim and orientation.
Remove the original pad without pulling on the speaker fabric.
Clean only the exposed plastic area.
Seat the replacement pad evenly.
Test audio, noise cancellation, and aware mode.
If the replacement cushion does not sit naturally, stop and check the model number. Forcing an incompatible pad can stretch the rim or leave a permanent gap.

How to Choose Replacement Bose Ear Pads
The best replacement cushion is not always the cheapest one. Comfort, seal, durability, and correct fit matter more than appearance alone.
Consider these materials:
• Protein leather or synthetic leather: Smooth and easy to clean, but it may peel over time.
• Fabric: Breathable and comfortable in warm weather, but it may absorb sweat and provide a slightly different seal.
• Memory foam: Soft and supportive, but it can change the fit if it is too thick.
• Cooling gel foam: May feel cooler during long use, but it can add weight or alter the sound.
Look for a replacement that matches the original cushion’s height and firmness. A thicker pad may improve comfort for people with larger ears, but it can also move the ear farther from the speaker.
A thinner pad may create a tighter seal, yet it can press the ear against the internal speaker grille. The right choice depends on your ear shape, listening time, climate, and comfort needs.
Read reviews with care. A pad that works well for one person may feel too firm or too warm for another. Reviews that mention exact Bose model compatibility are more useful than general comments about softness.
Common Mistakes to Avoid
Learning how to replace Bose headphone cushions is simple, but a few mistakes can cause damage or poor performance.
Avoid these problems:
• Buying pads for the wrong Bose model
• Pulling the cushion off with a sharp object
• Touching or pressing the speaker diaphragm
• Spraying cleaner into the ear cup
• Using glue on a clip-on cushion
• Installing one cushion upside down
• Leaving part of the mounting lip outside the groove
• Using too much force on plastic tabs
• Ignoring a torn inner fabric screen
• Failing to test noise cancellation afterward
One lesson I have seen repeatedly in headphone repairs is that rushing the first cushion makes the second one harder. The first side teaches you where the clips and grooves are. Take photos before removal if you feel unsure, and use the first completed side as a visual guide for the second.
Another useful tip is to keep the old cushion until testing is complete. If the replacement has the wrong shape, the original pad can help confirm the problem and support a return request.
Cleaning and Caring for New Bose Cushions
New cushions last longer when you reduce moisture and friction. Wipe them with a soft, slightly damp cloth after heavy use, then allow them to dry fully before storing the headphones.
Do not soak the pads. Avoid alcohol, bleach, household sprays, and strong detergents unless the product instructions specifically approve them. These chemicals can damage synthetic leather, stitching, foam, or protective coatings.
For regular care:
• Wipe away sweat after workouts or long listening sessions.
• Store the headphones in a cool, dry place.
• Avoid leaving them in a hot car.
• Do not fold or compress the cushions for long periods.
• Let damp pads air-dry before placing them in a case.
• Keep hair products and skin oils away from the cushion surface.
If the pads become wet, remove the headphones from power and let them dry naturally. Do not use a hair dryer or place them on a heater. Strong heat can warp foam and deform plastic parts.
Troubleshooting After Cushion Replacement
A new cushion should sit firmly and evenly. If something feels wrong, check the installation before assuming the headphones have an electronic fault.
Noise cancellation seems weaker
Check the seal around both ears. Look for a visible gap, a twisted cushion, or a pad that is not fully seated in the groove.
Also confirm that the new pads are designed for your exact model. Different foam density or pad thickness can affect how outside sound reaches the microphones.
The sound has changed
A small sound change is possible because the cushion affects the space around your ear. A large change may mean the pad is too thick, too thin, or not attached evenly.
Compare the left and right sides. If only one side sounds different, inspect that cushion first.
The cushion keeps coming loose
The mounting lip may not be fully inside the groove. Remove the pad and reinstall it slowly, pressing around the entire edge.
If a clip or plastic ring is broken, replacement may require a new mounting ring or professional service. Do not rely on tape or glue as a permanent repair.
The headphones feel too tight
New foam can feel firmer than old, compressed foam. Wear the headphones for short periods while the material settles, but stop if you feel pain or pressure.
A different cushion thickness may also change the fit. Confirm that the replacement is the correct model and style.
One side feels higher
Remove and reseat the uneven cushion. Check for folded fabric, trapped foam, or an edge that has not clicked into place.
When to Use Professional Repair
Replacing cushions is usually a safe home repair, but professional help is better when the ear cup itself is damaged.
Consider service if:
• The speaker grille is torn
• A microphone opening is damaged
• The ear cup shell is cracked
• A mounting clip has broken inside the housing
• The headphones will not power on after the repair
• Audio cuts out when the ear cup moves
• The battery or wiring is exposed
Cushion replacement should not require opening the main headphone housing. If you need to remove screws or disconnect wires, you may be moving beyond a basic ear pad repair.
Warranty terms can vary. A third-party cushion normally does not mean the entire headphone warranty is automatically void, but damage caused during installation may not be covered. Check the warranty terms and consider official service for newer or expensive models.
How Long Do Bose Headphone Cushions Last?
Many users replace headphone cushions after one to three years, but the actual life span depends on use. Daily wear, hot weather, exercise, and oily skin can shorten cushion life.
Signs that replacement is due include:
• Flaking surface material
• Foam that stays flat
• A rough or sticky feel
• Reduced comfort
• A poor seal
• Visible stitching damage
You do not need to wait until the cushion is completely destroyed. Replacing pads when they first lose their shape can protect comfort and help preserve noise cancellation.
The electronics in a Bose headset may continue working for many years. Fresh cushions can make an older pair feel new again without changing its core hardware.
Frequently Asked Questions About How to Replace Bose Headphone Cushions
Can I replace Bose headphone cushions myself?
Yes. Most Bose ear cushions are designed to be removed and replaced without opening the electronic housing. The key is to use model-specific pads and apply gentle, even pressure.
Do replacement Bose cushions affect noise cancellation?
They can. Noise cancellation depends partly on a good seal around the ear, so a poorly fitted or incompatible cushion may reduce performance.
Do I need glue to replace Bose ear pads?
Usually, no. Many Bose cushions attach with a mounting lip, clips, or a retaining ring. Glue can make future replacement harder and may damage the cushion or ear cup.
How do I know which Bose replacement cushions to buy?
Check the exact model name and generation before ordering. Compare the seller’s compatibility list with the model shown in the Bose app, user guide, or product label.
Why does one replacement cushion keep coming off?
The mounting lip may not be fully seated, or a clip may be damaged. Remove the pad, inspect the edge, and reinstall it by pressing around the full circumference.
Can I wash Bose headphone cushions?
Do not soak the cushions or place them in a washing machine. Wipe them with a lightly damp cloth and let them air-dry completely.
How often should I replace Bose headphone cushions?
Replace them when they crack, peel, flatten, smell, or stop forming a comfortable seal. For many daily users, this may be every one to three years.
Conclusion
Replacing Bose headphone cushions is a practical repair that can restore comfort, improve the ear seal, and extend the life of your headphones. Identify the exact model, choose compatible pads, remove the old cushion carefully, and press the new cushion evenly into its mounting groove.
Take your time, keep tools away from the speaker and microphones, and test audio and noise cancellation before regular use. With the right replacement pads and a careful installation, your Bose headphones can feel comfortable and reliable again. Explore model-specific repair resources, share your experience, or leave a comment about which Bose cushion you replaced.