

Use compatible caching software to place frequently used HDD data on a faster SSD automatically.
An SSD cache can make a large hard disk feel much faster without moving your files by hand. The SSD stores copies of often-used data, while the HDD keeps the full library. This guide explains how to use an SSD as a cache drive for an HDD on Windows, Linux, NAS systems, and hardware RAID. You will also learn which method is safest, how much SSD space you need, and which mistakes can put your data at risk.
What an SSD cache does
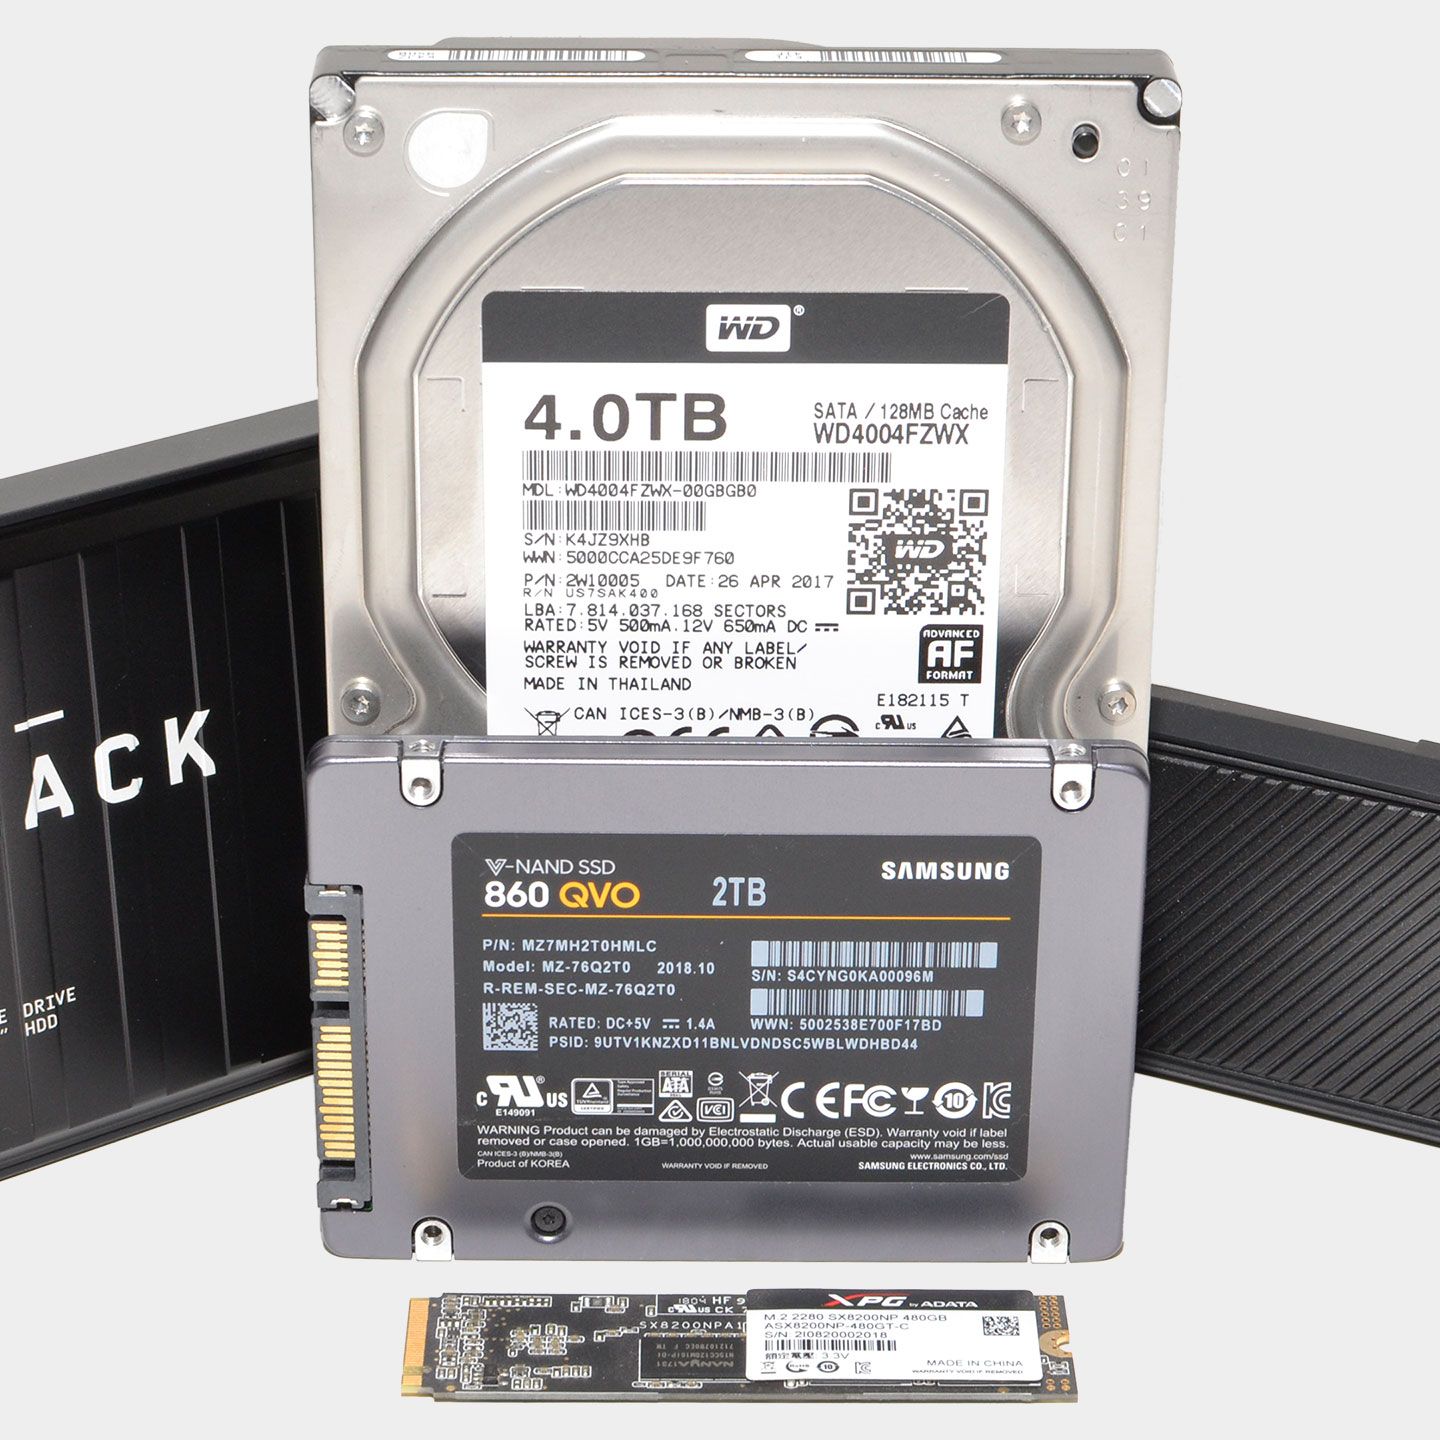
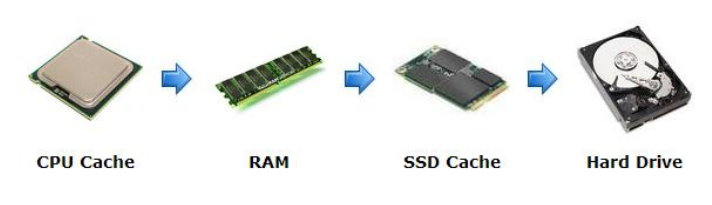
An SSD cache is a fast storage layer between your computer and a slower hard disk drive. When you open a file, launch an app, or load a game, the caching system copies useful data to the SSD. The next request can then come from the SSD instead of the HDD.
Think of the HDD as a large filing cabinet and the SSD as the small desk beside it. The cabinet holds everything. The desk keeps the papers you use most often.
The cache does not usually replace the HDD. It works with the HDD and tries to predict which data you will need next. Some tools cache reads only. Others cache both reads and writes.
There are two main cache modes:
• Read cache: The SSD stores copies of data from the HDD. If the SSD fails, the original data normally remains on the HDD.
• Write-through cache: New data goes to the SSD and HDD together. This is safer than delayed writing but may offer less speed.
• Write-back cache: New data lands on the SSD first and moves to the HDD later. This can be much faster, but a power loss or SSD failure may corrupt data that has not reached the HDD.
An SSD cache works best when your workload repeats the same data. It can help with operating system files, application launches, databases, virtual machines, and frequently used project files.
It may not help much when you copy large files once, stream new video files, or work with data that is too large to fit in the cache. In these cases, the HDD may still be the main limit.
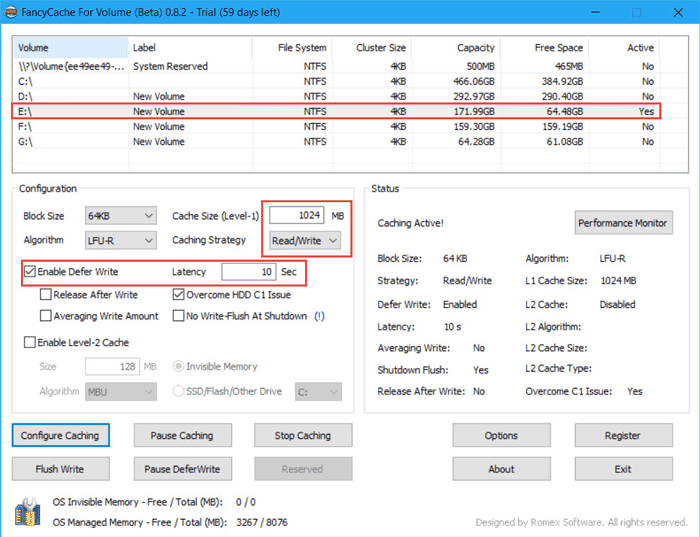
Benefits and limits of using an SSD cache
Learning how to use an SSD as a cache drive for an HDD can extend the useful life of an older system. You can keep the HDD’s large capacity while adding faster access for common tasks.
Key benefits include:
• Faster startup times for frequently used programs
• Quicker access to repeated files
• Better response from large photo or video libraries
• Lower cost than replacing a large HDD with an SSD
• Improved performance for some virtual machines and databases
• Less need to manually move files between drives
Still, caching is not magic. It cannot make every HDD task perform like native SSD storage. The result depends on the cache software, SSD speed, interface, workload, and amount of repeated data.
An SSD cache also adds another layer to your storage setup. If the software fails, the computer loses power, or the SSD becomes unreliable, you may face data loss in write-back mode. A cache should never be treated as a backup.
For the best balance, start with read caching or write-through caching. Use write-back caching only when you have reliable power protection, a healthy SSD, and a current backup.
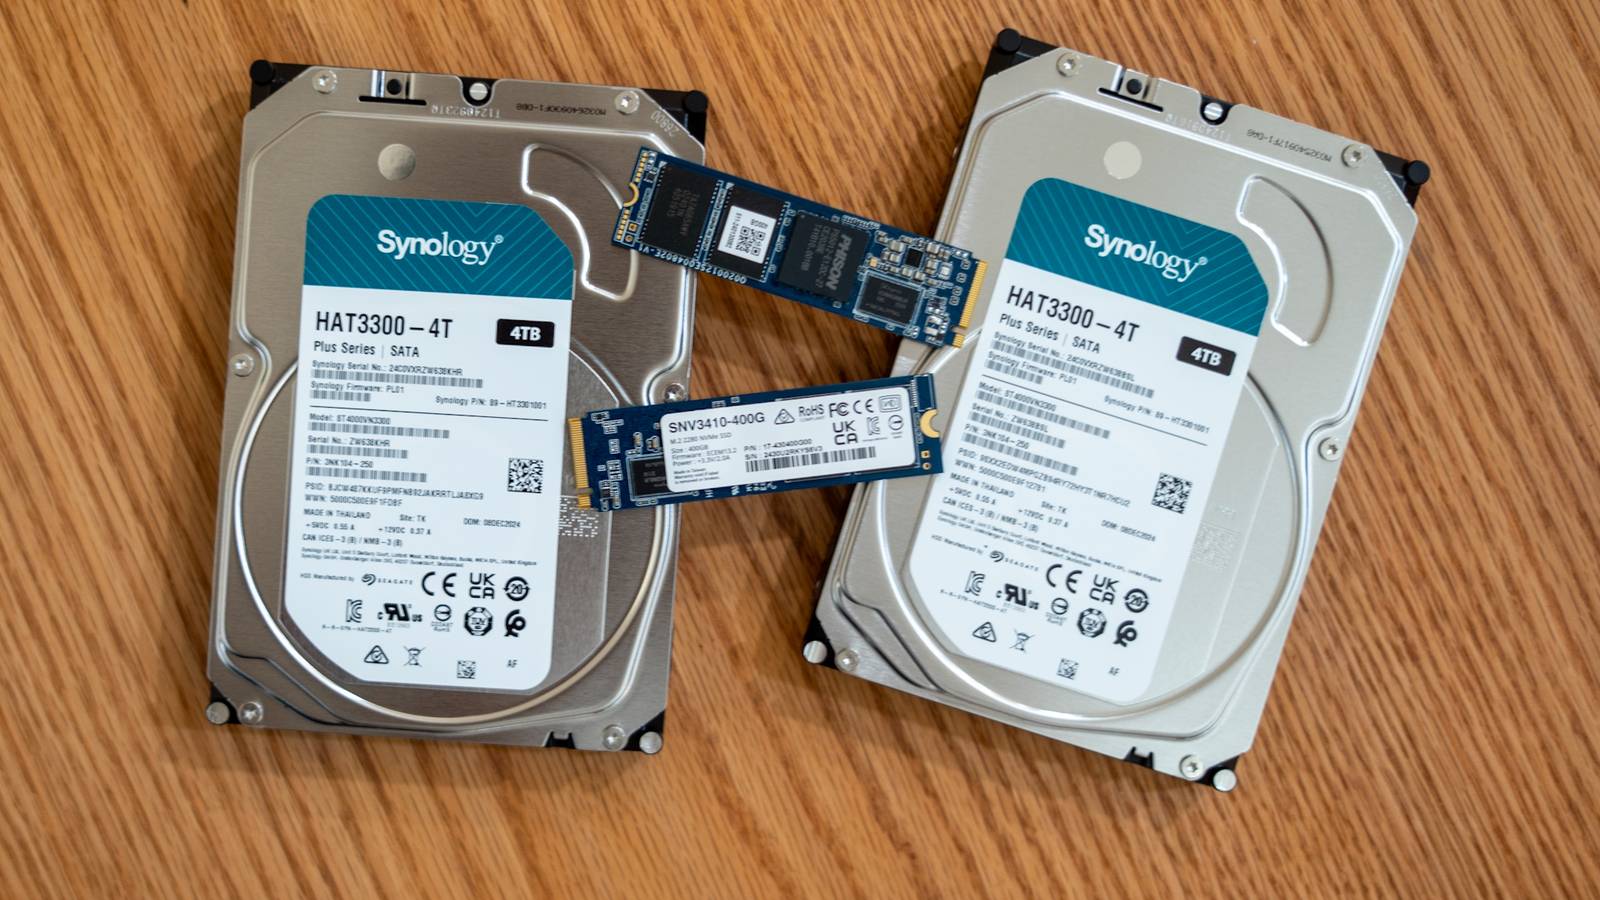
Check your hardware before setup
Before you use an SSD as a cache drive for an HDD, check the hardware and storage layout. A few minutes of planning can prevent a difficult recovery later.
Choose the right SSD
A SATA SSD can work well for a SATA HDD. An NVMe SSD can offer more bandwidth, but it may not improve performance if the caching software or HDD is the bottleneck.
Look for these features:
• At least 120 GB for a basic cache
• 250 GB to 500 GB for games, applications, or active projects
• Good endurance, especially for write caching
• Support for TRIM and modern self-monitoring data
• A reputable controller and NAND type
Do not use an old SSD with a high wear count for write-back caching. Consumer SSDs often have limited write endurance compared with enterprise models. Check the drive’s health with a trusted monitoring tool before you begin.
Check the HDD
Make sure the HDD has no warning signs. Review its SMART health data and scan for errors. Do not build a cache on top of a drive that already reports bad sectors, repeated read failures, or serious mechanical noise.
A cache can hide slow sectors for a while, but it cannot repair a failing hard drive.
Confirm free space and connection type
The SSD must appear correctly in your operating system. Check whether it uses:
• SATA
• NVMe
• USB
• A hardware RAID controller
USB SSDs are usually a poor choice for a system cache. Disconnects, power management, and USB driver issues can interrupt the cache layer. Use an internal drive when possible.
Also confirm that the motherboard supports the needed M.2 slot, SATA port, and boot mode. Some systems disable certain SATA ports when an M.2 drive is installed.
Back up before changing storage
Create a complete backup before enabling caching. Test that you can restore at least a few files. If you plan to use write-back mode, keep an additional backup that is not connected to the computer.

How to use an SSD as a cache drive for an HDD on Windows
Windows does not provide one universal, built-in SSD cache feature for every HDD. You usually need a storage management tool, a supported motherboard feature, or a hardware RAID controller.
The exact menu names differ between applications, but the general process is similar.
Method 1: Use dedicated caching software
Third-party caching software can combine an SSD and HDD into a cache relationship. Some tools support read caching, write-through mode, and write-back mode.
A typical setup looks like this:
Install the SSD and HDD inside the computer.
Confirm that Windows can see both drives in Disk Management.
Back up the HDD before installing the caching software.
Install a trusted caching application from its official vendor.
Select the HDD as the source or storage drive.
Select the SSD as the cache drive.
Choose read-only, write-through, or write-back caching.
Assign the cache size.
Start the cache or reboot when the software requests it.
Monitor the cache status and drive health.
Some programs cache an entire volume. Others let you select folders or applications. Folder-based caching is easier to understand and can reduce risk because the rest of the HDD works normally.
When possible, begin with read-only caching. Run your normal workload for several days. If the system stays stable and you have a tested backup, consider write-through mode.
Method 2: Use motherboard or chipset caching
Some older systems support technologies that combine a small SSD with a larger HDD. These features may use firmware settings, a special driver, or a supported chipset.
This method can be fast, but it has limits:
• The motherboard may need a specific chipset
• The cache may not work after moving the drives to another computer
• The feature may no longer receive updates
• Reinstalling Windows may require the original driver
• Some systems support only certain SSD sizes
Before using this method, check the motherboard manual and current support documents. Do not change SATA controller modes casually. Switching between AHCI, RAID, and other modes after Windows installation can cause boot errors.
Method 3: Use Storage Spaces carefully
Windows Storage Spaces can pool drives and create storage tiers on supported configurations. A tier can place active data on SSD storage and less active data on HDD storage.
However, a storage tier is not identical to a simple SSD cache. It may require you to create a new virtual disk and move data into it. It can also have specific disk, capacity, and resiliency rules.
Storage Spaces is more suitable for a planned storage pool than for a quick cache added to an existing system disk. Read the recovery steps before creating the pool, and do not delete the original volume until you confirm that your data is safe.

How to use an SSD as a cache drive for an HDD on Linux
Linux offers several mature storage-layer options. The best choice depends on whether you want a whole-device cache, a file system cache, or a fast tier for a server.
Bcache
Bcache places an SSD in front of a block device such as an HDD. It supports read caching and write policies. It is useful when you want the SSD to accelerate a whole disk or partition.
A safe high-level workflow is:
Back up the HDD.
Install the SSD and verify both device names.
Confirm device names with tools such as
lsblk.Create the cache device and backing device according to your distribution’s documentation.
Start with a read-focused or write-through policy.
Format and mount the resulting device as directed.
Test reboot behavior before storing important data.
Be extremely careful with Linux device names. Choosing the wrong device during setup can erase a disk immediately.
LVM cache
Logical Volume Manager supports cache volumes through dm-cache. This approach can add an SSD cache to an existing logical volume.
LVM cache commonly uses:
• A fast cache data area
• A cache metadata area
• A logical volume on the HDD
You can select write-through or write-back behavior. Write-through is the safer first choice. Write-back can reduce write latency but requires a stable system and a good recovery plan.
Monitor metadata health closely. Damaged cache metadata can make the logical volume difficult to activate.
ZFS L2ARC
ZFS can use an SSD as a second-level read cache called L2ARC. It stores copies of data that has already moved through the main memory cache.
L2ARC is read cache only. It does not replace RAM, and it does not turn every HDD workload into SSD storage. It works best on systems with enough memory and a repeated read pattern.
File system and application caching
Some applications provide their own cache settings. Media servers, databases, virtual machine platforms, and content management systems may let you place temporary files or indexes on an SSD.
This can be safer and more predictable than caching the whole HDD. For example, placing a database index, thumbnail folder, or virtual machine disk on the SSD may deliver a clear improvement without adding a complex block cache.
How to use an SSD as a cache drive for an HDD in a NAS
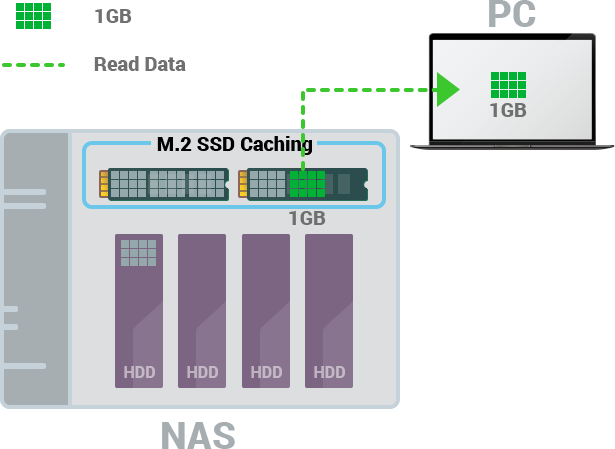
Many NAS devices support SSD caching through their own operating system. The exact feature depends on the manufacturer, model, drive bays, and storage layout.
A NAS may offer:
• Read-only SSD cache
• Read-write SSD cache
• A dedicated SSD storage pool
• Automatic storage tiering
• Cache support for selected volumes
Read-only cache is usually the safest starting point. If the SSD fails, the NAS can often fetch the original data from the HDD array.
Read-write cache needs more care. Some NAS systems require two SSDs for protection against a single drive failure. This is common when the cache must preserve pending writes.
Before activating NAS SSD caching:
Confirm that the NAS supports your SSD type.
Check the approved drive list when available.
Update the NAS operating system.
Back up the NAS data.
Install one or more SSDs as required.
Select the volume that needs acceleration.
Choose read-only or read-write caching.
Allow the cache to warm up.
Watch cache health, temperature, and alerts.
Do not remove a NAS cache SSD without using the system’s proper removal process. The NAS may need to flush or detach the cache first.
A dedicated SSD volume can be better than a cache when you have predictable files. For instance, active documents can live on SSD storage while movies and backups remain on the HDD array.
Select the right cache mode
Cache mode determines both performance and risk. It deserves careful attention.
Read-only caching
Read-only caching stores copies of HDD data on the SSD. It is the best choice for most home users.
Advantages include:
• Low data-loss risk if the SSD fails
• Simple recovery
• Faster repeated reads
• Easy testing
The first access may still be slow because the data must come from the HDD. Performance improves as the cache learns your habits.
Write-through caching
Write-through mode writes data to the HDD before confirming the operation. The SSD may still help with reads, but new data is protected by the original disk.
This mode is a good middle ground. It gives you some cache benefits while reducing the chance of losing recent data after a sudden shutdown.
Write-back caching
Write-back mode confirms writes before the HDD receives them. This can make a slow HDD feel much faster during bursts of activity.
The risk is clear: data sitting only on the SSD can disappear after a power failure, software crash, or SSD failure. If you use write-back caching, consider:
• A UPS for the computer or NAS
• A high-endurance SSD
• A cache tool with power-loss protection
• A mirrored cache when supported
• Frequent backups
Do not enable write-back simply because it is the fastest option. Speed is useful only when your data remains safe.
Configure cache size and monitor performance
A larger SSD does not always create a larger performance gain. The best cache size depends on your active data set, not your total storage capacity.
Practical starting points include:
• 64 GB to 128 GB for documents and light application use
• 250 GB to 500 GB for games and common desktop work
• 500 GB or more for large projects, virtual machines, or busy servers
Leave free space on the SSD. A drive filled to its limit can slow down and may have less room for background maintenance.
After you use an SSD as a cache drive for an HDD, measure the result. Do not rely only on a benchmark. Test the tasks that matter to you:
• Boot the computer several times
• Open your most-used applications
• Search your photo or video library
• Load a regular game level
• Open a common project
• Copy a group of small files
Use Windows Performance Monitor, Linux monitoring tools, NAS health pages, or the cache software’s own dashboard. Watch for high SSD temperatures, cache errors, rising HDD response times, and unexpected disconnects.
A cache hit means the requested data came from the SSD. A cache miss means the system had to read from the HDD. A low hit rate may show that the workload does not repeat enough data to benefit from caching.
One lesson from storage testing is that small files often benefit more than large files. Large sequential transfers can quickly fill the cache and fall back to HDD speed.
Common mistakes to avoid
The most common error is treating a cache as a backup. A cache stores copies or temporary writes. It does not protect you from accidental deletion, malware, theft, fire, or a failed HDD.
Avoid these mistakes:
• Using write-back mode without a backup
• Caching a failing HDD
• Selecting the wrong disk during Linux setup
• Using a cheap or worn-out SSD for heavy writes
• Removing the SSD without detaching the cache
• Changing RAID or SATA modes without a recovery plan
• Assuming a cache improves every workload
• Filling the SSD completely
• Ignoring firmware and driver updates
• Testing only with synthetic benchmarks
If you need more speed for an operating system, a direct SSD migration may be better than caching. If you need more space, keep the HDD and add an SSD for active files. If you need both speed and protection, use an SSD for working data and maintain a separate backup system.
The simplest storage design is often the most reliable. Every extra layer should solve a real problem.
A practical setup example
Suppose you have a desktop with a 4 TB HDD and a 500 GB SATA SSD. You store photos, games, documents, and videos on the HDD.
A sensible plan would be:
Back up the 4 TB HDD.
Check the HDD SMART status.
Install the SSD internally.
Use trusted caching software that supports read-only mode.
Assign 250 GB of the SSD to the cache.
Keep the remaining SSD space for temporary files or active projects.
Test the system for one week.
Compare application launch times and file access.
Keep write-back mode disabled unless you have a strong reason to use it.
In this example, games and frequently opened photos may load faster after the cache warms up. A new video file copied once to the HDD may show little improvement.
If the photo library is used every day, a better long-term plan may be to move its current working folders directly to the SSD. The HDD can then store the full archive and backup copy.
Frequently asked questions
Can I use any SSD as a cache drive for an HDD?
Many SATA and NVMe SSDs can work, but compatibility depends on the caching software, operating system, and storage controller. Check support before buying, and choose a healthy SSD with enough endurance for your workload.
Is an SSD cache better than replacing the HDD?
A cache costs less when you need to keep a large HDD capacity and often use the same files. Replacing the HDD with an SSD gives more consistent speed and is usually better for operating systems, games, and heavy daily work.
Does an SSD cache protect my HDD data?
No. A read cache does not protect against HDD failure, and a write-back cache can add data-loss risk during a power loss or SSD failure. Keep a separate backup of important files.
How much SSD space do I need for caching?
A 64 GB to 128 GB cache can help with light desktop use. For games, large applications, or active projects, 250 GB to 500 GB is a more useful starting range.
Can I use an external USB SSD as a cache?
Some tools may support it, but internal storage is usually more reliable. USB disconnects, power issues, and driver changes can interrupt the cache and may cause problems with write-back data.
Will an SSD cache make my HDD as fast as an SSD?
No. It can make repeated tasks much faster, but cache misses still use HDD speed. Direct SSD storage delivers more consistent performance across a wider range of tasks.
Should I choose read-only or write-back caching?
Read-only caching is the safest option for most people. Use write-back caching only with a reliable SSD, strong backup plan, and protection against sudden power loss.
Conclusion
Using an SSD as a cache drive for an HDD can improve repeated reads while preserving the HDD’s large capacity. The safest path is to check both drives, create a backup, start with read-only or write-through caching, and measure real tasks instead of trusting benchmark numbers.
The focus keyword, how to use an SSD as a cache drive for an HDD, describes a useful upgrade, but the best method depends on your system. Choose dedicated software on Windows, bcache or LVM cache on Linux, and the supported cache feature on a NAS. Start small, monitor drive health, and never treat the cache as a backup.
Apply the safest setup that fits your workload, then explore more storage guides or share your caching results and questions in the comments.
