

Most headphone audio jack faults come from loose wires, dirt, bent contacts, or a damaged plug.
Learning how to fix audio jack on headphones can save money and keep a favorite pair out of the trash. The right repair depends on the symptom, such as sound in one ear, crackling audio, or no sound at all. This guide explains safe tests, simple cleaning, plug replacement, wire repairs, and the point where professional service makes more sense.
:max_bytes(150000):strip_icc()/001-fix-xbox-one-controller-headphone-jack-not-working-4771243-74cb595b0d9e43d1b351c233b3c5e819.jpg)
Understand the headphone audio jack problem
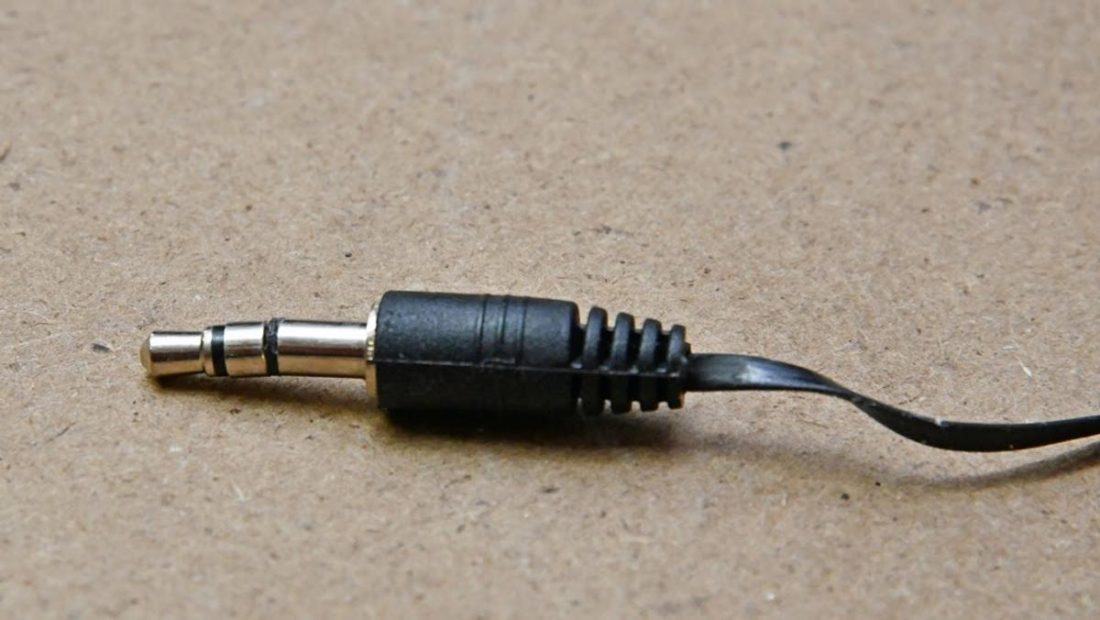
The audio jack is the connection point that carries sound from a phone, computer, game console, or amplifier to the headphone speakers. Most wired headphones use a 3.5 mm plug, although some use a 2.5 mm plug or a 6.35 mm adapter.
A standard stereo plug often has three contact areas:
- Tip: left audio channel
- Ring: right audio channel
- Sleeve: ground connection
Headsets with a microphone often use a TRRS plug. The extra contact carries the microphone signal. This design is common with phones, laptops, and gaming headsets.
Before you start learning how to fix audio jack on headphones, identify the real fault. The problem may be the plug, the headphone cable, the device port, or the speaker inside the earcup.
Common signs include:
- Sound works only when the plug is held at a certain angle
- One side sounds weak or silent
- Audio cuts out when the cable moves
- Crackling occurs near the plug
- The plug feels loose in the device
- The microphone does not work
- No sound comes from either side
A damaged plug is often the easiest problem to repair. A broken wire inside the headband or earcup is harder and may require more disassembly.

Test the headphones before repairing them
Testing first prevents a common mistake: repairing good headphones when the real problem is the phone or computer. Try the headphones with two different devices. If the same fault appears on both, the headphones are likely the cause.
Play audio at a moderate volume. Then gently move the plug and the first few inches of cable. Do not force the plug or twist it hard. If sound cuts in and out near the plug, the cable or plug may have an internal break.
Check these points:
- Inspect the plug for bends, corrosion, or deep scratches.
- Check whether the device port contains lint or dust.
- Test another pair of headphones in the same port.
- Turn off Bluetooth if the device may be routing sound wirelessly.
- Check the device’s balance and accessibility settings.
- Test the microphone separately if the headset has one.
If another pair also fails, clean or inspect the device port before opening the headphones. A port packed with pocket lint can prevent the plug from making full contact.
A multimeter can provide a more exact test. Set it to continuity mode, then check whether each plug contact connects to the correct wire. Avoid touching powered equipment while testing. Disconnect the headphones from all devices first.

Clean the plug and device port
Dirt is one of the simplest causes of poor headphone sound. Skin oil, dust, and pocket lint can coat the metal contacts. This creates resistance or blocks contact, much like a thin layer of paint between two metal parts.
Turn off the device before cleaning. Wipe the headphone plug with a clean, dry microfiber cloth. For stubborn grime, use a small amount of 70% isopropyl alcohol on the cloth. Do not soak the plug.
To clean a device port, use a flashlight and inspect it first. Remove loose lint with a wooden toothpick or a soft, nonmetal pick. Work slowly and keep the tool near the outer edge. Metal tools can scratch contacts or create a short circuit.
Avoid these cleaning mistakes:
- Do not pour liquid into the headphone port.
- Do not spray household cleaner into the port.
- Do not use compressed air at very high pressure.
- Do not push lint deeper into the device.
- Do not reconnect the headphones until the alcohol has fully dried.
After cleaning, test the headphones again. If sound returns, you may not need to replace any parts. Cleaning is often the safest first step when learning how to fix audio jack on headphones.
Fix a loose or damaged headphone plug
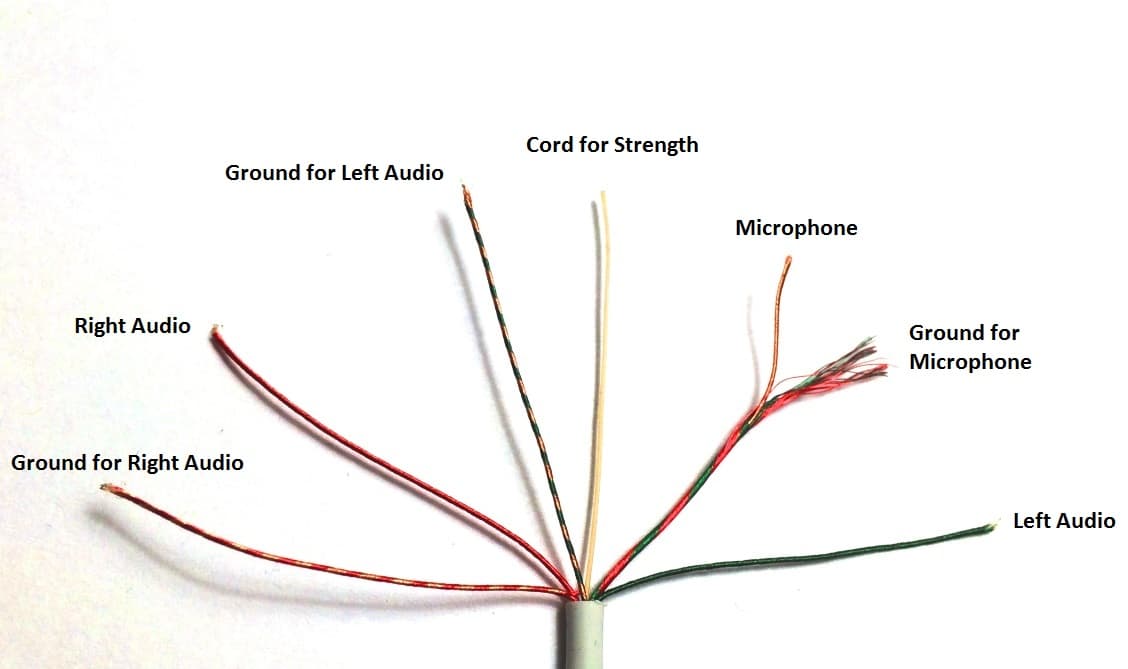
If the plug is bent, cracked, or loose, replacing it is usually more reliable than trying to reshape it. Replacement 3.5 mm plugs are widely available. Choose a plug that matches your headphones.
Use a three contact plug for standard stereo headphones. Use a four contact TRRS plug for headphones with a microphone. TRRS wiring can vary, so check the replacement plug’s wiring diagram before soldering.
You will need:
- Replacement audio plug
- Small wire cutters
- Wire stripper or sharp blade
- Soldering iron
- Rosin core solder
- Heat shrink tubing
- Helping hands or a small clamp
- Multimeter, if available
Follow these steps:
- Slide the plug’s outer cover and a piece of heat shrink tubing onto the cable before soldering.
- Cut away the old plug several inches above the damaged area.
- Strip about one inch of the outer cable jacket.
- Separate the small colored wires.
- Remove the thin enamel coating from each wire by gently scraping it or briefly heating it with solder.
- Tin the wire ends with a small amount of solder.
- Solder each wire to the matching terminal on the new plug.
- Check that no solder bridges touch nearby terminals.
- Add heat shrink tubing over the soldered area.
- Reassemble the plug and test the headphones.
Wire colors are not universal. One brand may use red for the right channel, while another may use a different color. The ground wire is often bare or copper colored, but this is not guaranteed.
A common stereo arrangement is tip for left, ring for right, and sleeve for ground. Still, confirm the plug markings. Guessing can reverse the channels or create a short.
In hands-on cable repairs, the most frequent mistake is forgetting to slide the plug cover onto the cable first. Once the wires are soldered, the cover cannot pass over the new connection. Take a moment to check the order before using the soldering iron.

Repair a broken wire near the jack
Sometimes the plug looks fine, but the wire has broken inside the insulation. This often happens where the cable bends near the plug. That area receives repeated stress, so it acts like a hinge that slowly weakens the metal strands.
If the sound changes when you bend the cable near the plug, cut away the damaged section and install a new plug. Trying to solder one broken strand without removing the weak section often leads to another failure.
For a wire break farther from the plug, you can splice the cable:
- Find the damaged section by gently flexing the cable.
- Cut out the weak area.
- Strip both cable ends.
- Identify the matching conductors.
- Solder each conductor separately.
- Cover each connection with heat shrink tubing.
- Add a larger piece of heat shrink over the whole repair.
Keep the left, right, and ground wires separate. If two bare wires touch, the audio may become quiet, distorted, or completely silent.
Many headphone wires use very thin strands covered with enamel. Normal wire strippers may not remove the coating well. Scrape the coating carefully, then apply solder until the wire accepts it.
Do not use electrical tape as the only long-term repair. It may hold for a short time, but it does not provide strong strain relief. Heat shrink tubing gives a cleaner and more durable result.
Fix sound in only one ear
One-sided sound usually points to a broken channel wire, a poor plug connection, or a damaged speaker. First, test the headphones with another device. Then move the cable near the plug, the Y-split, and the silent earcup.
If sound returns briefly when the cable moves, the wire is likely damaged. Replace the plug if the problem is near the plug. Open the earcup only if the fault appears near that side.
Before opening an earcup, look for screws under pads or decorative covers. Use a plastic pry tool when possible. Metal tools can scratch the housing or damage the speaker.
Inside the earcup, inspect:
- Solder joints on the speaker terminals
- Wires pinched by the plastic housing
- Loose wires near the hinge
- Signs of corrosion
- Broken strain relief
A speaker terminal may look connected but have a cracked solder joint. Reheating the joint with a clean, hot soldering iron may restore the connection. Do not hold the iron on the terminal for too long because excess heat can damage the speaker.
If the speaker itself measures open on a multimeter, it may have failed. In that case, replacing the driver is possible only when a matching part is available. For low-cost headphones, replacement is often more practical.

Fix crackling, static, or intermittent audio
Crackling audio often comes from a weak connection. It can also result from a damaged cable, dirty contacts, or a failing device port. Move one section of the cable at a time to locate the sensitive area.
If touching the plug causes noise, clean the plug and port first. If moving the cable causes noise, inspect the cable for sharp bends or crushed areas. If the noise occurs only with one device, check that device’s port and audio settings.
Keep these points in mind:
- Static that changes with cable movement usually indicates a mechanical fault.
- Static that remains still may point to a device or amplifier problem.
- Sound that cuts out when the plug rotates may indicate worn contacts.
- Distorted sound in both ears may result from a poor ground connection.
- Crackling only at high volume may come from a damaged speaker.
A new plug can fix many intermittent faults, but it will not repair a damaged driver. Test carefully before buying parts. This diagnostic step makes how to fix audio jack on headphones less of a guessing game.

Repair a headphone jack inside the earcup
Some headphones have a removable audio jack mounted inside one earcup. This design is common on studio headphones and gaming headsets. If the jack itself is loose, the solder joints may have separated from the circuit board.
Unplug the headphones before opening them. Remove the ear pad and housing screws, then take a photo of the wiring before disconnecting anything. The photo can help you restore each wire to its original position.
Check for:
- Cracked solder around the jack terminals
- Loose wires
- Broken circuit board traces
- A jack that moves inside its mounting hole
- Corrosion or burn marks
A loose jack can sometimes be fixed by resoldering the terminals. If the jack is physically worn, replace it with one that has the same size, contact layout, and mounting style.
Do not assume that every 3.5 mm jack is compatible. Some jacks use switched contacts for audio routing, while others include a microphone connection. Compare the original part with the replacement before installation.
If the circuit board is cracked or a trace has lifted, the repair becomes more advanced. A jumper wire may restore the trace, but this work requires a fine soldering tip and steady hands.

Use the right tools and stay safe
Soldering is useful for headphone repairs, but it involves heat, fumes, and small parts. Work in a ventilated area on a stable, nonflammable surface. Wear eye protection when cutting wire or removing solder.
Use a temperature-controlled soldering iron if possible. A clean tip transfers heat quickly, which reduces the time the wire or circuit board is exposed to heat. Lead-free solder often needs more heat than traditional solder, so follow the product instructions.
Safety rules matter:
- Unplug the headphones before testing or soldering.
- Keep the hot iron in its stand when not in use.
- Wash your hands after handling solder.
- Keep solder and tools away from children and pets.
- Do not repair lithium battery circuits unless you understand battery safety.
- Let repaired parts cool before touching them.
Use a multimeter carefully. It can test continuity, resistance, and possible shorts. However, continuity readings can be misleading when small speakers and circuit boards are connected. Use the reading as one clue, not the only proof.
If the headphones are expensive, sealed, or still under warranty, check the warranty before opening them. Opening the housing may cancel coverage. A manufacturer or qualified repair shop may also have the correct replacement parts.
Know when replacement is better
How to fix audio jack on headphones is not always a repair question. Sometimes replacement is safer, cheaper, and more reliable. Consider the age, price, condition, and sentimental value of the headphones.
Repair may be worthwhile when:
- The headphones are expensive or professionally used.
- The problem is clearly limited to the plug.
- Replacement parts are easy to find.
- You already own soldering tools.
- The headphones have a comfortable fit that is hard to replace.
Replacement may be better when:
- Multiple parts have failed.
- The cable is permanently attached and badly damaged.
- The housing is cracked.
- The driver is dead.
- The repair cost is close to the price of new headphones.
- You cannot identify the wiring safely.
A repaired cable may work well for years, but it may not look factory-made. Also, some modern headphones use special wiring, inline controls, or digital electronics. A standard replacement plug may restore audio but disable the microphone or buttons.
Be honest about the limits of a repair. A careful repair can extend product life and reduce waste, but it cannot restore a speaker that has physically failed.
Prevent future headphone jack damage
Prevention is easier than repeated repair. Most cable failures come from bending, pulling, or storing the headphones under tension.
Use these habits:
- Pull the plug by its metal or plastic housing, not the cable.
- Store the headphones in a loose loop.
- Keep the plug clean and dry.
- Avoid placing heavy items on the cable.
- Do not leave the plug bent sharply inside a pocket.
- Use a small cable clip to reduce movement.
- Add heat shrink near a weak strain relief when appropriate.
- Keep wired headphones away from liquids and extreme heat.
A gentle loop is better than a tight coil. Tight bends force the internal strands to flex in the same place again and again. Over time, the strands break even when the outside insulation still looks perfect.
If you use headphones during travel, a small case can prevent the cable from being crushed. This simple habit often protects the exact area that causes most audio jack faults.
Frequently Asked Questions
Can I fix a headphone jack without soldering?
You can clean the plug and port without soldering, and that may solve a dirt-related problem. A broken wire or damaged plug usually needs soldering, a crimp-style replacement, or professional repair.
Why do my headphones work when I twist the plug?
Twisting the plug changes how its contacts touch the device. This usually points to a worn plug, dirty contacts, a loose device port, or a broken wire near the plug.
How do I know if the headphone jack or headphones are broken?
Test the headphones with another device and test another pair in the original device. If the problem follows the headphones, repair the headphones; if it stays with the device, inspect its port or settings.
Can I replace a TRRS headphone plug with a regular stereo plug?
You can, but the microphone and inline controls may stop working. A regular stereo plug carries left, right, and ground, while a TRRS plug adds another contact for the microphone or control circuit.
Why is one side of my headphones silent after a plug repair?
The channel wire may be connected to the wrong terminal, a solder joint may be weak, or the ground may be touching another contact. Check the plug diagram and test each connection for continuity.
Is it safe to use electrical tape on a damaged headphone cable?
Electrical tape can provide a temporary cover, but it does not restore a broken connection or offer strong strain relief. For a lasting repair, replace the damaged section and use heat shrink tubing over the soldered joints.
Should I repair headphones that are still under warranty?
Check the warranty terms before opening or cutting the cable. Manufacturer service may be a better choice because self-repair can cancel coverage.
Conclusion
Fixing a headphone audio jack starts with careful testing, cleaning, and inspection. Many faults come from a damaged plug or a broken wire near the cable entrance, and both can often be repaired with basic tools. More serious faults, such as a failed driver or damaged circuit board, may make replacement the wiser choice.
Work slowly, confirm the wiring, and use heat shrink for strength. If you have solved your own headphone jack problem, share what worked so other readers can avoid the same mistakes.
