

Use the SSD maker’s Secure Erase or Sanitize tool, then verify the drive is empty before selling it.
Learning how to securely erase an SSD before selling it takes more than deleting files or emptying the Recycle Bin. SSDs manage data in ways that differ from hard drives, so the safest method uses built-in encryption, firmware commands, or a trusted manufacturer tool. This guide explains the process in simple steps, including what to avoid, how to protect your accounts, and when physical destruction is the better choice.
Why securely erasing an SSD matters
Deleting a file does not always remove its data. It usually removes the file’s index, while parts of the original data may remain on the drive until new information replaces it.
SSDs add another challenge. They use flash memory, a controller, and a process called wear leveling. The controller moves data between memory cells to extend the drive’s life. As a result, a normal overwrite may not reach every old copy.
That is why learning how to securely erase an SSD before selling it is important. A buyer may use data recovery software to find personal photos, tax files, saved passwords, work documents, or browser data.
Your risk is higher if the SSD stored:
• Social Security numbers or tax records
• Banking details or credit card data
• Medical records
• Business files or customer information
• Private photos and messages
• Password databases or recovery codes
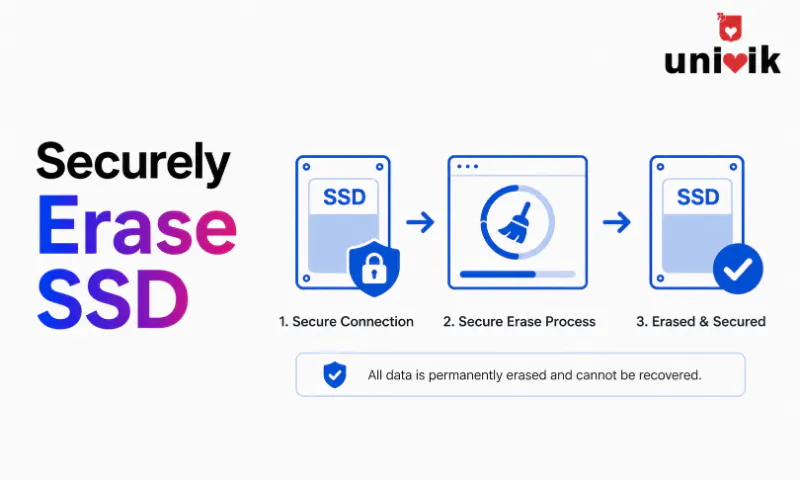
A secure erase sends a command that tells the SSD to clear its memory cells or encryption keys. This is different from formatting a partition or deleting folders.
NIST media sanitization guidance recognizes methods such as Clear, Purge, and Destroy. For most modern SSDs, a supported firmware-based Sanitize or Secure Erase command is more suitable than repeated software overwrites.
Before you erase the SSD
A secure erase is usually permanent. Take time to prepare the computer and confirm that you have saved everything you need.
Start with a full backup. Copy important files to a new drive or a trusted cloud service. Open several files from the backup to confirm they work. A backup that has never been tested is only a hope.
Also check whether your browser, password manager, and other apps sync data. Sign out of services on the device before the erase. Remove the computer from account dashboards when possible.
Use this checklist:
• Back up documents, photos, videos, and downloads
• Export browser bookmarks if you need them
• Save password manager data and recovery codes
• Deauthorize software such as Adobe, Microsoft, or music apps
• Sign out of Apple, Google, and Microsoft accounts
• Turn off Find My, device tracking, and remote lock features
• Record the SSD model and serial number if you need sales records
• Connect the computer to AC power
• Keep the erase tool and recovery media ready
If the SSD uses full-disk encryption, confirm that you know the recovery key before starting. Encryption helps protect data, but losing the key can also lock you out of your own backup or recovery process.
In my experience helping people prepare used computers for sale, the most common mistake is starting the erase too soon. One person remembered an important tax folder only after the process began. A simple file review and backup check can prevent that stressful moment.
The best ways to securely erase an SSD
The correct method depends on the SSD type, computer, operating system, and level of privacy you need. The safest choice is normally the manufacturer’s tool or a secure erase function built into the system firmware.
Use the SSD manufacturer’s utility
Many SSD brands provide a support app with a feature named Secure Erase, Sanitize, or Crypto Erase. The name may differ, but the goal is similar.
Typical steps include:
- Identify the exact SSD model.
- Download the official utility from the manufacturer’s website.
- Back up the drive.
- Read the tool’s warning about permanent data loss.
- Create a bootable USB drive if the tool requires one.
- Boot from the utility.
- Choose the correct SSD.
- Run Secure Erase, Sanitize, or the equivalent option.
- Shut down the computer when the tool finishes.
Do not download an erase tool from an unknown website. A fake utility could install malware or erase the wrong drive.
A manufacturer utility is often the easiest answer to how to securely erase an SSD before selling it because it understands the drive’s controller and supported commands.
Use BIOS or UEFI Secure Erase
Some desktop and laptop systems include a storage security menu in BIOS or UEFI. Look for terms such as:
• Secure Erase
• SSD Sanitize
• NVMe Sanitize
• Storage Erase
• Drive Erase
The location varies by motherboard and computer brand. Check the system manual before using it.
BIOS-based tools can work well because they communicate directly with the storage device. They also avoid the problem of trying to erase the active operating system from inside that same system.
Use NVMe Format or Sanitize commands
NVMe SSDs may support Format NVM or Sanitize commands. These are advanced options, so use them only when you know the exact drive and command.
A supported NVMe Sanitize operation can clear user data through methods defined by the drive. Format NVM may also offer secure erase settings, but available options differ by model.
If you use Linux, tools such as nvme-cli can display supported features and issue commands. For example, an experienced user might inspect a drive with:
sudo nvme id-ctrl /dev/nvme0
Do not copy commands from a random forum without checking the device path. Choosing /dev/nvme0 instead of the correct drive could erase the wrong disk.
Use ATA Secure Erase for SATA SSDs
SATA SSDs may support ATA Secure Erase. This command is sent through the drive’s firmware and is not the same as overwriting files from Windows or macOS.
Linux users may use hdparm, but the process has risks. Some drives can enter a locked state, and a power failure during the process may cause trouble. Use this method only if you understand the drive’s security state and have reliable power.
For many users, the official SSD utility is safer and simpler than manually using command-line tools.

How to securely erase an SSD before selling it on Windows
Windows offers several ways to reset a computer, but not all provide the same level of SSD sanitization.
For a complete Windows laptop or desktop
Windows 11 and Windows 10 include Reset this PC. The process can remove your files and reinstall Windows.
Follow these general steps:
- Open Settings.
- Go to System, then Recovery.
- Select Reset this PC.
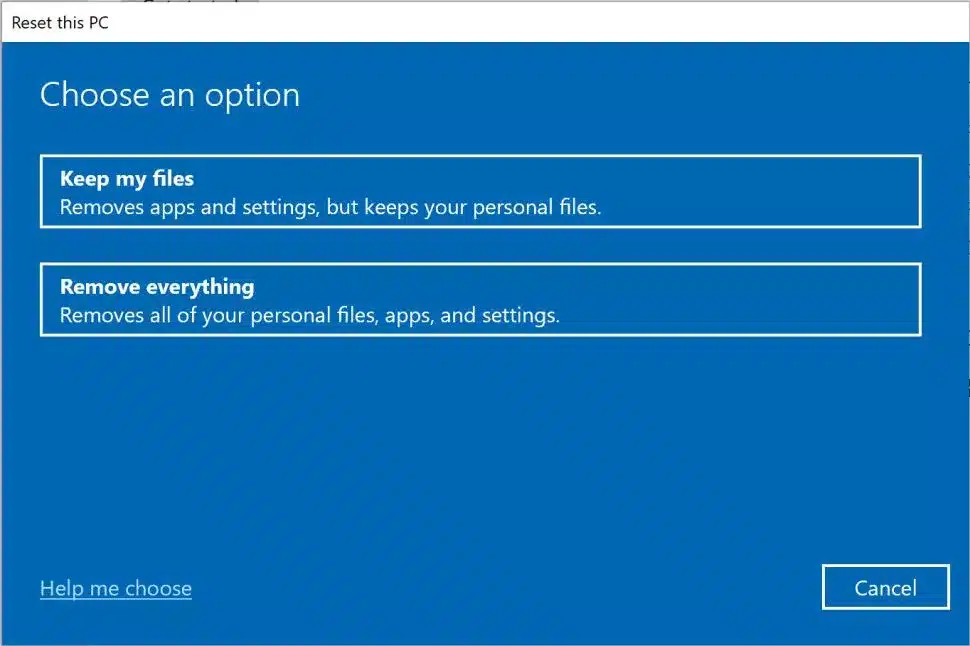
- Choose Remove everything.
- Select Cloud download or Local reinstall.
- Open Change settings if available.
- Turn on Clean data.
- Confirm the correct drive and start the reset.
- Leave the computer at the first setup screen when finished.
The Clean data option makes recovery more difficult, but Microsoft notes that it is intended for consumers and does not meet government or industry data-erasure standards. It may be suitable for a normal personal sale, but it is not the best choice for highly sensitive business data.
For stronger protection, use the SSD maker’s Sanitize or Secure Erase function first. Then reinstall Windows only if you want to sell the computer as ready to use. If you reinstall Windows, do not sign in with your own Microsoft account.
For a separate SSD
If you are selling only the SSD, connect it directly to a desktop motherboard when possible. USB adapters and external enclosures may block Secure Erase, Sanitize, or NVMe commands.
An internal SATA connection is usually better for a SATA drive. An M.2 NVMe drive should use a compatible motherboard slot or a proven enclosure that supports the required command.
A normal quick format is not enough for how to securely erase an SSD before selling it. Use the official utility or a trusted bootable erase environment.
How to securely erase an SSD before selling it on a Mac
Modern Macs offer a simple option when the hardware supports it.
Apple silicon and T2 Macs
Macs with Apple silicon and Intel Macs with a T2 Security Chip support Erase Assistant. It can sign you out of Apple services, remove activation locks, erase user data, and restore the Mac to a setup state.
Use this path:
- Open the Apple menu.
- Select System Settings or System Preferences.
- Open General, then Transfer or Reset.
- Choose Erase All Content and Settings.
- Follow the prompts.
- Confirm that the Mac no longer appears in your Apple account.
This process is strong because the device normally uses hardware-backed encryption. Erasing the encryption keys makes the old data unreadable, even if flash cells still contain fragments.
Older Intel Macs
Older Macs may not have Erase Assistant. Back up the Mac, sign out of iCloud and Messages, turn off Find My Mac, and boot into macOS Recovery.
From Recovery, use Disk Utility to erase the internal drive. For an SSD, do not rely on repeated overwrite options. Apple has noted that secure erase options are not available in Disk Utility for SSDs in the same way they are for hard drives.
If the old Mac stored sensitive data and lacks hardware encryption, use an SSD manufacturer utility or consider professional destruction instead.

What not to do when erasing an SSD
Some popular methods are poor choices for solid-state drives. They can waste time, reduce drive life, or create false confidence.
Avoid these approaches:
• Deleting files and emptying the Trash
• Performing only a quick format
• Running several full overwrite passes
• Using DBAN as your first choice for an SSD
• Removing only the visible partitions
• Assuming a factory reset always sanitizes every drive
• Using an unknown third-party eraser
• Erasing while the drive may lose power
• Selecting a drive without checking its model and capacity
DBAN was designed mainly for traditional hard drives. It may not properly handle SSD overprovisioning, spare cells, wear leveling, or hidden areas. Repeated overwrites also add unnecessary wear.
The key lesson in how to securely erase an SSD before selling it is to use the drive’s own security features whenever possible. Think of it like clearing a hotel room with a master key instead of searching under every piece of furniture.
How to verify that the SSD is erased
Verification matters, but no consumer test can prove that every flash cell has been inspected. A successful firmware erase command is the strongest practical evidence for most home users.
After the process finishes, check the following:
- Restart the computer.
- Confirm that the SSD shows no usable partitions or operating system.
- Boot from a separate USB installer if needed.
- Check that the drive appears as unallocated or blank.
- Confirm that your old files do not open.
- Review your Microsoft, Apple, Google, and password manager accounts.
- Remove the device from account and tracking pages.
If the drive is still visible in Disk Management or Disk Utility, that does not mean old data remains. The drive itself may simply be detected without a formatted volume.
Do not create new files on the SSD after erasing it. If you plan to sell the complete computer, reinstall the operating system only after the secure erase. Then stop at the welcome or setup screen.
For a business, regulated environment, or highly sensitive project, save the erase report when the tool provides one. Some enterprise tools record the drive model, serial number, method, and completion status.

When physical destruction is the right choice
Secure erase is appropriate for most personal sales. Physical destruction is better when the data is extremely sensitive, the drive is damaged, or the erase command cannot be trusted.
Consider destruction when:
• The SSD contains protected health or financial data
• The drive has failed and cannot accept a sanitize command
• The manufacturer tool reports an error
• The SSD has unknown firmware or questionable origin
• Your organization requires a documented destruction process
• The drive is going to recycling without a reliable sanitization record
A professional data destruction service can shred or crush the device and provide documentation. Do not casually drill into an SSD and assume every chip is damaged. Flash memory chips may be separate from the main board, and fragments can still contain data.
Physical destruction should also be handled safely. Wear eye protection, follow local recycling rules, and avoid fires or unsafe battery damage. If the SSD is inside a laptop, recycle the full device through an approved electronics program.

A practical sale-day checklist
Use this final checklist before handing the device to a buyer:
• Confirm that your backup opens
• Sign out of all personal accounts
• Disable device tracking and activation locks
• Remove saved payment methods
• Disconnect cloud storage
• Run Secure Erase, Sanitize, or Erase All Content and Settings
• Confirm the erase completed without errors
• Check that no personal files remain
• Remove the SSD or computer from account dashboards
• Provide only the accessories and documents the buyer needs
If you sell a computer with a fresh operating system, use a temporary setup only if the system requires it. Never leave your personal account signed in.
This workflow makes how to securely erase an SSD before selling it less stressful. It also helps prevent the awkward situation where a buyer contacts you because your account is still linked to the device.
Frequently asked questions about how to securely erase an SSD before selling it
Is formatting an SSD enough before selling it?
No. A quick format removes the file system structure but may leave recoverable data behind. Use the SSD manufacturer’s Secure Erase or Sanitize feature instead.
Does a factory reset securely erase an SSD?
A factory reset removes user data, but the level of protection depends on the operating system and settings. Choose a full erase option, and use a firmware-based SSD sanitize command when the data is highly sensitive.
Can I use DBAN to erase an SSD?
DBAN is not the preferred tool for SSDs because it may not address wear leveling, spare cells, or hidden storage areas. Use the manufacturer’s tool or a supported NVMe or ATA secure erase function.
Is SSD secure erase permanent?
Yes, a successful Secure Erase, Sanitize, or cryptographic erase is designed to make the old data inaccessible. Treat the process as permanent and confirm your backups before starting.
Should I remove the SSD before selling the computer?
You do not need to remove it if you securely erase the drive and remove your accounts. Remove it or use professional destruction if the data is highly sensitive or the drive cannot complete a trusted erase.
Does encryption make SSD erasure unnecessary?
Encryption greatly lowers the risk because destroying the encryption key can make old data unreadable. Still, sign out of accounts and use the computer’s erase or sanitize process before selling it.
Conclusion
The safest way to securely erase an SSD before selling it is to back up your files, sign out of every account, and use the drive maker’s Secure Erase or Sanitize tool. Windows Reset and Apple’s Erase All Content and Settings can work well for complete computers, but a simple delete or quick format is not enough.
Check the result, remove the device from your online accounts, and choose professional destruction when the data is highly sensitive or the drive is damaged. Take these steps before your next sale, and explore your SSD manufacturer’s support guide for the exact tool and instructions.