

Yes, clone your existing Windows drive to the SSD, replace the HDD, and boot without reinstalling Windows.
Upgrading from a hard disk drive to a solid-state drive can make an older laptop feel new again. A proper disk clone moves Windows, apps, files, settings, and the boot data to the SSD. This guide explains how to upgrade a laptop from HDD to SSD without reinstalling Windows, while avoiding common problems such as missing boot files, wrong drive formats, and lost data.

What You Need Before Cloning the Drive
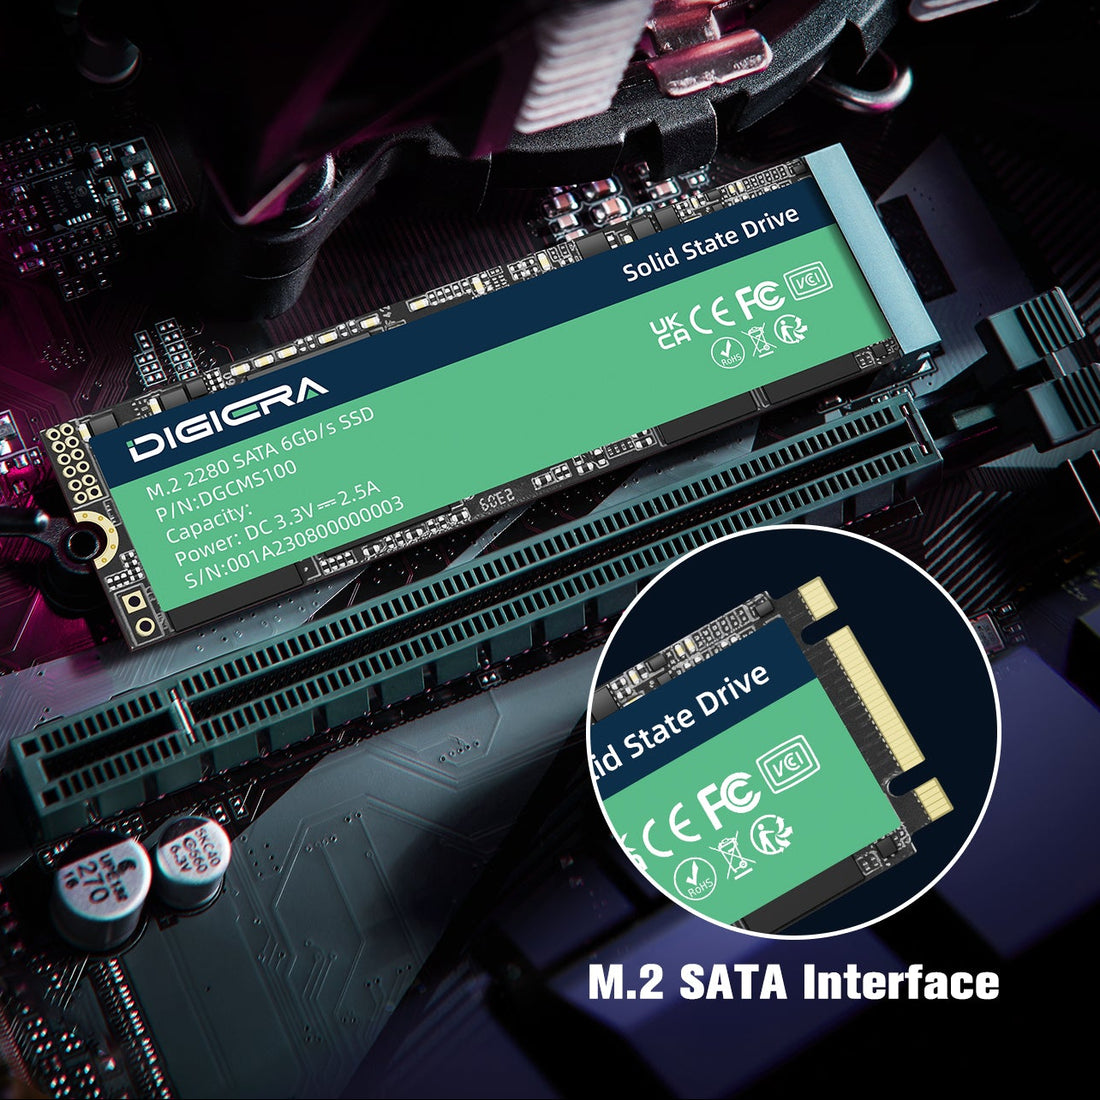
Before learning how to upgrade a laptop from HDD to SSD without reinstalling Windows, check that the new drive will fit and work in your laptop. Most older laptops use a 2.5-inch SATA drive. Newer models may use an M.2 SATA or M.2 NVMe SSD.
Check your laptop manual or search the exact model online. Look for the drive type, physical size, interface, and maximum supported capacity.
You will usually need:
• A compatible SSD with enough storage for your used data
• A USB-to-SATA adapter or external drive enclosure for a 2.5-inch SATA SSD
• A small Phillips screwdriver
• Disk cloning software
• A backup drive for important files
• A USB flash drive for recovery tools, if needed
The SSD does not always need to match the HDD’s total capacity. It only needs enough free space for the data being cloned. For example, a 500 GB SSD can often replace a 1 TB HDD if the HDD contains less than 500 GB of usable data.
Before you open the laptop, connect it to power. Also, back up photos, documents, work files, browser data, and password records. Cloning is usually safe, but a backup protects you if the old drive fails during the process.

Check the Laptop and Prepare Windows
The first practical step in how to upgrade a laptop from HDD to SSD without reinstalling Windows is to inspect the current Windows setup. Press Windows + E, right-click the Windows drive, and choose Properties to see how much space is in use.
Remove files you no longer need. Empty the Recycle Bin, clear temporary files, and uninstall unused apps. Windows includes a storage cleanup tool under Settings > System > Storage.
Also check these items:
• Confirm that Windows starts normally from the HDD.
• Run a malware scan.
• Install pending Windows updates.
• Check the HDD for errors.
• Save your BitLocker recovery key if device encryption is enabled.
To check the drive, open File Explorer, right-click the Windows drive, choose Properties, select Tools, and run Error checking. You can also open Terminal or Command Prompt as an administrator and run:
chkdsk C: /scan
If Windows reports serious disk errors, repair them before cloning. A failing HDD may produce a clone that looks complete but contains damaged files.
If BitLocker is active, pause protection before cloning when the cloning software recommends it. Do not delete encryption protection unless you understand the risks. After the SSD boots correctly, you can resume BitLocker.

Choose the Right SSD
An SSD is much faster than a traditional HDD because it uses flash memory instead of spinning platters. Windows can start faster, programs can open sooner, and the laptop may feel more responsive during normal tasks.
For most laptops, a 2.5-inch SATA SSD is the simplest choice. It uses the same general connection found in many laptop hard drives. An M.2 SSD is smaller, but the laptop must support the correct M.2 type.
Pay attention to these details:
• 2.5-inch SATA SSDs need a SATA connection and usually fit older laptops.
• M.2 SATA and M.2 NVMe drives are not interchangeable in every laptop.
• SSD capacity should exceed the amount of data stored on the current Windows partition.
• A reputable SSD with a warranty is safer than an unknown low-cost model.
• A 500 GB or 1 TB SSD is enough for many home and office laptops.
Do not assume that every M.2 slot supports NVMe. Some slots support only SATA, while others support both. The notch shape can provide a clue, but the laptop manual is more reliable.
If the new SSD is smaller than the old HDD, the cloning tool may need to resize the Windows partition. Shrink the old partition in Windows Disk Management first if the cloning program cannot do this automatically.

Create a Complete Backup
Cloning copies the drive, but it is not the same as a separate backup. A clone can fail because of a weak USB connection, bad sectors, software errors, or an unexpected power loss.
Copy important files to another drive or a trusted cloud service. Include:
• Documents and desktop files
• Photos and videos
• School or work folders
• Browser bookmarks and saved data
• Email archives
• Game saves
• Software license keys
• Tax, medical, or financial records
A useful test is to open several backed-up files from the backup location. A backup is valuable only if the files can be restored.
If the HDD makes clicking sounds, freezes, or takes a long time to open folders, do not keep using it more than necessary. In that situation, a professional recovery service or a specialized rescue tool may be safer than repeated cloning attempts.

Install Cloning Software
The next part of how to upgrade a laptop from HDD to SSD without reinstalling Windows is choosing a cloning tool. The software must support Windows boot partitions, GPT or MBR disks, and partition resizing.
Common options include:
• Clonezilla for advanced users who want detailed control
• Rescuezilla for a simpler graphical interface
• A manufacturer’s migration tool when supported by the SSD brand
• A reputable commercial disk imaging or cloning application
Download software from its official website. Avoid modified installers and unknown download sites.
Connect the SSD to the laptop with the correct USB adapter or enclosure. Windows may ask you to initialize the drive. If the cloning program manages this step, allow the program to handle it. Otherwise, initialize the SSD using the same partition style used by the existing Windows disk.
You can check the partition style in Disk Management:
Right-click the Start button and open Disk Management.
Right-click the disk label, such as Disk 0, not the partition itself.
Choose Properties.
Open the Volumes tab.
Check whether the disk uses GPT or MBR.
Most modern UEFI computers use GPT. Older systems may use MBR and legacy BIOS mode. The source and destination should normally use a compatible boot layout.
Clone the HDD to the SSD
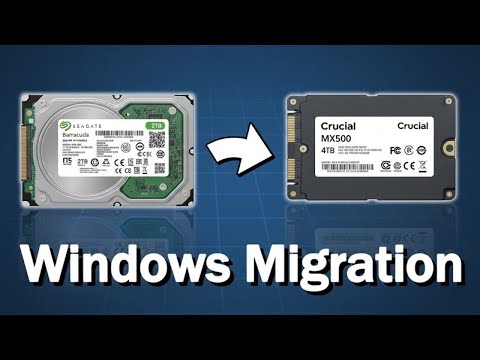
Now you can start the main process for how to upgrade a laptop from HDD to SSD without reinstalling Windows. Open the cloning program and select the HDD as the source disk. Select the SSD as the destination disk.
Be extremely careful at this stage. Choosing the wrong destination can erase the original HDD.
Use this general process:
Select the entire HDD as the source.
Select the SSD as the destination.
Copy all required partitions, not only the C: drive.
Include the EFI System Partition, Microsoft Reserved partition, Windows partition, and recovery partition when present.
Adjust the Windows partition size if the SSD is smaller.
Start the clone and confirm the warning about erasing the SSD.
The cloning process may take from 20 minutes to several hours. The time depends on the amount of data, the speed of the HDD, and the USB connection.
Do not use the laptop heavily during the clone. Do not unplug the SSD, close the lid, or allow the laptop to shut down. If the program reports bad sectors, stop and investigate instead of ignoring the message.
When the process finishes, shut down the laptop completely. Do not restart into Windows while both drives are connected unless the software gives clear instructions. Two identical Windows drives can confuse the boot process.

Replace the HDD With the SSD
Disconnect the charger and remove the laptop battery if it is removable. For a built-in battery, follow the laptop maker’s instructions and disconnect it internally only if you are comfortable doing so.
Remove the bottom cover with the correct screwdriver. Keep each screw organized because some laptops use different screw lengths.
Find the existing HDD. It may sit in a metal bracket or a rubber mount. Remove the retaining screws, disconnect the drive cable, and transfer the bracket or connector to the SSD if needed.
Install the SSD in the same position. Do not force the connector. A SATA drive should slide into place with gentle, even pressure.
Before closing the cover, check that:
• The SSD is firmly connected.
• The bracket is secure.
• No cable is trapped under the drive.
• The battery connector is properly attached.
• All screws are returned to their original locations.
This physical step is simple, but it is where many avoidable mistakes happen. A bent connector or loose cable can make a good SSD appear to be dead.

Make the Cloned SSD Bootable
The next test determines whether how to upgrade a laptop from HDD to SSD without reinstalling Windows worked correctly. Turn on the laptop and open the boot menu or firmware setup. Common keys include F2, F12, Delete, and Esc, but the correct key depends on the manufacturer.
Choose the new SSD as the first boot device. If the laptop starts Windows normally, allow it to reach the desktop and wait a few minutes while Windows detects the new storage device.
If Windows does not start, check these common causes:
• The laptop is still trying to boot from the old HDD.
• The EFI System Partition was not copied.
• The clone uses GPT, but the firmware is set to legacy BIOS mode.
• The clone uses MBR, but the firmware expects UEFI.
• The cloning process did not complete.
• The SSD is not fully connected.
• The original Windows partition was not marked or configured correctly.
Many cloning tools include a boot repair feature. You can also start Windows Recovery from a Windows installation USB and use Startup Repair. Keep the original HDD untouched until the SSD has passed several successful boot tests.
Expand the Windows Partition
A cloned drive may show unused space if the SSD is larger than the old HDD. You can add that space to the Windows partition using Disk Management.
Right-click Start and open Disk Management.
Find the Windows partition.
Confirm that unallocated space is directly next to it.
Right-click the Windows partition.
Choose Extend Volume.
Follow the wizard.
The Extend Volume option may be unavailable if another partition sits between the Windows partition and the unused space. Some recovery partitions are placed at the end of the disk. A trusted partition manager may move or resize partitions, but back up your data first.
Do not delete a recovery or EFI partition simply because it looks small. These partitions may contain startup files or recovery tools that Windows needs.
Optimize and Test the New SSD
Windows normally recognizes an SSD and enables suitable maintenance settings. It uses TRIM to tell the SSD which blocks are no longer needed. You can check whether TRIM is active by opening an administrator Command Prompt and running:
fsutil behavior query DisableDeleteNotify
A result of 0 generally means that TRIM commands are enabled for supported storage devices.
Windows Optimize Drives may display the SSD as a solid-state drive. It does not perform the same traditional defragmentation used for an HDD. Windows schedules appropriate optimization based on the drive type.
After the first successful boot, test:
• Several restarts
• Sleep and wake
• Wi-Fi and Bluetooth
• Audio and webcam
• USB ports
• Windows activation
• Your most important applications
• File access and personal folders
Check the SSD’s health with a reliable diagnostic tool from the drive maker. Watch for unusual errors, overheating, or sudden freezes during the first few days.
A useful repair-bench lesson is to keep the old HDD untouched for at least one week. It acts like a spare key. If a hidden file or setting is missing, you can still recover it without rushing.
What to Do With the Old HDD
Do not immediately format the old drive. Confirm that the laptop boots from the SSD by shutting down, disconnecting the old HDD if it remains installed, and starting the computer again.
If the laptop has a second drive bay, you can use the old HDD for less important files. You may also place it in a USB enclosure and use it as a backup drive.
Before reusing or selling the HDD, erase it securely. Deleting files or formatting the drive does not fully remove old data. For sensitive information, use a secure erase feature supported by the drive or follow a trusted data destruction process.
If you plan to keep the old HDD, rename it clearly so you do not accidentally save new files to the wrong drive. The SSD should remain the main Windows drive.
Common Problems and Practical Fixes
The SSD does not appear
Check the USB adapter, cable, enclosure, and drive connection. Try another USB port and open Disk Management to see whether Windows detects the drive.
The laptop shows “No boot device”
Open firmware settings and select the SSD as the first boot device. If that does not work, run Startup Repair from Windows recovery media and confirm that the EFI or system partition was cloned.
The clone stops before finishing
The source HDD may have bad sectors or file system errors. Run a disk check, reduce unnecessary data, try another cloning method, or create an image from a rescue environment.
The SSD has less usable space than expected
Manufacturers describe capacity using decimal units, while Windows reports capacity using binary units. A drive sold as 500 GB will normally show a smaller number in Windows.
Windows asks for activation
Most hardware changes of this kind do not remove digital activation, but activation can sometimes need verification. Go to Settings > System > Activation and sign in with the Microsoft account linked to the license when possible.
The laptop is not much faster
Check whether Windows actually boots from the SSD. Also inspect startup apps, available free space, thermal throttling, and the laptop’s memory. An SSD improves storage speed, but it cannot fix every performance problem.
Is Cloning Better Than a Clean Windows Install?
Cloning is usually best when you want to preserve your current setup. It keeps installed programs, personal settings, drivers, and files in place. This makes it the fastest way to upgrade a laptop from HDD to SSD without reinstalling Windows.
A clean installation can be better when Windows has malware, serious corruption, years of unused software, or unexplained errors. It gives you a fresh system, but you must reinstall programs, restore files, find drivers, and configure settings.
Cloning also copies problems. If the old Windows installation is unstable, the SSD may behave the same way. Before deciding, consider the laptop’s condition and the time you have available.
Frequently Asked Questions About How to Upgrade Laptop From HDD to SSD Without Reinstalling Windows
Can I upgrade my laptop from HDD to SSD without losing files?
Yes. Cloning the entire HDD to the SSD can preserve Windows, programs, settings, and personal files. Still, create a separate backup before starting because cloning is not a substitute for backup.
Do I need to reinstall Windows after cloning?
No. A successful clone copies the Windows system partitions and boot files to the SSD. You may need to change the boot order or repair startup files if the laptop does not boot from the new drive.
Can I clone a larger HDD to a smaller SSD?
Yes, as long as the used space and required partitions fit on the SSD. You may need to delete unnecessary files or shrink the Windows partition before cloning.
Should I clone all partitions or only the C: drive?
Clone all important system partitions, including the EFI System Partition, recovery partition, and Windows partition. Copying only the C: drive can leave the SSD without the files needed to start Windows.
How long does it take to clone a laptop HDD to an SSD?
The process can take about 20 minutes to several hours. The time depends on the amount of data, HDD health, SSD speed, and whether the drive is connected through USB 2.0 or USB 3.0.
Can I use the old HDD after installing the SSD?
Yes. You can place it in a USB enclosure, use it as secondary storage, or keep it as a temporary backup. Do not format it until you have confirmed that the SSD boots and all important files are available.
Why does my cloned SSD not boot?
The firmware may be selecting the wrong drive, or the boot mode may not match the cloned disk. Check UEFI or legacy mode, confirm the SSD boot order, and use Windows Startup Repair if necessary.
Conclusion
Learning how to upgrade a laptop from HDD to SSD without reinstalling Windows is mostly a matter of careful preparation. Back up your data, check SSD compatibility, clone every required partition, replace the drive, and test the new installation before erasing the HDD.
The upgrade can deliver a major improvement in startup time and daily responsiveness without forcing you to rebuild your computer from scratch. Take your time, label the drives clearly, and keep the original HDD safe until the SSD works reliably. If this guide helped, explore more storage and Windows maintenance resources or share your upgrade experience in the comments.