

Use gentle soap, little water, and a slow air-dry to clean over ear headphones pads safely.
Over ear headphone pads collect sweat, skin oil, dust, makeup, and bacteria every time you wear them. I have found that the safest method depends on the pad material, since leatherette, real leather, velour, and foam all react differently to moisture. This guide explains how to clean over ear headphones pads without damaging the cushions, weakening the glue, or letting water reach the speakers.
Why You Should Clean Over Ear Headphones Pads
Headphone pads sit against your skin for hours. They absorb sweat and oil, much like a small sponge. Over time, this buildup can cause a sour smell, sticky texture, skin irritation, and faster pad wear.
Dirty pads can also affect sound. Thick oil and dust may block tiny openings in mesh or fabric. Flattened or damp pads can change the seal around your ears, which may reduce bass and outside noise control.
Regular cleaning helps you:
- Remove sweat, oil, dust, and makeup
- Reduce unpleasant odors
- Protect your skin from irritation
- Keep the pads soft and comfortable
- Extend the life of the headphones
- Maintain a more stable sound seal
Cleaning will not make worn pads new again. If the foam has collapsed, the outer material is peeling, or the cushion no longer seals around your ears, replacement pads may be the better choice.
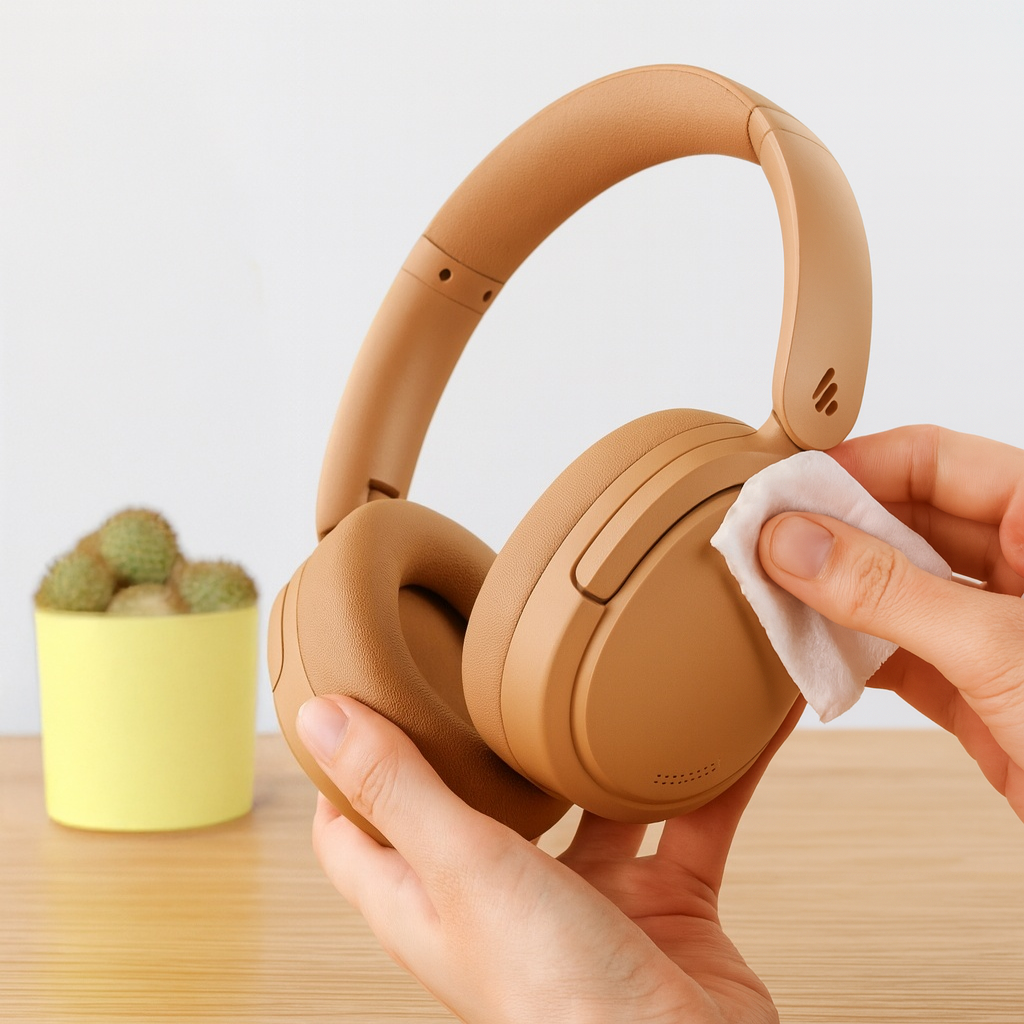
Identify the Pad Material First
Before learning how to clean over ear headphones pads, check what they are made of. The wrong cleaner can stain fabric, dry out leather, or dissolve the finish on synthetic leather.
Look closely at the outer surface and compare it with the types below.
Leatherette or synthetic leather
Leatherette is common on gaming headsets and consumer headphones. It often looks smooth and slightly shiny. It may be made from polyurethane or PVC.
This material is easy to wipe, but it can peel when exposed to sweat, heat, harsh chemicals, or repeated rubbing. Use a damp cloth, not a wet one.
Real leather
Real leather feels more natural and may show a fine grain. It needs gentle care because strong soap and excess water can remove natural oils.
Use a cleaner made for finished leather when the manufacturer allows it. Avoid soaking the pad or using household disinfectant.
Velour, cloth, or fabric
Fabric pads feel soft and may look fuzzy. They hold more dust and sweat than smooth pads, so they need careful brushing and light surface cleaning.
Do not flood fabric pads. Water can move into the foam and take a long time to dry.
Mesh and foam
Some pads have a thin mesh layer over exposed foam. These are delicate and can tear when scrubbed. Clean the surface with a soft brush or barely damp cloth.
If you cannot identify the material, treat it as delicate fabric. This approach is slower but safer.

What You Need Before Cleaning
Gather simple supplies before you start. You do not need expensive headphone cleaning kits.
Use:
- Two or three clean microfiber cloths
- A soft toothbrush or makeup brush
- A small bowl
- Lukewarm water
- A drop of mild dish soap
- Cotton swabs for seams
- A dry towel
- A fan for gentle air movement
for real leather, use a suitable leather cleaner only if the headphone maker permits it. For stubborn odors, an enzyme cleaner may help on some fabric pads, but test it on a hidden spot first.
Avoid:
- Rubbing alcohol on leatherette or real leather
- Bleach
- Acetone or nail polish remover
- Glass cleaner
- Strong laundry detergent
- Abrasive sponges
- Hair dryers and heat guns
- Perfume or essential oils
- Spraying liquid directly on the headphones
A mild soap solution is usually enough. More cleaner does not mean cleaner pads. It often leaves residue that attracts more dust.

How to Clean Over Ear Headphones Pads Step by Step
This method works well for most removable leatherette and fabric pads. Always check the product manual first, since some brands give material specific instructions.
1. Turn off and unplug the headphones
Power off wireless headphones. Remove the charging cable, audio cable, and any detachable accessories.
Keep the headset away from the sink. Water and electronics are a poor match, even when the liquid never touches the speaker.
2. Remove the pads if possible
Many pads twist, pull, or snap off. Hold the ear cup with one hand and remove the pad slowly with the other.
Never force it. Some pads use a plastic ring or thin clips that can break. If the pads do not come off easily, clean them while attached.
3. Remove loose dust
Use a dry microfiber cloth or soft brush to lift dust, hair, and crumbs. Brush toward the outside edge rather than pushing debris into the cushion.
This dry step matters. If you add water first, loose dirt can turn into a muddy film.
4. Mix a mild cleaning solution
Put lukewarm water in a small bowl. Add one small drop of mild dish soap and stir it well.
Dip the corner of a microfiber cloth into the solution. Wring it until it feels only slightly damp. You should not be able to squeeze water from it.
5. Wipe the surface gently
Wipe the pad in small circles. Start with the least dirty area and move toward the more soiled areas.
Do not press hard. Let the damp cloth lift the oil. Hard scrubbing can remove color, roughen the surface, or push dirt deeper into fabric.
6. Clean the seams and edges
Use a cotton swab that is almost dry to clean seams, folds, and the area around the pad ring. These spots often hold sweat and skin oil.
Take extra care near the speaker grille. A liquid drop can travel through the grille and damage the driver.
7. Remove soap residue
Use a second cloth dampened with plain water. Wring it very well, then wipe the pad once or twice.
Leaving soap behind can make the surface stiff or sticky. This is one of the most common mistakes people make when they clean over ear headphones pads.
8. Dry the pads fully
Pat the pads with a dry towel. Place them in a cool, shaded area with good airflow.
Let removable pads dry for at least several hours. Thick foam may need a full day. Do not reinstall them while the inside still feels cool, damp, or heavy.

How to Clean Fabric and Velour Pads
Fabric and velour pads need a lighter touch than smooth pads. Their fibers can trap sweat, dust, and skin flakes.
Start with a soft, dry brush. A clean makeup brush works well because its bristles are gentle. Brush in one direction, then lift the remaining dust with a dry microfiber cloth.
For deeper cleaning:
- Mix a small amount of mild soap with lukewarm water.
- Dip a cloth into the mixture.
- Wring the cloth until it is nearly dry.
- Press and lift the cloth over the fabric.
- Avoid rubbing back and forth.
- Use a clean damp cloth to remove soap.
- Air dry the pads completely.
Pressing and lifting works better than soaking. It draws grime out without driving water into the foam.
For removable fabric pads, you may be able to hand wash them. Only do this when the care instructions allow it. Never twist the pads, wring them, or place them in a dryer. Squeeze them gently between towels instead.

How to Clean Leatherette and Real Leather Pads
Leatherette pads are usually simple to clean, but they are sensitive to chemicals and heat. Wipe them with a slightly damp microfiber cloth, then dry them right away with another cloth.
If the surface feels greasy, use a tiny amount of mild soap in water. Apply the solution to the cloth, never straight to the pad. Keep moisture away from peeling edges and stitched areas.
Real leather needs more care. First remove dust with a dry cloth. If needed, use a leather cleaner made for finished leather and test it on a hidden area.
Do not use leather conditioner unless the manufacturer recommends it. Some conditioners can make headphone pads slippery or alter the surface finish. Avoid household oils, including coconut oil and olive oil, because they may darken the leather and leave residue.
A key lesson from hands on headphone care is that heat causes more damage than people expect. A hair dryer may seem useful, but heat can warp synthetic leather and speed up peeling. Room temperature and patience are safer.

How to Disinfect Over Ear Headphone Pads
Cleaning removes dirt. Disinfecting reduces many germs. These are related but different tasks.
Start by checking the manufacturer’s care guidance. Some headphone makers allow a lightly dampened wipe with a certain alcohol level on hard plastic parts, but that does not mean the same product is safe for the pads.
For most pads:
- Clean the surface first.
- Use a product approved for the pad material.
- Apply it to a cloth, not the headphones.
- Keep liquid away from seams and speaker grilles.
- Wipe once without soaking.
- Allow the pads to dry fully.
Alcohol can dry out real leather and damage some leatherette finishes. It may also cause color loss or cracking after repeated use. When you clean over ear headphones pads, mild soap and water are often the safer daily option.
If the headphones are shared, wipe the pads after each user when practical. For personal use, regular cleaning and proper drying are usually enough.

How to Remove Sweat and Odor
Sweat odor often comes from moisture trapped in the foam. Spraying fragrance on the pads only covers the smell for a short time and may irritate your skin.
First clean the surface with mild soap and water. Then allow the pads to dry in open air. Do not seal damp pads inside a case.
For removable fabric pads, place them near a fan on a low setting. Keep the fan at a distance and use room temperature air. You can also place the dry pads in a clean container with an odor absorbing material nearby, but do not let powder or granules touch the pads.
If the smell returns quickly, inspect the headband and the inside of the ear cups. Sweat may have reached other surfaces. Clean hard plastic areas with a lightly damp cloth, then dry them at once.
Persistent odor may mean the foam has absorbed moisture deep inside. In that case, replacement pads may be more hygienic and more cost effective than repeated cleaning.

How Often Should You Clean Headphone Pads?
The right schedule depends on how often you wear the headphones, how much you sweat, and whether you share them.
A simple schedule is:
- Light users: Wipe the pads every two to four weeks.
- Daily users: Clean the surface once a week.
- Heavy exercisers: Wipe them after every workout and deep clean them weekly.
- Shared headphones: Clean them between users when possible.
- Humid climates: Check for moisture and odor more often.
You do not need to deep clean every day. Frequent soaking can shorten pad life. A quick dry wipe after use often prevents heavy buildup.
Store headphones in a cool, dry place. Leave the case open for a while after use so moisture can escape. Avoid leaving the headset in a hot car, where heat can soften adhesives and speed up synthetic leather peeling.
Common Mistakes to Avoid
Knowing what not to do is a major part of learning how to clean over ear headphones pads.
Avoid these mistakes:
- Soaking the pads in a bowl of water
- Spraying cleaner directly on the ear cups
- Using bleach or strong disinfectant
- Scrubbing with a rough sponge
- Using a hair dryer to speed up drying
- Reinstalling pads while they are damp
- Pulling pads off with sharp tools
- Applying oil to synthetic leather
- Ignoring the manufacturer’s instructions
- Cleaning only the visible surface
One mistake I often see in real world headphone care is using too much water because the pads look very dirty. The better method is repeated light passes. It takes a little longer, but it protects the foam and glue.
If the pad is peeling, cracked, torn, or permanently flattened, cleaning cannot repair it. Replace both pads as a pair when possible so the left and right sides have the same thickness and seal.
How to Replace Headphone Pads After Cleaning
Before replacing the pads, inspect the plastic mounting ring and the thin fabric over the speaker. Remove loose hair or dust with a dry brush.
Match the pad’s clips, tabs, or mounting lip with the ear cup. Start at one point and work around the edge. Press gently until the pad sits evenly.
Check that:
- No part of the pad blocks the speaker grille
- The cushion is not twisted
- The seam sits in the same position on both sides
- The pad does not pull away from the cup
- The left and right pads feel equally firm
After installation, play music at a low volume. Listen for rattling or an uneven sound. A poor fit can change bass response and comfort.
If the pad will not attach, stop rather than forcing it. Look for the correct replacement model or mounting ring. A pad that is stretched or installed unevenly may fall off during use.
A Simple Maintenance Routine
A short routine can keep your pads cleaner between deep washes.
After each use:
- Wipe away visible sweat with a dry microfiber cloth.
- Leave the headphones in open air for a few minutes.
- Avoid placing damp headphones in a closed case.
Once a week:
- Brush away dust and hair.
- Wipe the pads with a barely damp cloth.
- Clean the headband and hard plastic areas.
- Check for peeling, cracks, or odor.
Once a month:
- Remove the pads if the design allows it.
- Clean the seams and mounting ring.
- Inspect the foam and speaker mesh.
- Deep clean the pad material when needed.
This routine makes it easier to clean over ear headphones pads because grime never gets enough time to form a thick layer.
Frequently Asked Questions About How to Clean Over Ear Headphones Pads
Can I wash over ear headphone pads with water?
You can use a small amount of water on many pad materials, but do not soak them unless the manufacturer says they are washable. Use a barely damp cloth, then let the pads dry completely before using them.
Can I use rubbing alcohol on headphone pads?
Rubbing alcohol may damage leatherette, real leather, printed surfaces, and some adhesives. Use it only when the manufacturer approves it for that exact material, and apply a small amount to a cloth rather than spraying the pad.
How do I clean non removable headphone pads?
Brush away dry dust first, then wipe the surface with a nearly dry, soapy microfiber cloth. Protect the speaker grille and use gentle airflow to dry the pad without heat.
How do I remove a bad smell from headphone pads?
Clean away sweat and oil, then let the pads dry in a cool, ventilated place. If the smell remains after several cleanings, the foam may be holding moisture and the pads may need replacement.
Can I put headphone pads in the washing machine?
Most headphone pads should not go in a washing machine because the agitation can damage foam, stitching, glue, and mounting parts. Hand washing is safer only when the product care instructions allow it.
How often should I clean over ear headphones pads?
Clean daily use pads about once a week and wipe them after heavy sweating. People who use headphones less often can clean them every two to four weeks.
Conclusion
The safest way to clean over ear headphones pads is to use a soft cloth, mild soap, very little water, and plenty of drying time. Identify the material first, protect the speaker openings, and avoid heat and harsh chemicals.
A light weekly wipe can prevent odor, stains, and early wear. Start with a gentle method today, inspect the pads as they dry, and replace them when cleaning can no longer restore comfort or hygiene. Share your own headphone care tips or explore more practical audio maintenance guides.
