

Use an M.2 SATA or NVMe SSD that draws power from the motherboard slot, so no separate power cable is needed.
Learning how to install SSD in desktop without extra power cable is mainly about choosing the right drive. A 2.5-inch SATA SSD needs both a data cable and a SATA power lead, while an M.2 SSD gets power directly from its motherboard slot. This guide explains compatibility, installation, setup, common mistakes, and safe alternatives in clear steps.
How an SSD Gets Power in a Desktop
There are two common SSD types for desktop computers:
• 2.5-inch SATA SSDs use a SATA data cable and a separate SATA power cable from the power supply.
• M.2 SSDs plug into a small slot on the motherboard and receive power through that slot.
This difference is the key to learning how to install SSD in desktop without extra power cable. An M.2 drive combines the data connection and power connection in one motherboard-mounted interface.
An M.2 SSD may use either the SATA protocol or the NVMe protocol. The shape can look similar, but the motherboard must support the correct type. Always check the motherboard manual before buying the drive.

Check Whether Your Desktop Supports an M.2 SSD
Before opening the case, inspect the motherboard or its manual. Look for a slot labeled M.2, M2, PCIe, NVMe, or SATA M.2.
The slot may sit between the CPU socket and the main PCIe slots. It may also be hidden under a small metal heatsink. A tiny screw or standoff near the slot usually holds the SSD in place.
Check these points:
• Confirm that the board has an M.2 slot.
• Check whether the slot supports NVMe, M.2 SATA, or both.
• Confirm the supported drive length, such as 2280.
• Check whether installing the SSD disables a SATA port.
• Look for an M.2 screw and standoff.
Most desktop M.2 drives use the 2280 size. This means the drive is 22 millimeters wide and 80 millimeters long. Some compact boards support shorter sizes, so do not assume every M.2 SSD will fit.
Motherboard manuals are especially useful here. They explain lane sharing, supported storage modes, and BIOS limits. This simple check can prevent a drive from fitting physically but failing to appear in the system.
What You Need Before Installation
The installation is simple, but a few items make the process safer and easier.
You will usually need:
• A compatible M.2 SSD
• A Phillips screwdriver
• The motherboard manual
• An M.2 mounting screw
• An M.2 heatsink, if your board includes one
• A USB flash drive with Windows or another operating system, if this is a new system drive
Shut down the computer fully before you begin. Turn off the power supply switch and unplug the wall cable. Press the computer’s power button for a few seconds to discharge leftover power.
Work on a hard table, not a carpet. Touch the metal computer case before handling the SSD, or use an anti-static wrist strap. Avoid touching the gold contacts on the drive.
When I work on desktop upgrades, the most common small mistake is losing the M.2 screw. It is tiny and easy to drop inside the case. Place it in a small cup before you start.
How to Install SSD in Desktop Without Extra Power cable
follow these steps to install an M.2 SSD directly into the motherboard.
1. Open the desktop case
Remove the side panel. Most cases use two rear screws, thumb screws, or a sliding panel. Place the panel somewhere safe.
Find the M.2 slot on the motherboard. If it has a heatsink, remove the retaining screw and lift the cover away.
2. Check the M.2 standoff
The standoff must match the length of your SSD. For a common 2280 drive, the standoff should sit at the 80 mm position.
If the standoff is in the wrong position, move it only if your case or motherboard design allows it. Do not install the drive without a proper support point.
3. Insert the SSD
Hold the SSD by its edges. Align the notch on the connector with the key inside the M.2 slot.
Slide the drive into the slot at about a 25 to 30-degree angle. Use gentle pressure. The drive should enter smoothly. Never force it, since a damaged connector can ruin the motherboard or SSD.
4. Press the drive down
Once the connector is fully inserted, press the free end of the SSD down toward the standoff. It should lie flat against the board.
Install the small M.2 screw. Tighten it until the drive is secure, but do not overtighten it. The screw only needs to stop the drive from moving.
5. Replace the heatsink
If your motherboard has an M.2 heatsink, remove the protective film from its thermal pad. Place the heatsink over the SSD and secure it.
The heatsink is not required for every drive, but it can help control heat during long file transfers. NVMe SSDs can become warm because they move data at high speed.
6. Close the case and start the computer
Reconnect the wall power cable and switch on the power supply. Start the desktop and enter the BIOS or UEFI by pressing a key such as Delete, F2, or F12.
Look for the storage or boot menu. The SSD should appear by its model name or capacity.
This process explains how to install SSD in desktop without extra power cable because the motherboard supplies power through the M.2 slot. No SATA power lead is connected to the drive.
Set Up the SSD in Windows
A new SSD may not appear in File Explorer right away. Windows often needs the drive to be initialized and formatted first.
To set it up:
Right-click the Start button.
Select Disk Management.
Find the new drive by checking its capacity.
If prompted, choose GPT for modern UEFI systems.
Right-click the unallocated space.
Select New Simple Volume.
Assign a drive letter.
Format the volume as NTFS.
Use care during this step. Selecting the wrong drive can erase existing files. Compare the capacity and current partitions before making changes.
If you plan to use the SSD as the Windows boot drive, install Windows on it or clone your old drive. After cloning, enter the BIOS and select the new SSD as the first boot device.
For a clean Windows installation, create installation media on a USB flash drive. Start the computer from the USB drive and choose the M.2 SSD during setup.

How to Confirm the SSD Is Working
After installation, check both the BIOS and the operating system.
In the BIOS, confirm that the SSD appears in the storage list. In Windows, open Device Manager and expand Disk drives. You can also check Disk Management for the drive’s capacity and status.
Useful checks include:
• Confirm the full or near-full capacity is visible.
• Check that the SSD has a drive letter.
• Copy a large file to test basic operation.
• Use the SSD maker’s software to check health and firmware.
• Monitor temperatures during heavy use.
Do not judge performance only by a short benchmark. Temperatures, motherboard lanes, storage mode, and the type of files being copied can affect results.
An NVMe SSD may run below its advertised speed if it is installed in a slower PCIe slot. That does not always mean the drive is faulty. Advertised speeds are measured under specific test conditions.

Can You Install a 2.5-Inch SATA SSD Without a Power Cable?
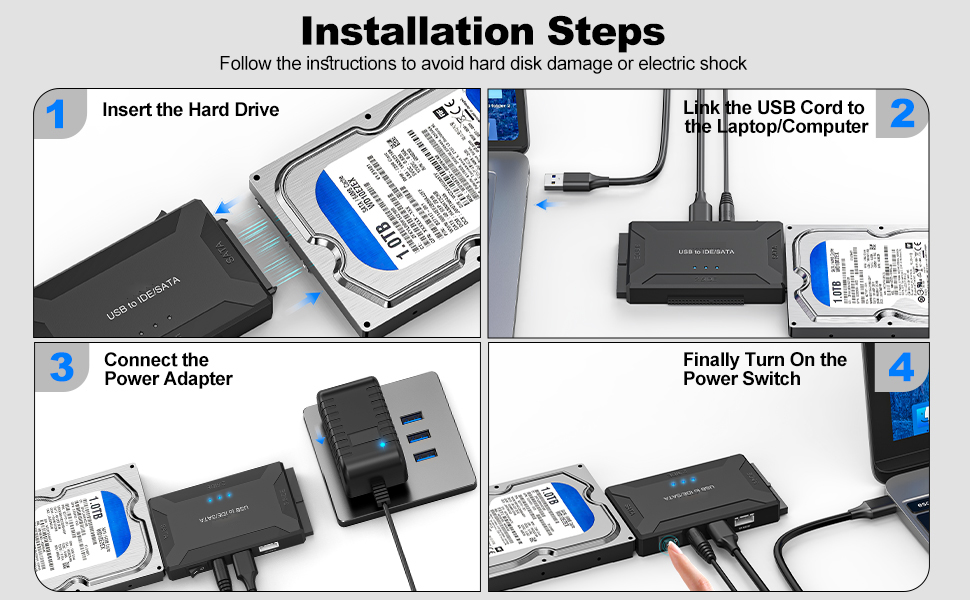
Usually, no. A standard 2.5-inch SATA SSD needs a 15-pin SATA power connection. The SATA data cable alone does not provide enough power for normal operation.
This is an important limit when learning how to install SSD in desktop without extra power cable. SATA data and SATA power are separate connections by design.
You have a few alternatives:
• Install an M.2 SATA SSD if the motherboard supports it.
• Install an NVMe M.2 SSD in a compatible PCIe M.2 slot.
• Use a PCIe-to-M.2 adapter card that draws power from the PCIe slot.
• Use an available Molex-to-SATA power adapter if the power supply has a Molex connector.
A PCIe-to-M.2 adapter can work well, but it must support the type of SSD you want to use. Some adapters support only NVMe drives. Others support M.2 SATA drives but need a motherboard connection for boot support.
Do not try to power a 2.5-inch SATA SSD through a homemade cable or an unused motherboard header. Incorrect wiring can damage the drive, power supply, or motherboard.
Using a PCIe Adapter When There Is No M.2 Slot
A desktop without an M.2 slot can still use an SSD without a dedicated SATA power cable. A PCIe-to-M.2 adapter fits into an open PCIe slot and supplies power through the slot.
This method works best with an NVMe SSD and a modern motherboard. Insert the SSD into the adapter, secure it with the supplied screw, and place the adapter into an open PCIe slot.
Keep these limits in mind:
• The adapter must support your SSD protocol.
• The motherboard must provide suitable PCIe lanes.
• Booting from the drive may require UEFI support.
• A graphics card can block a small PCIe slot.
• The adapter may not include a heatsink.
Some inexpensive adapters are passive boards. They do not improve drive speed. They simply connect the M.2 drive to the motherboard’s PCIe lanes and provide slot power.
In builds I have worked on, this method solved the problem when every SATA power plug was already in use. The key lesson was to check boot support before moving the operating system to the new drive.
Common Problems and Simple Fixes
The SSD does not appear in the BIOS
Power off the computer and reseat the SSD. Make sure it is fully inserted and held down by the correct screw.
Then check the motherboard manual. Some M.2 slots support only NVMe, while others support only SATA-based M.2 drives. A protocol mismatch is a common cause of detection failure.
The SSD appears in BIOS but not Windows
Open Disk Management. The drive may be uninitialized, offline, or missing a drive letter.
If it contains important data, do not format it. Formatting removes the existing file system and can make recovery more difficult.
The computer will not boot after cloning
Enter the BIOS and select Windows Boot Manager on the new SSD. If the old drive is still connected, temporarily disconnect it while testing the new boot drive.
Also check whether the original system uses UEFI or Legacy BIOS mode. The new drive and boot mode should match the installation setup.
The SSD gets very hot
Make sure the heatsink’s plastic film was removed from the thermal pad. Improve case airflow and avoid placing the drive directly beneath a hot graphics card when possible.
High temperatures can cause thermal throttling. The SSD slows itself to reduce heat, which can make long transfers feel much slower.
The drive is slower than expected
Check whether the SSD is installed in the correct M.2 slot. Some slots use fewer PCIe lanes or share bandwidth with other devices.
Also remember that write speed often drops after the SSD’s fast cache fills. This is normal behavior for many consumer drives.
Mistakes to Avoid During Installation
A careful installation takes only a few minutes, but avoid these errors:
• Buying an NVMe drive for an M.2 SATA-only slot.
• Assuming every M.2 slot supports every M.2 drive.
• Installing the SSD without a motherboard standoff.
• Tightening the retaining screw too much.
• Touching the gold connector pins.
• Removing the wrong drive in Disk Management.
• Forgetting to remove the heatsink’s protective film.
• Using an unsafe homemade power connection.
• Ignoring BIOS boot settings after cloning Windows.
The most damaging mistake is forcing the SSD into the slot. The notch should align naturally. If it does not, stop and check the drive type and slot orientation.
Another common mistake is buying based only on the word “M.2.” M.2 describes the physical form. It does not always describe the storage protocol. Always confirm whether the drive is SATA or NVMe.
Benefits and Limits of a Cable-Free M.2 SSD
The main benefit is a cleaner installation. There is no SATA data cable and no separate SATA power lead. This can improve airflow and make cable management easier.
Other advantages include:
• Faster installation
• Fewer loose cables
• Better use of modern motherboard features
• High performance with NVMe models
• Less clutter near the front of the case
There are also limits. M.2 drives can cost more than basic SATA SSDs. NVMe drives may run warmer, and some motherboards disable certain SATA ports when an M.2 slot is active.
An M.2 drive is not automatically faster in every task. For web browsing, office work, and many games, the difference between a good SATA SSD and an NVMe SSD may feel small. Choose based on compatibility, price, capacity, and workload.
Safety and Compatibility Checklist
Use this checklist before finishing the upgrade:
• The SSD protocol matches the motherboard slot.
• The drive size matches the M.2 standoff.
• The SSD is fully inserted.
• The retaining screw is installed.
• The heatsink film is removed, if present.
• The SSD appears in BIOS or UEFI.
• The correct drive is selected in Disk Management.
• Important files are backed up.
• The boot order is correct if the SSD contains Windows.
A backup is especially important before cloning or changing boot devices. Hardware installation is low risk, but storage mistakes can cause data loss.
Motherboard manuals and SSD installation guides remain the best references for model-specific details. Specifications can vary even between two boards from the same product family.
Frequently Asked Questions
Can I install an SSD in a desktop without a SATA power cable?
Yes, if you use an M.2 SSD in a compatible motherboard slot. The slot supplies both power and the data connection, so no separate SATA power cable is required.
Can a SATA SSD work with only the data cable?
No. A 2.5-inch SATA SSD needs a separate SATA power connection from the power supply. The SATA data cable does not provide the required operating power.
Is NVMe better than SATA for a desktop upgrade?
NVMe is usually faster, especially for large file transfers and demanding workloads. For simple office work, browsing, and gaming, a SATA SSD can still provide a major improvement over a hard disk drive.
Why is my M.2 SSD not detected?
The slot may support a different protocol, such as SATA instead of NVMe. Reseat the drive, check the BIOS, and review the motherboard manual for M.2 compatibility and shared-port limits.
Do I need a heatsink for an M.2 SSD?
Not always. A heatsink can help an NVMe SSD maintain speed during long workloads, but many basic desktop tasks work normally without one.
Can I boot Windows from a PCIe-to-M.2 adapter?
Often, yes, on modern UEFI motherboards. However, boot support depends on the motherboard firmware and adapter design, so check both before moving your operating system.
Will installing an M.2 SSD disable SATA ports?
Some motherboards disable one or more SATA ports when a specific M.2 slot is used. The manual will identify which ports share bandwidth with that slot.
Conclusion
The easiest way to install SSD in desktop without extra power cable is to use a compatible M.2 SSD. The motherboard slot supplies power and data, which removes the need for separate SATA cables. Before installation, confirm the drive protocol, slot support, drive length, and boot options.
Work slowly, protect the SSD from static, and never force the connector. If your desktop lacks an M.2 slot, a suitable PCIe-to-M.2 adapter may provide another clean solution. Check your motherboard manual first, then make the upgrade with confidence and share your results or questions in the comments.
