

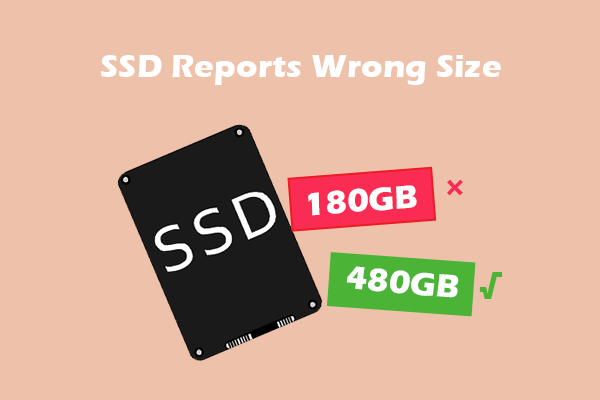
You can fix SSD showing wrong storage capacity by checking units, partitions, formatting, firmware, and hardware health.
It is frustrating to install a new SSD and see less space than the label promises. In most cases, the drive is not damaged. The difference comes from decimal and binary measurement, hidden partitions, recovery files, unallocated space, or a disk setup that limits usable capacity. This guide explains how to fix SSD showing wrong storage capacity safely, with clear steps for Windows, macOS, and common hardware problems.
Why Your SSD Shows Less Storage Than Advertised
The first thing to understand is that storage makers and operating systems use different measuring systems.
SSD manufacturers calculate capacity in decimal units:
• 1 GB equals 1,000,000,000 bytes
• 1 TB equals 1,000,000,000,000 bytes
Windows often displays capacity using binary values but still labels them as GB. In binary measurement:
• 1 GiB equals 1,073,741,824 bytes
• 1 TiB equals 1,099,511,627,776 bytes
This means a drive sold as 1 TB may appear as about 931 GB in Windows. A 500 GB SSD may show close to 465 GB. This is normal and does not mean the drive has lost data.
The operating system also reserves some space for file systems, partition tables, boot files, recovery tools, and system protection. These areas may not appear as normal storage in File Explorer or Finder.
When learning how to fix SSD showing wrong storage capacity, first compare the drive’s byte count with its advertised size. If the numbers match after accounting for decimal and binary units, the SSD is likely working correctly.

Common Causes of Incorrect SSD Capacity
Several issues can make an SSD show much less or more usable space than expected.
Decimal and binary measurement
This is the most common reason. A 2 TB SSD will not usually show as exactly 2 TB inside Windows. It may appear near 1.81 TB because the operating system uses a different calculation.
Hidden recovery partitions
Many computers include recovery partitions. These help restore Windows or macOS when the system fails. They may use several gigabytes, and some manufacturer recovery tools can use even more.
Unallocated space
Unallocated space belongs to the SSD but is not assigned to a usable volume. Windows cannot save files there until you create or extend a partition.
Multiple partitions
A drive may contain a system partition, recovery partition, EFI partition, and one or more data partitions. File Explorer only shows mounted volumes, not every part of the physical disk.
Old partition formats
MBR has limits that can affect large drives. For example, MBR commonly supports disks up to about 2 TB when using standard 512-byte sectors. GPT is the modern replacement for large drives and newer computers.
RAID or storage pooling
A disk managed by RAID, Intel RST, Storage Spaces, or a similar system may show capacity differently. Some space may be used for redundancy or pool metadata.
SSD over-provisioning
SSDs may reserve a small amount of NAND flash for wear leveling, garbage collection, and replacement blocks. This space improves long-term performance and endurance, but it is not available for regular files.
Fake or faulty SSD capacity
A counterfeit SSD may report a false size to the operating system. It can appear normal at first, then overwrite older files when its real memory limit is reached. A failing controller or firmware problem can also cause unusual capacity readings.
Check the Real SSD Capacity Before Making Changes
Before changing partitions or formatting the drive, confirm what the system detects. This prevents unnecessary repairs and protects your data.
Check SSD capacity in Windows
- Press Windows + X.
- Select Disk Management.
- Find the SSD by matching its model and approximate size.
- Review every partition, including unallocated space.
- Right-click the disk name and open Properties if you need more details.
You can also use PowerShell. Open PowerShell as an administrator and run:
Get-Disk | Select Number, FriendlyName, OperationalStatus, Size, PartitionStyle
The Size value is shown in bytes. Compare that number with the manufacturer’s listed capacity.
Check SSD capacity on macOS
- Open Disk Utility.
- Select View.
- Choose Show All Devices.
- Click the physical SSD, not only the volume beneath it.
- Review the device size, containers, and volumes.
For more detail, open Terminal and run:
diskutil list
This command shows physical disks, APFS containers, partitions, and recovery areas.
Check the SSD in the firmware menu
Restart the computer and enter the UEFI or BIOS setup. The key may be Delete, F2, F10, or Esc, depending on the system.
If the firmware sees the correct physical size but Windows or macOS does not, the problem is likely related to partitions, drivers, or the operating system. If the firmware also reports the wrong size, check the connection, firmware, enclosure, or drive itself.
Fix Unallocated Space on an SSD
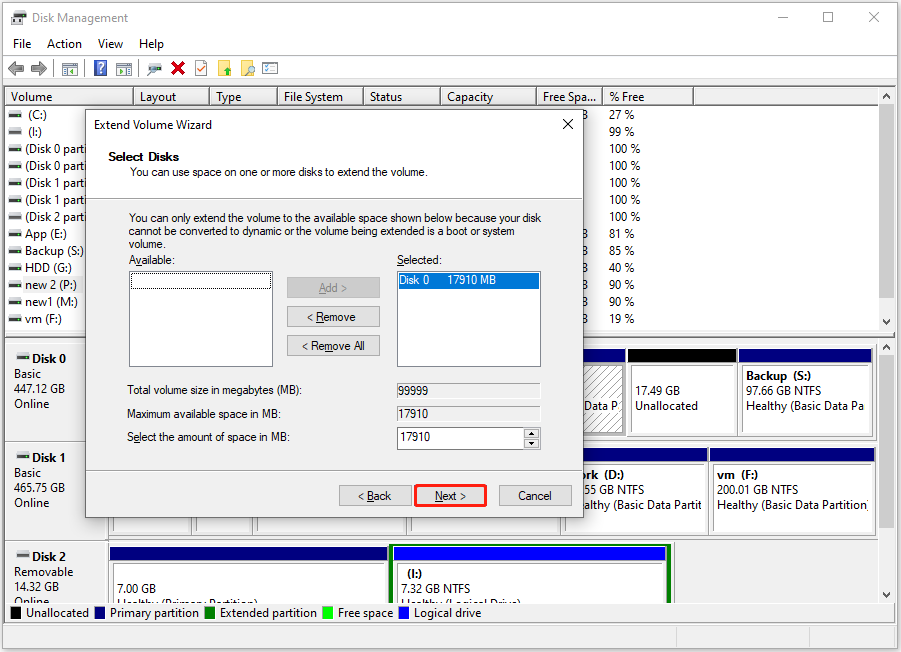
Unallocated space is often the easiest capacity problem to solve. It means the SSD has unused space that is not part of a normal volume.
Extend an existing Windows partition
Use this method when unallocated space sits directly after the main partition.
- Back up important files.
- Press Windows + X and open Disk Management.
- Right-click the partition you want to enlarge.
- Choose Extend Volume.
- Follow the wizard and accept the available space.
Windows can extend a partition only when the unallocated space is immediately to its right. If another partition sits between them, the built-in tool may not work.
Create a new volume
If you want a separate storage area:
- Open Disk Management.
- Right-click the unallocated space.
- Select New Simple Volume.
- Choose a drive letter.
- Format it as NTFS for general Windows use.
Do not delete an unknown partition simply because it looks small. EFI and recovery partitions are important for booting and system repair.
Use Disk Utility on macOS
In Disk Utility, select the physical drive or APFS container. If space is available inside the container, you may be able to resize the volume. Always confirm that you selected the correct disk before applying changes.
The key lesson in how to fix SSD showing wrong storage capacity is simple: unallocated space is not missing space. It is unused space waiting to be assigned.

Format the SSD With the Correct File System
A new SSD may appear with no usable space because it has not been initialized or formatted.
Choose the right file system
• NTFS works well for internal Windows drives.
• exFAT works across Windows and macOS and supports large files.
• APFS is best for modern Mac storage.
• FAT32 offers broad compatibility but limits individual files to 4 GB.
Formatting removes the data on the selected volume. Make a backup before proceeding.
Initialize a new SSD in Windows
If Disk Management shows the drive as “Not Initialized”:
- Open Disk Management.
- Right-click the disk label.
- Select Initialize Disk.
- Choose GPT for modern computers and large drives.
- Create and format a new volume.
Use MBR only when you need compatibility with an older computer or operating system. GPT is usually the better choice for current systems.
Format an external SSD
An external SSD may show the wrong capacity because it was formatted for a different system or because its enclosure has a compatibility issue. Back up the drive, erase the volume, and select a suitable file system.
For a drive shared between Windows and macOS, exFAT is often practical. However, safely eject the disk from both systems to reduce the chance of file system corruption.
Convert MBR to GPT Carefully
A large SSD may show limited capacity when it uses MBR instead of GPT.
GPT supports very large disks and works with UEFI systems. MBR is older and has practical limits, especially around the 2 TB boundary.
Windows includes a tool called mbr2gpt that can convert a suitable system disk without deleting personal files. The process still requires a complete backup because partition changes always carry some risk.
A typical check command is:
mbr2gpt /validate /disk:0
If validation succeeds, the conversion may be possible. The exact command depends on your disk number and Windows setup. Do not guess the disk number, and do not use conversion tools on a disk that contains irreplaceable data without a backup.
For a secondary drive, deleting the existing partitions and converting the disk to GPT may be simpler, but this permanently erases the volume.
Remove Unwanted Partitions Without Breaking the System
Some partitions are safe to remove only in specific situations. Others are essential.
Usually important partitions
• EFI System Partition: helps a UEFI computer boot.
• Microsoft Reserved Partition: used by Windows on GPT disks.
• Recovery Partition: stores repair and reset tools.
• APFS Recovery Volume: supports macOS recovery features.
If you are using a new SSD as a secondary storage drive and it contains old partitions from another computer, you can usually erase the entire disk and create a fresh volume. Do not do this if it is your current boot drive unless you have a clear recovery plan.
A common mistake is deleting a recovery partition to gain a few gigabytes, only to discover that factory reset tools no longer work. The small amount of recovered space is rarely worth that risk.
When checking how to fix SSD showing wrong storage capacity, look at the complete disk map rather than judging the result from File Explorer alone.
Update SSD Firmware, Drivers, and BIOS
Firmware controls how an SSD communicates with the computer. A firmware bug can cause detection problems, incorrect health readings, or unusual capacity behavior.
Check the SSD maker’s support software for:
• Firmware updates
• Drive health information
• Temperature readings
• Secure erase tools
• Over-provisioning settings
• Interface and link speed
Also update the motherboard BIOS or UEFI when the manufacturer lists storage compatibility fixes. For SATA drives, try a different SATA cable and motherboard port. For NVMe drives, reseat the SSD and confirm that the slot supports the correct PCIe generation.
Do not interrupt a firmware update. Connect a laptop to power, avoid restarting the system, and close other programs before starting.
Test Whether the SSD Is Fake or Failing
If the displayed capacity is dramatically wrong, or files become corrupted, test the drive before using it for important data.
Trusted capacity tests write data across the entire drive and then read it back. Examples include:
• H2testw on Windows
• F3 on macOS and Linux
• The SSD manufacturer’s diagnostic utility
• A full read and write test from a reputable storage tool
These tests can take hours, especially on large drives. They may also add wear to the SSD, so use them carefully on a drive that already shows signs of failure.
Warning signs include:
• The drive reports a size that is much larger than its label.
• Files disappear after the drive becomes partly full.
• Copy operations fail near a specific capacity point.
• The SSD disconnects under load.
• Health tools report serious errors.
• The drive name or serial number looks suspicious.
Stop using the SSD if it contains important data and fails a full capacity test. A fake drive cannot be repaired with partition tools. Request a refund or replacement, and avoid storing personal files on it.
Troubleshoot an External SSD or USB Enclosure
External drives add another layer between the SSD and the computer. The USB enclosure, adapter, cable, or hub may affect detection.
Try these steps:
- Connect the SSD directly to the computer.
- Use a different USB port.
- Avoid unpowered hubs.
- Test with another cable.
- Try the drive on another computer.
- Check whether the enclosure supports NVMe or SATA.
- Confirm that the enclosure supports the SSD’s capacity.
An NVMe SSD placed in a SATA-only enclosure will not work correctly. The reverse can also cause problems. Some low-cost adapters have poor controllers and may report unstable speeds or disconnect during large transfers.
In practical troubleshooting, changing the cable is often overlooked. A weak connection can make a healthy SSD look like a failing one.
Repair File System Errors
A damaged file system may report incorrect free space even when the physical SSD capacity is normal.
Windows
Open Command Prompt as an administrator and run:
chkdsk X: /f
Replace X with the correct drive letter. The /f option repairs logical file system errors. Do not use the wrong drive letter.
Windows also includes Disk Management and the Optimize Drives tool. For SSDs, Optimize Drives normally sends a TRIM command rather than performing a traditional hard-disk defragmentation.
macOS
Open Disk Utility, select the volume, and choose First Aid. This checks and repairs supported file system problems.
If the physical drive itself has hardware errors, file system repair will not solve the root cause. Back up your files and use the manufacturer’s health tool when possible.
Use TRIM and Leave Free Space
TRIM helps an SSD identify blocks that no longer contain useful data. This supports garbage collection and can help maintain write performance.
Modern Windows and macOS systems usually manage TRIM automatically when the SSD and connection support it. On Windows, you can check optimization settings through “Defragment and Optimize Drives.”
Avoid filling an SSD completely. Keeping some free space gives the controller room to manage data, although the exact amount depends on the model and workload. Manufacturer over-provisioning may reserve space automatically, while some advanced users create a small unallocated area manually.
This does not usually fix a reported capacity difference. It helps the SSD work well after you have solved the real storage issue.
Mistakes to Avoid When Fixing SSD Capacity
Storage repairs can cause permanent data loss. Keep these warnings in mind.
• Do not format the wrong disk. Match the model, size, and serial number.
• Do not delete EFI or recovery partitions without understanding their purpose.
• Do not convert MBR to GPT without a full backup.
• Do not trust a new SSD until it passes a capacity test.
• Do not use random partition software from an unknown website.
• Do not run secure erase unless you understand that it destroys data.
• Do not assume every missing gigabyte means a hardware failure.
• Do not continue writing to an SSD that corrupts files.
One of the most useful lessons from real storage troubleshooting is to change one thing at a time. Record the original disk layout, take screenshots, and confirm the result after each step. This makes it much easier to undo a mistake.
A Safe Troubleshooting Order
Use this order when deciding how to fix SSD showing wrong storage capacity:
- Compare the advertised decimal capacity with the operating system’s binary value.
- Check the physical disk in Disk Management or Disk Utility.
- Look for unallocated space and hidden partitions.
- Confirm whether the disk uses GPT or MBR.
- Check the cable, port, enclosure, and BIOS or UEFI detection.
- Back up files before changing partitions.
- Extend a volume or create a new volume if space is unallocated.
- Update firmware and storage drivers.
- Run a full capacity and health test if the size still looks suspicious.
- Replace the SSD if it fails testing or causes data corruption.
This method starts with low-risk checks and saves destructive actions for last. It also separates normal capacity differences from true hardware faults.
Frequently Asked Questions About How to Fix SSD Showing Wrong Storage Capacity
Why does my 1 TB SSD show only 931 GB?
Manufacturers use decimal units, while operating systems often display binary values labeled as GB. A 1 TB drive showing about 931 GB is normal and does not usually indicate a problem.
Can unallocated space make an SSD look smaller?
Yes. Unallocated space belongs to the physical SSD but is not assigned to a usable volume. You can extend an adjacent partition or create a new volume after backing up your data.
Should I use GPT or MBR for a new SSD?
GPT is normally the best choice for modern computers, UEFI systems, and drives larger than 2 TB. MBR is mainly useful for older hardware and legacy operating systems.
How can I tell whether an SSD is fake?
Run a full capacity test with a trusted tool that writes and reads data across the drive. If files fail or become corrupted after a certain point, stop using the SSD and seek a refund or replacement.
Will formatting restore the missing SSD capacity?
Formatting can make unallocated or uninitialized space usable, but it cannot restore space reserved by the manufacturer or correct the decimal and binary measurement difference. It also erases data from the selected volume.
Why does Windows show a different SSD size than BIOS?
If BIOS reports the correct size but Windows does not, the issue may involve partitions, drivers, storage pools, or file system configuration. If both report the wrong size, inspect the connection, enclosure, firmware, and SSD hardware.
Conclusion
Most cases of SSD showing wrong storage capacity are normal or easy to correct. Check decimal versus binary units first, then inspect partitions, unallocated space, GPT or MBR setup, cables, firmware, and drive health.
Always back up important files before formatting or changing partitions. If a full capacity test shows corruption or the SSD reports a clearly false size, replace it instead of trusting it with your data. Follow the safe troubleshooting order above, and explore your SSD maker’s support tools for model-specific guidance.
