

To format a new NVMe SSD, initialize it as GPT, create a partition, and choose the right file system.
Learning how to format new NVMe SSD storage is simple once you know the correct order. The key steps are checking that the drive is detected, backing up important data, choosing GPT, and selecting a file system such as NTFS or exFAT. This guide explains the process for Windows, Linux, and macOS while covering common mistakes, performance tips, and safe setup choices.
What formatting a new NVMe SSD actually does
Formatting prepares an NVMe SSD for use by creating a file system. The file system tells your operating system how to store, find, and manage files on the drive.
A new SSD may appear as unallocated space. It may also need to be initialized before Windows or another operating system can use it. Formatting does not improve the drive’s advertised speed, but it makes the storage ready for files, games, applications, or an operating system.
When you format a new NVMe SSD, you may complete three separate tasks:
- Initialize the disk, usually with the GPT partition style.
- Create a partition that uses the available space.
- Format that partition with a file system such as NTFS, exFAT, APFS, or ext4.
These steps are related, but they are not identical. Initialization sets the disk structure, while formatting prepares a specific partition for file storage.
A blank drive is like an empty filing cabinet. Initialization labels the cabinet, partitioning creates drawers, and formatting adds the system used to organize documents inside those drawers.
Before you format a new NVMe SSD
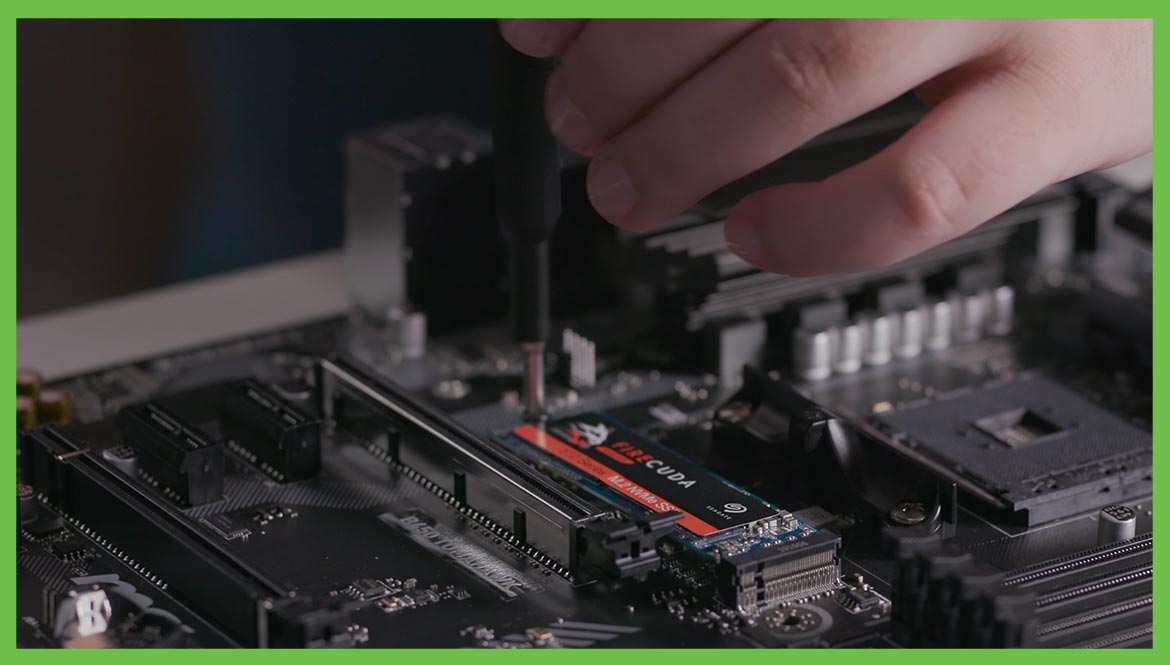
Before learning how to format new NVMe SSD storage, confirm that the drive is installed correctly and detected by your computer.
Shut down the computer before installing an internal NVMe drive. Insert the SSD into the correct M.2 slot and secure it with the motherboard screw or retention clip. Some motherboards share M.2 slots with SATA ports or PCIe slots, so check the motherboard manual if the drive does not appear.
Before formatting, check these points:
- Confirm that the SSD model and capacity appear in the BIOS or UEFI.
- Make sure the drive is fully inserted into the M.2 slot.
- Remove important files if the drive was previously used.
- Confirm which disk you are selecting before deleting or formatting anything.
- Update the motherboard firmware if the SSD is not detected.
- Check whether a heatsink or thermal pad is installed correctly.
A new NVMe SSD often arrives without usable partitions. However, “new” does not always mean “empty.” A returned, refurbished, or previously installed drive may contain data. Treat every unfamiliar disk as if it contains important files until you verify otherwise.
In my own PC upgrades, the most common mistake has not been the format command. It has been selecting the wrong disk because two drives had similar capacities. I now identify the target drive by its model number and size before making any changes.
Choose the right file system
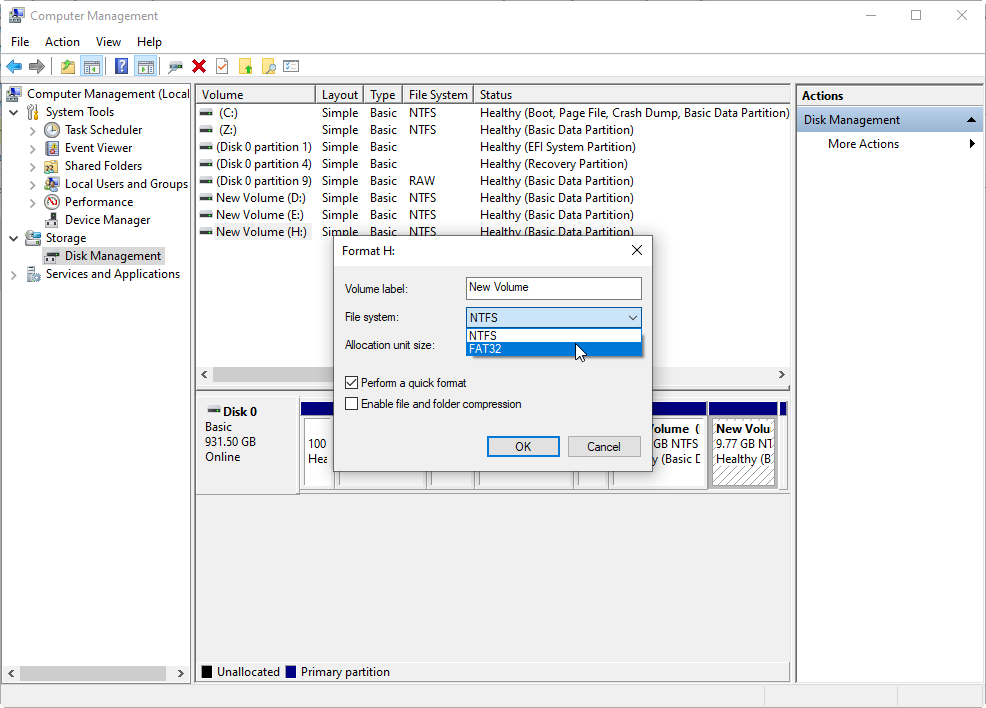
The best file system depends on how you plan to use the SSD. Choosing the right option is an important part of learning how to format new NVMe SSD storage correctly.
NTFS for Windows
NTFS is usually the best choice for a Windows-only internal SSD. It supports large files, file permissions, journaling, and Windows security features.
Use NTFS if you plan to store:
- Windows applications
- PC games
- Work files
- Photos and videos
- A Windows operating system
exFAT for cross-platform use
exFAT works well when you need to move files between Windows and macOS. It supports large files and does not have the same small file size limit as older FAT32.
Use exFAT for an external NVMe SSD that will connect to different computers. It is convenient, but it lacks some advanced features found in NTFS, APFS, and ext4.
APFS for macOS
APFS is Apple’s preferred file system for modern Mac computers and SSDs. Use it for a Mac startup drive or a Mac-only internal or external SSD.
macOS may offer several APFS choices, including encrypted and case-sensitive formats. Standard APFS is suitable for most users.
ext4 for Linux
ext4 is a common choice for Linux installations and Linux-only storage. It is stable, mature, and well supported by many distributions.
Linux users may also choose btrfs or another file system for special features. Unless you have a specific reason, ext4 is a practical starting point.

How to format a new NVMe SSD in Windows
Windows provides two simple tools for formatting a new NVMe SSD: Disk Management and DiskPart. Disk Management is safer for most users, while DiskPart gives you more control.
Method 1: Use Disk Management
Follow these steps:
- Press Windows key + X.
- Select Disk Management.
- Find the NVMe SSD by checking its capacity and model.
- If Windows asks to initialize the disk, choose GPT.
- Locate the area marked Unallocated.
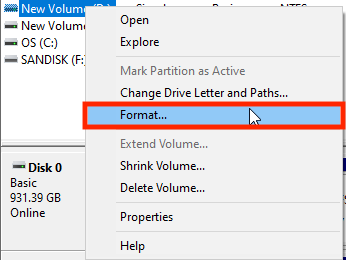
- Right-click the unallocated area.
- Select New Simple Volume.
- Follow the New Simple Volume Wizard.
- Choose the volume size.
- Assign a drive letter.
- Select NTFS for a Windows-only drive or exFAT for cross-platform use.
- Enter a clear volume label.
- Select Perform a quick format.
- Click Finish.
After the process ends, open File Explorer. The SSD should appear under This PC with the drive letter you selected.
GPT is the recommended partition style for modern computers. It supports large drives and works with UEFI firmware. MBR is older and is mainly useful for compatibility with legacy systems.
Method 2: Use DiskPart
DiskPart can format a new NVMe SSD quickly, but one wrong disk number can erase another drive. Use it only after checking the disk number and capacity carefully.
- Open the Start menu.
- Search for Command Prompt.
- Select Run as administrator.
- Type
diskpartand press Enter. - Type
list diskand press Enter. - Identify the NVMe SSD by its size.
- Type
select disk X, replacing X with the correct disk number. - Type
cleanonly if you are certain the disk is correct. - Type
convert gpt. - Type
create partition primary. - Type
format fs=ntfs quick. - Type
assign. - Type
exit.
The clean command removes the partition information from the selected disk. It is powerful and destructive. If you only need to format an existing partition, Disk Management is usually the safer option.
How to format a new NVMe SSD during Windows installation
You can format a new NVMe SSD while installing Windows. This is useful when the SSD will become the system drive.
Start the Windows installation from a USB installer. When the installer asks where to install Windows, select the NVMe SSD by checking its size. Delete old partitions on that SSD only, then select the unallocated space and click Next.
Windows will automatically create the partitions it needs on a GPT disk. This usually includes an EFI system partition, a Microsoft reserved partition, the main Windows partition, and a recovery partition.
Do not delete partitions from another disk just because they look unfamiliar. If you have multiple drives installed, disconnecting extra drives during Windows installation can reduce the risk of choosing the wrong one.
When setting up a new PC, I often disconnect the old system drive before installing Windows on the new NVMe SSD. This simple step prevents boot files from being placed on the wrong drive.
How to format a new NVMe SSD on macOS
macOS uses Disk Utility to erase and format storage. The process is slightly different from Windows, but the goal is the same.
- Connect or install the NVMe SSD.
- Open Applications, then Utilities, then Disk Utility.
- Select View and choose Show All Devices.
- Select the physical NVMe SSD in the left sidebar.
- Click Erase.
- Enter a name for the drive.
- Choose APFS for Mac-only use.
- Choose exFAT for use with both macOS and Windows.
- Select GUID Partition Map as the scheme.
- Click Erase.
Selecting the physical device matters. If you select only an existing volume, macOS may erase that volume without changing the full partition structure.
For a Mac startup disk, APFS with GUID Partition Map is normally the correct combination. For a portable drive shared with Windows computers, exFAT is often more practical.
Apple’s Disk Utility documentation recommends using the device view when you need to manage the complete partition scheme. That approach also makes it easier to confirm that you selected the correct drive.
How to format a new NVMe SSD in Linux
Linux users can format an NVMe SSD through a graphical utility or the terminal. The exact tool may vary by distribution, but the basic process remains similar.
Using GNOME Disks
Many Linux distributions include GNOME Disks.
- Open Disks from the application menu.
- Select the NVMe SSD from the left panel.
- Verify its capacity and model.
- Select the drive menu.
- Choose Format Disk.
- Select GPT unless you need legacy compatibility.
- Create a new partition in the unallocated space.
- Choose ext4 for Linux-only use.
- Choose exFAT for cross-platform storage.
- Apply the changes.
- Mount the new partition.
Using the terminal
Experienced Linux users can use tools such as lsblk, fdisk, parted, and mkfs.
First, identify the drive:
lsblk
Check the model and size carefully. Then create a partition with a tool such as fdisk or parted. After that, format the partition. For example:
sudo mkfs.ext4 /dev/nvme0n1p1
The device name will not always be /dev/nvme0n1p1. Confirm the correct path first. Formatting the wrong device can remove an operating system or personal files in seconds.
Linux documentation and filesystem tools make an important distinction between a whole disk and a partition. Usually, you create a partition first and then format that partition, not the entire physical disk.
Quick format versus full format
A quick format creates a new file system structure without checking every area of the drive. It usually finishes in seconds or minutes.
A full format takes longer because the operating system may scan the storage for errors. On modern SSDs, a full format is rarely needed for normal setup. It does not provide the same type of health check as a professional SSD diagnostic tool.
Choose a quick format when:
- The SSD is new and appears healthy.
- You are preparing a normal storage drive.
- You need to start using the drive quickly.
- You have already checked the drive with a health tool.
Consider a deeper check when:
- The SSD shows errors.
- The drive disconnects during use.
- The reported capacity looks wrong.
- You bought the drive used.
- The system reports input or output errors.
Formatting is not the same as securely erasing an SSD. A normal format removes file system references, but some old data may remain recoverable. For secure disposal, use the SSD manufacturer’s secure erase or sanitize tool. Avoid repeatedly overwriting an SSD because unnecessary writes can add wear.
Check the SSD after formatting
After you format a new NVMe SSD, confirm that the operating system sees the expected capacity and file system.
In Windows, open File Explorer and right-click the drive. Select Properties to view the file system, used space, and available space. You can also use the manufacturer’s software to check drive health and firmware.
A small difference between the advertised capacity and usable capacity is normal. Manufacturers use decimal units, while operating systems often display capacity using binary measurements. The space used by partition structures and system folders also reduces the visible amount slightly.
Check these items:
- The drive has the correct label.
- The total capacity looks reasonable.
- The selected file system is correct.
- Files can be copied to and from the drive.
- The drive remains connected after restarting.
- The SSD temperature stays within a normal range.
Do not judge SSD performance from one file copy. Large transfers can slow after the SSD’s write cache fills. This behavior is normal for many consumer drives and does not always indicate a problem.
Common mistakes to avoid
Learning how to format new NVMe SSD storage also means understanding what can go wrong.
Formatting the wrong drive
This is the most serious mistake. Always compare the model, capacity, and connection type before selecting a disk.
Choosing MBR on a modern system
MBR can limit boot options and partition size. GPT is normally the better choice for UEFI-based computers and current operating systems.
Using the wrong file system
NTFS is not the best choice for a drive that must work natively with both Windows and macOS. Likewise, exFAT may not provide the permissions and features needed for a Windows system drive.
Forgetting to initialize the disk
A drive may appear in BIOS but not in File Explorer. Open Disk Management and check whether Windows shows it as unknown, offline, or unallocated.
Ignoring motherboard limits
Some M.2 slots support SATA M.2 drives, PCIe NVMe drives, or both. A compatible-looking slot does not always support every M.2 drive.
Skipping backups
Formatting permanently removes access to files stored on the selected partition. Keep at least one separate backup of important photos, documents, and projects.
How to improve NVMe SSD performance and life
Formatting alone does not optimize an NVMe SSD. Good system settings and proper maintenance matter too.
Keep reasonable free space on the drive. A nearly full SSD may have less room for background management and sustained writes. The exact ideal amount varies by drive, but leaving around 10% to 20% free is a sensible general habit.
Enable TRIM through the operating system. TRIM helps the SSD identify blocks that are no longer needed. Modern versions of Windows, macOS, and Linux usually manage TRIM automatically.
Other practical tips include:
- Install the latest stable SSD firmware.
- Keep the NVMe drive cool with suitable airflow or a motherboard heatsink.
- Avoid defragmenting an SSD manually.
- Use the operating system’s optimization tool.
- Monitor drive health with trusted software.
- Keep backups even when the SSD is new.
NVMe SSDs are fast, but speed can produce heat. If the controller becomes too warm, it may reduce performance to protect the drive. Good airflow often helps more than small software tweaks.
Frequently Asked Questions About How to Format a New NVMe SSD
Should I format a new NVMe SSD before using it?
Yes, if the drive is unallocated or has no usable file system. Initialize it as GPT, create a partition, and format it with the file system that matches your operating system.
Should I use GPT or MBR for a new NVMe SSD?
Use GPT for most modern computers that use UEFI firmware. MBR is mainly for older systems that require legacy BIOS compatibility.
What is the best format for an NVMe SSD in Windows?
NTFS is usually the best choice for an internal Windows SSD. Choose exFAT if you need to move the drive between Windows and macOS computers.
Can formatting damage an NVMe SSD?
Normal formatting does not usually damage an NVMe SSD, but it does remove access to data on the selected partition. Repeated unnecessary erase operations add writes, so use secure erase tools only when you have a clear need.
Why is my new NVMe SSD not showing in File Explorer?
The drive may need initialization, partitioning, or a drive letter. Open Disk Management and check whether it appears as offline, unknown, unallocated, or without a drive letter.
Do I need to format an NVMe SSD before installing Windows?
You do not need to format it manually first. During Windows Setup, select the correct SSD, remove its old partitions if appropriate, and install Windows to the unallocated space.
Conclusion
Formatting a new NVMe SSD is a short process when you follow the right order. Confirm that the drive is detected, choose GPT, create the correct partition, and select NTFS, exFAT, APFS, or ext4 based on how you will use the storage.
The safest habit is to identify the SSD by its model and capacity before making changes. Take a few extra seconds to verify the disk, because that small check can prevent permanent data loss. Use this guide to format your drive with confidence, then test it, monitor its health, and keep a reliable backup of important files.
